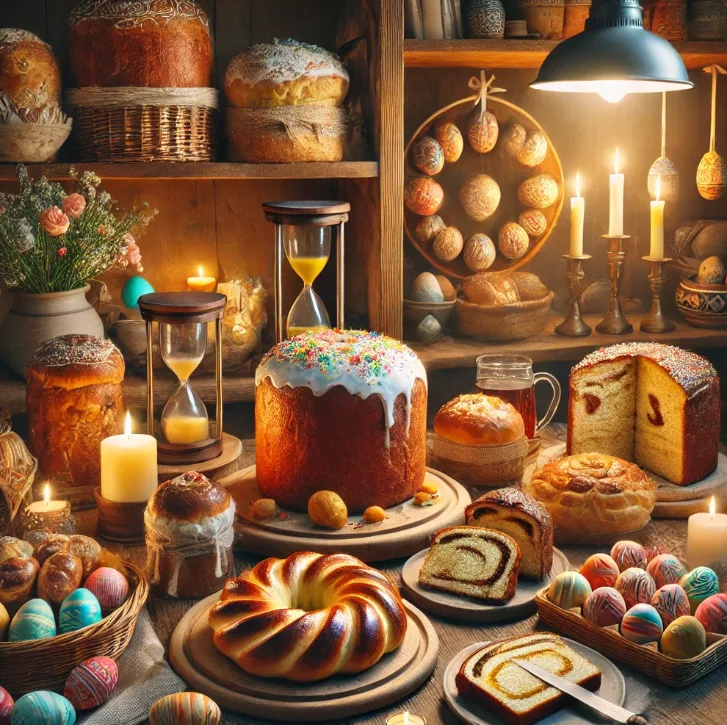
The Easter holidays are a special time, marked not only by religious traditions and moments of reflection but also by a family feast full of delicious dishes. Among the most beloved Easter customs is the preparation of traditional sweets that bring a warm, familiar atmosphere into our homes. These recipes, passed down from generation to generation, are a true culinary treasure, and no matter how trends change, they retain their authentic charm and taste.
In this article, we will focus on some of the most cherished traditional Easter sweets, as well as a few recommendations for simple yet delicious recipes, perfect for adding a touch of joy and flavor to your Easter celebrations.
Biscuit “Salami” with Turkish delight – A Classic Yet Unmistakable Recipe

The biscuit salami is one of the most loved desserts in Romanian cuisine, perfect for ending a family meal or enjoying as an afternoon sweet. It’s a simple recipe with a delicious taste, customizable by adding ingredients like Turkish delight, nuts, or raisins. In this version, we include Turkish delight to give it extra flavor and texture. Here’s how to prepare this classic dessert, step by step.
Ingredients:
- 400 g plain biscuits (e.g., petit beurre or any unsweetened variety)
- 150 g butter
- 200 g sugar
- 2 tbsp cocoa powder
- 2 tbsp milk
- 100 g Turkish delight, diced
- 100 g nuts or hazelnuts (optional)
- Rum or vanilla extract (to taste)
Preparation:
- Prepare the ingredients:
- Crush the biscuits in a large bowl (by hand or with a rolling pin in plastic bags).
- Dice the Turkish delight into small cubes for even distribution.
- If using nuts, coarsely chop them for added crunch.
- Make the cocoa syrup:
- In a saucepan over low heat, combine butter, sugar, cocoa, and milk. Stir until sugar dissolves and mixture is smooth.
- Remove from heat, stir in rum or vanilla, and let the syrup cool slightly so it’s warm—not hot—when added to the biscuits.
- Mix everything:
- In a large bowl, combine crushed biscuits, Turkish delight, and nuts.
- Pour the cocoa syrup over and mix with a wooden spoon or spatula until everything is coated.
- Form the salami:
- Lay out plastic wrap or parchment, place the mixture on it, and shape into a cylinder, pressing gently.
- Wrap tightly and refrigerate for at least 4 hours (ideally overnight) to set.
- Serve:
- Unwrap and slice into thin rounds. Optionally dust with powdered sugar for an elegant touch.
Tips:
- Substitute Turkish delight with candied fruit or chocolate for variety.
- For a less sweet salami, reduce sugar.
- Add raisins or shredded coconut for extra texture.
Cherry Jam and Walnut Tart – A Detailed Recipe

Cherry Jam and Walnut Tart is an exceptional dessert, with a perfect balance between the tartness of the cherries and the sweetness of the walnuts. This tart is ideal to enjoy alongside a cup of tea or as a dessert after a festive meal. The buttery crust and rich filling are the perfect combination for a classic and delicious treat.
Here is a complete and detailed recipe for the cherry jam and walnut tart.
Ingredients for the crust:
- 250 g all-purpose flour
- 100 g cold butter (cut into cubes)
- 2–3 tbsp powdered sugar
- 1 egg
- 1 tsp vanilla extract
- Pinch of salt
- 2–3 tbsp cold water (if needed)
Ingredients for the filling:
- 200 g cherry jam (or canned cherries, drained, if jam is unavailable)
- 100 g finely chopped walnuts (or hazelnuts)
- 50 g sugar (if the cherry jam is not sweet enough)
- 1 tsp vanilla extract (optional, but adds a distinctive flavor)
- 1 egg (for egg wash)
- 1 tbsp milk (for egg wash)
Preparation:
- Making the crust:
- In a large bowl, sift together the flour, powdered sugar, and salt. Mix gently to distribute evenly.
- Add the cold butter cubes and rub them into the dry ingredients with your fingertips until the mixture resembles coarse crumbs. (You may use a food processor for speed.)
- Add the egg and vanilla extract, mixing just until combined. If the dough is too dry, add cold water, one tablespoon at a time, until it comes together. Avoid over-kneading to prevent a tough crust.
- Wrap the dough in plastic wrap and refrigerate for at least 30 minutes. This chilling helps the dough firm up and become easier to work with.
- Preparing the filling:
- In a small bowl, combine the cherry jam, chopped walnuts, and sugar (if needed). For extra aroma, stir in the vanilla extract.
- If using canned cherries, drain them well and fold them into the walnut mixture.
- Assembling the tart:
- Divide the chilled dough into two portions: a larger piece for the base and a smaller one for the edges. On a floured surface, roll out the larger piece into a thin round, large enough to line a 24 cm tart pan (bottom and sides).
- Gently press the dough into the pan, trimming any excess from the edges. Use a fork to dock the base to prevent air bubbles during baking.
- Spread the cherry-walnut filling evenly over the crust.
- Preparing the egg wash (optional):
- Beat the egg with the milk in a small bowl.
- Using a pastry brush, lightly coat the tart’s edges with this mixture to achieve a beautiful golden glaze.
- Baking the tart:
- Preheat your oven to 180 °C (with fan) or 200 °C (without fan).
- Bake the tart for 30–40 minutes, until the crust is golden and crisp around the edges and the cherry jam begins to bubble up slightly.
- After baking, allow the tart to cool completely before slicing to let the filling set perfectly.
- Serving:
- Serve the tart plain or dusted with powdered sugar for an elegant appearance.
- For an indulgent treat, accompany it with a dollop of whipped cream or a scoop of vanilla ice cream.
Additional Tips:
- For a chocolate twist, melt a few squares of dark chocolate and drizzle over the filling before baking.
- If walnuts aren’t on hand, substitute with hazelnuts or almonds for equally delicious texture.
- The tart keeps well in the refrigerator for 2–3 days but is best enjoyed when freshly made.
This cherry jam and walnut tart is ideal for any festive table, offering not only a wonderful taste but also an extraordinary aroma thanks to the cherry-walnut combination. With its tender crust and juicy filling, it will surely become a family favorite!
Semolina Pasca (Flourless)

Pasca is a traditional Easter dessert, and in this flourless variant, pasca becomes more easily digestible while retaining its creamy texture and authentic taste. Semolina is the key ingredient that replaces flour, providing the pasca with a delicate consistency, perfect for the holidays.
Ingredients:
For the filling:
- 500 g well-drained cottage cheese
- 150 g semolina
- 200 ml milk
- 200 g sugar
- 4 eggs
- 1 tsp vanilla extract
- Zest of 1 lemon
- 50 g raisins (optional, if you enjoy dried fruit)
- 1 tsp baking powder (to help aerate the mixture)
For the dough (base and edges):
- 100 g butter
- 100 g sugar
- 1 egg
- 1 tsp vanilla extract
- Pinch of salt
- 2–3 tbsp sour cream (for a more tender dough)
- 2 tbsp cold water (if needed to bind the dough)
Preparation:
1. Making the dough (base and edges):
- In a large bowl, cream the softened butter with the sugar and a pinch of salt until light and fluffy.
- Add the egg and vanilla extract, mixing well.
- Gradually stir in the sour cream until the mixture is smooth.
- If the dough is too dry and does not come together, add cold water one tablespoon at a time until it forms a workable paste.
- Wrap the dough in plastic wrap and refrigerate for 15–20 minutes to firm up before use.
2. Preparing the semolina filling:
- In a saucepan, bring the milk to a boil. Gradually add the semolina, stirring continuously to prevent lumps. Cook until all the liquid is absorbed and the mixture becomes creamy. Let it cool completely.
- In a large bowl, combine the well-drained cottage cheese with the cooled semolina, stirring to blend.
- Beat the eggs with the sugar, then fold into the cheese and semolina mixture until all ingredients are fully incorporated.
- Stir in the vanilla extract, lemon zest, and raisins (or other optional additions such as candied fruit or nuts). Mix until homogeneous.
- Gently fold in the baking powder.
3. Assembling the pasca:
- Preheat your oven to 180 °C (fan) or 200 °C (conventional).
- Grease a tart or baking pan with butter and line it with parchment paper to prevent sticking.
- Remove the dough from the refrigerator and roll it out on a floured surface (or between sheets of parchment) into a sheet large enough to cover the bottom and sides of the pan.
- Gently press the dough into the pan, creating a border by pressing lightly along the edges. Dock the bottom with a fork to prevent air bubbles during baking.
- Pour the cheese and semolina filling into the prepared crust, smoothing the top.
4. Baking and finishing:
- Bake the pasca in the preheated oven for 40–50 minutes, or until the top is golden and the center is set. Test for doneness by inserting a skewer into the middle—if it comes out clean, the pasca is baked.
- Allow the pasca to cool completely before slicing. For best results, chill in the refrigerator for several hours or overnight so the filling firms up and holds its shape.
Additional Tips:
- For a fluffier pasca, you can add a second teaspoon of baking powder to the filling to increase aeration.
- Substitute raisins with candied fruit for a more varied flavor.
- To create a lighter version, replace the sugar with natural sweeteners and the sour cream with Greek yogurt or plain yogurt.
This flourless semolina pasca is simple to prepare yet full of tradition and flavor. With its fine texture and delicate filling, it is perfect for Easter celebrations or any special occasion.
Traditional Homemade Chocolate Recipe

Homemade chocolate is a delicious dessert that can bring back childhood memories. It’s a simple recipe with an intense flavor and a smooth texture, perfect for serving at festive tables or enjoying as a treat at any time of day. With accessible ingredients and a short preparation time, homemade chocolate is an ideal choice for those who want to make a dessert at home without using industrial ingredients.
Here’s how you can prepare homemade chocolate in the simplest and clearest way.
Ingredients:
- 200 g butter
- 200 g sugar
- 100 ml milk
- 250 g high-quality cocoa powder
- 200 g nuts (optional; you can use hazelnuts or almonds)
- 1 tsp vanilla extract (optional)
- Pinch of salt (to enhance the intense cocoa aroma)
Preparation:
1. Preparing the ingredients:
- Ensure the butter is at room temperature, making it easier to melt and mix.
- Weigh and prepare all ingredients. If adding nuts or other dried fruits, chop them into small pieces.
- Sifting the cocoa powder helps prevent lumps—sift it into a separate bowl before use.
2. Melting the butter and creating the base mixture:
- In a large saucepan, combine butter and sugar. Melt over medium heat, stirring frequently until the butter is melted and the sugar is dissolved.
- Once the sugar has fully dissolved and the butter is melted, add the milk. Stir well until the milk is fully incorporated and the mixture is smooth and uniform.
- Remove the pan from heat and gradually whisk in the sifted cocoa powder, stirring continuously to avoid lumps. The mixture should thicken and become dense.
3. Adding nuts and other flavorings:
- Stir in the chopped nuts (or other dried fruits) to distribute them evenly throughout the chocolate mixture.
- If desired, add vanilla extract and a pinch of salt to highlight the chocolate’s deep, rich flavor.
- Continue stirring until the mixture is homogeneous and all ingredients are fully combined.
4. Molding and chilling:
- Prepare a small 20×20 cm pan or a silicone mold lined with parchment paper to prevent sticking. If you lack parchment, lightly grease the pan with butter.
- Pour the chocolate mixture into the mold and level it evenly with a spatula. Ensure the mixture is spread uniformly.
- Let the chocolate cool to room temperature, then refrigerate for at least 3–4 hours—ideally overnight. This chilling step is essential for the chocolate to set and achieve a firm consistency.
5. Serving:
- Once the chocolate has fully set and hardened, remove it from the mold. If you used a silicone mold, demolding will be very easy.
- Slice the chocolate into squares or desired shapes. For cleaner cuts, use a hot knife (dip it in warm water before slicing).
6. Storage:
- Store homemade chocolate in an airtight container in the refrigerator for 1–2 weeks. Keeping it chilled is important, as it contains no preservatives and can soften or melt at room temperature.
Tips and Variations:
- For a silkier chocolate: Add 1 tsp of melted cocoa butter into the mixture to give it an even smoother texture.
- For a sweeter chocolate: Increase the sugar amount, but be cautious—too much sweetness can overpower the intense cocoa taste.
- Ingredient swaps: Replace nuts with hazelnuts, almonds, or even raisins for a different flavor. You can also stir in coconut flakes for an interesting texture.
- Dairy-free version: For a vegan option, substitute milk with almond, coconut, or other plant-based milk, and replace butter with margarine or vegan butter.
This homemade chocolate recipe is easy to prepare, yielding a smooth, creamy chocolate with an intense cocoa flavor. Perfect for serving as a dessert at festive gatherings or gifting to loved ones!
Marius Cake Recipe

Marius Cake is a delicious dessert, featuring a fluffy sponge, a layer of fine cream, and a chocolate glaze. It’s an elegant and refined cake that can become the perfect dessert for any special occasion. Here’s how you can prepare it, step by step, to achieve the best result.
Ingredients:
For the sponge:
- 5 eggs
- 150 g sugar
- 100 ml water
- 200 g flour
- 1 packet baking powder
- 2 tbsp cocoa powder
- 50 g melted butter
- 1 tsp vanilla extract
For the cream:
- 400 ml heavy cream (36% fat)
- 200 g powdered sugar
- 200 g white chocolate (or milk chocolate for a sweeter taste)
- 1 packet gelatin (or 10 g gelatin granules)
- 100 ml water
For the chocolate glaze:
- 100 g dark chocolate
- 50 ml heavy cream
- 2 tbsp powdered sugar
1. Preparing the sponge:
- Preheat the oven to 180 °C. Grease a 24 cm round cake pan with butter and line it with parchment paper.
- In a large bowl, beat the eggs with the sugar using a mixer until they become foamy and increase in volume.
- In a small saucepan, bring the water to a boil. Once boiling, add a few tablespoons of sugar and stir until it dissolves completely.
- In another bowl, sift together the flour, baking powder, and cocoa. Gradually fold these dry ingredients into the egg mixture, alternating with the hot sugar water—always adding the liquid little by little.
- Stir in the melted butter and vanilla extract with a spatula until fully incorporated.
- Pour the batter into the prepared pan and level the surface with a spatula. Bake for 25–30 minutes, or until a skewer inserted into the center comes out clean.
- Allow the sponge to cool completely before removing it from the pan and slicing it into two or three layers.
2. Preparing the cream:
- Soak the gelatin in 100 ml of cold water for 10 minutes. Then, gently warm (do not boil) until fully dissolved.
- Heat the heavy cream in a saucepan (without bringing it to a boil), then add the chopped white chocolate. Stir until the chocolate melts completely and the mixture is smooth.
- Stir the dissolved gelatin into the white chocolate cream until well combined.
- Let the cream cool slightly, then refrigerate for 15–20 minutes to firm up a bit. After chilling, add the powdered sugar and whip with a mixer until the cream becomes fluffy and holds a firm consistency.
- For a lighter texture, you may fold in a little whipped cream into the white chocolate mixture.
3. Assembling the cake:
- Slice the cooled sponge into 2 or 3 layers, depending on how thick you want the cream layers.
- Place the first layer of sponge on a serving platter and spread half of the white chocolate cream over it.
- Add the second sponge layer and top with the remaining cream. If you have three layers, repeat accordingly.
- Cover the cake with the final sponge layer and refrigerate for at least 2 hours to allow the cream to set.
4. Preparing the chocolate glaze:
- In a small saucepan, heat the heavy cream and powdered sugar until they reach a boil.
- Once boiling, add the chopped dark chocolate and stir until it melts completely and the glaze becomes shiny.
- Let the glaze cool slightly, then pour it evenly over the chilled cake.
5. Serving:
After the glaze has set slightly, slice the cake and serve it cold. You can decorate with fresh fruit, whipped cream, or chocolate shavings according to your preference.
Additional Tips:
- For a fruity note, place fresh or candied fruit (such as raspberries or strawberries) between the cream layers.
- For an even lighter texture, replace the white chocolate cream with a mascarpone cheese cream.
- To intensify the flavor, add a splash of rum or coffee extract to the white chocolate cream.
Marius Cake is a delightful dessert with a delicate taste and soft texture that will surely become a favorite of everyone who tries it!
Cocoa Loaf Cake Recipe
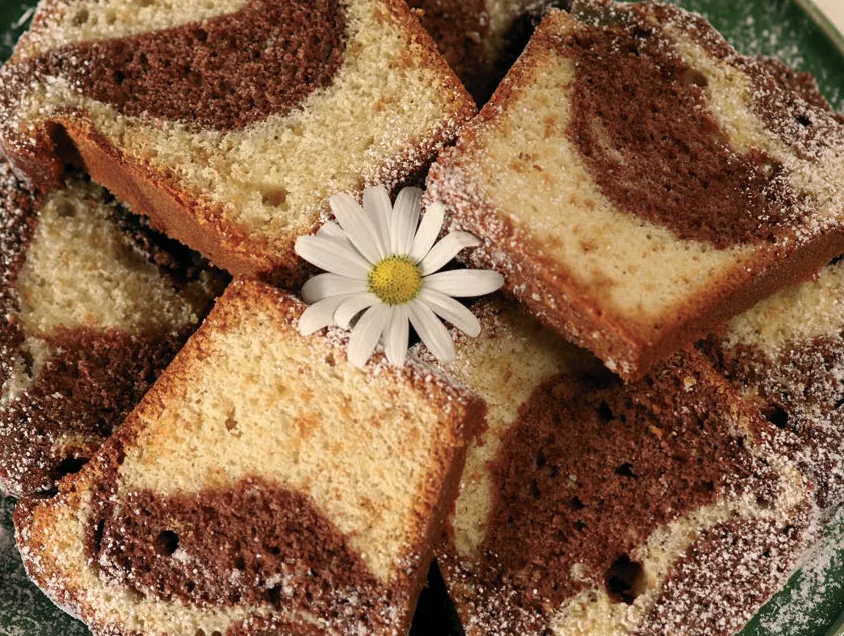
The cocoa loaf cake is a classic dessert, simple to prepare and very tasty, perfect for any occasion. With a fluffy texture and an intense cocoa flavor, this loaf can be served both at breakfast and as a dessert at a family meal. Follow the detailed steps below to prepare the most delicious cocoa loaf cake!
Ingredients:
For the batter:
- 3 eggs
- 200 g sugar
- 1 packet baking powder (10 g)
- 200 g flour
- 50 g high-quality cocoa powder
- 100 ml milk
- 100 g melted butter (or oil)
- 1 tsp vanilla extract
- Pinch of salt
For the chocolate glaze (optional):
- 100 g dark chocolate (or milk chocolate, depending on preference)
- 50 ml heavy cream
1. Preparing the batter:
- Preheat the oven to 180 °C (with fan) or 200 °C (without fan). Grease a loaf pan (about 25 cm long) with butter and dust it with flour, or line it with parchment paper to prevent sticking.
- In a large bowl, beat the eggs with the sugar using a mixer until you obtain a spongy cream that has doubled in volume—this can take about 3–5 minutes.
- Add the milk and melted butter (or oil) to the egg and sugar mixture. Continue mixing until fully incorporated.
- In another bowl, sift together the flour, cocoa powder, baking powder, and salt. Thoroughly mix these dry ingredients to prevent lumps.
- Gradually fold the dry ingredient mixture into the wet mixture, stirring gently with a spatula or on low mixer speed, so as not to create lumps. Mix until you obtain a smooth, uniform batter.
- Stir in the vanilla extract once more to distribute it evenly.
2. Baking the loaf:
- Pour the batter into the prepared loaf pan. Level the surface gently with a spatula to ensure an even top.
- Place the pan in the preheated oven and bake for approximately 40–45 minutes. To check doneness, insert a skewer into the center—if it comes out clean, the cake is baked.
- For an even fluffier outcome, check the loaf after 30 minutes and, if the top is browning too quickly, cover it with aluminum foil.
3. Preparing the glaze (optional):
- In a small saucepan, combine the chopped chocolate with the heavy cream. Heat over low heat, stirring continuously, until the chocolate is fully melted and the glaze is shiny and smooth.
- Allow the glaze to cool slightly before pouring it over the cooled loaf.
4. Assembling and serving:
- After the loaf has cooled completely, pour the chocolate glaze over the top, using a spoon or knife to spread it evenly.
- Let the glaze set for a few minutes before slicing the cake into pieces.
- Serve the cocoa loaf cake alongside a cup of tea or coffee.
Additional Tips:
- For added aroma, you can add a few drops of rum extract or a pinch of cinnamon to the batter.
- For a softer crumb, replace part of the butter with yogurt or sour cream for an extra tender bite.
- Fruit variation: Stir chunks of chocolate or candied fruit (e.g., raspberries, blueberries, or bananas) into the batter for a more varied flavor.
- Sugar-free option: To make this loaf more diet-friendly, replace the sugar with natural sweeteners (such as stevia or xylitol).
This cocoa loaf cake is a classic dessert that’s easy to make and extremely delicious, perfect for brightening up any family meal or enjoying as a snack. Fluffy, aromatic, and boasting an intense cocoa flavor, it will surely become a favorite for everyone!
Carmen Cake Recipe
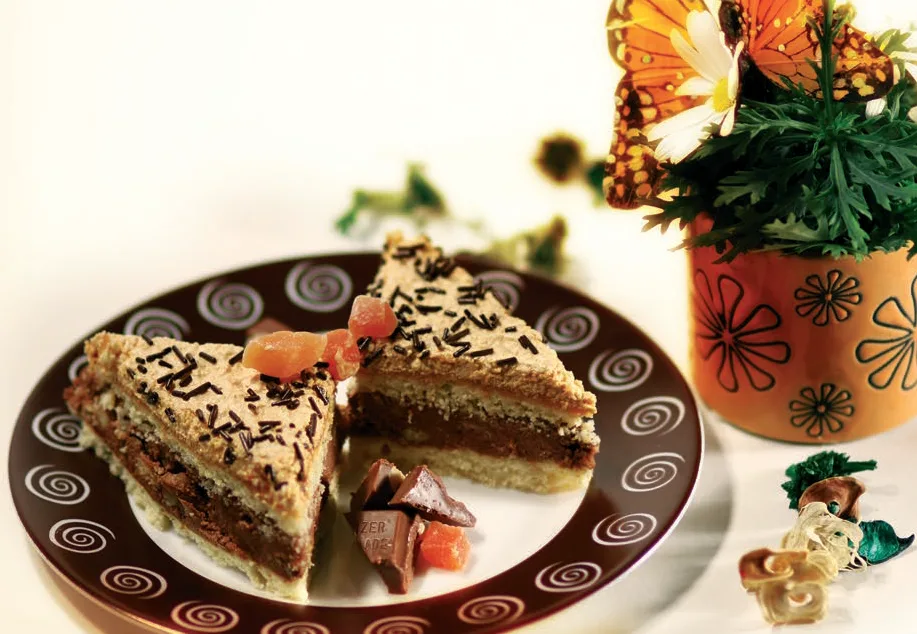
Carmen Cake is a delicious and refined dessert, perfect for festive tables or any special occasion. It features a tender crust with a distinct flavor, an apricot jam and walnut cream, and a final glaze that adds a crisp texture and a delicate taste. Here’s how to prepare this cake step by step, with all the necessary details.
Ingredients:
For the layers:
- 250 g Unirea Original margarine
- 150 g powdered sugar
- 1 tsp ammonium bicarbonate, neutralized with lemon (to help the crust become light and fluffy)
- 4 egg yolks
- 500 g flour
- 1–2 tbsp sour cream (to aid in kneading the dough)
For the cream:
- 100 ml milk
- 150 g Unirea margarine for creams
- 300 g apricot jam (or another sweet jam, to taste)
- 1 cup ground walnuts (about 100 g)
- 2 tbsp cocoa powder (to add a hint of chocolate)
- Zest of one lemon (for extra aroma)
For decoration:
- 4 egg whites
- 200 g granulated sugar
- 50 g dark chocolate (for grating)
Preparation time: 90 minutes
Difficulty: Medium
1. Preparing the layers:
- In a large bowl, combine 250 g margarine and 150 g powdered sugar. Mix until the margarine softens and the sugar dissolves.
- Add the neutralized ammonium bicarbonate; this will help achieve a light, fluffy crust.
- Incorporate the 4 egg yolks and mix until homogeneous.
- Gradually add the 500 g flour, stirring continuously. You may need to add 1–2 tbsp sour cream to help the dough come together. The dough should be soft but not sticky.
- Knead the dough for 5–10 minutes until smooth and elastic. If it’s too stiff, add a bit more sour cream—but not too much, or the dough may become too soft.
- Divide the dough into 3 equal portions and roll each out on a floured surface.
- Bake each sheet separately on a 20×30 cm baking tray at 180 °C (preheated oven) for about 10–12 minutes, or until the edges are lightly golden.
- Once baked, let the layers cool completely before preparing the cream.
2. Preparing the cream:
- In a small saucepan over low heat, warm 100 ml milk. When it’s hot, add 150 g margarine for creams and stir until fully melted.
- Stir in 300 g apricot jam (or jam of choice) until smooth. If the jam is too thick, add a splash of milk to reach a creamy consistency.
- Add 1 cup ground walnuts and 2 tbsp cocoa powder, stirring to create a thick, uniform cream.
- Grate the zest of one lemon into the cream for a fresh, aromatic note. Mix well and let the cream cool slightly before layering.
3. Assembling the cake:
- Place the first baked layer on a serving platter or in a serving dish.
- Spread half of the apricot-jam-and-walnut cream evenly over the first layer.
- Place the second layer on top and cover it with the remaining cream.
- Top with the final layer and press gently to secure all layers.
4. Decorating the cake:
- Beat the 4 egg whites with 200 g sugar until you obtain stiff, glossy peaks.
- In a small saucepan or microwave, melt 50 g dark chocolate over a bain-marie.
- Spread the meringue uniformly over the top layer of the cake.
- Drizzle the melted chocolate over the meringue and let the cake cool completely.
5. Serving:
Allow the cake to cool fully at room temperature or in the refrigerator for a few hours so the cream sets and you achieve a perfect texture. Cut into small pieces and serve with a cup of tea or coffee.
Additional Tips:
- Storage: This cake keeps very well in the refrigerator for several days, often tasting even better the next day.
- Fruit variation: For a more intense fruit flavor, swap the apricot jam for berry or plum jam.
- Extra decoration: Sprinkle the cake with toasted nuts or coconut flakes for a more attractive presentation and additional flavor.
Carmen Cake is a refined dessert with multiple textures and flavors that will surely impress any guest!
Figaro Cake Recipe

Figaro Cake is a classic dessert that combines the sweet taste of plum jam with the crunchy texture of walnuts and the tender, buttery crust. In this version, we replace margarine with butter for a richer and more delicate flavor. Here’s how to prepare this cake step by step.
Ingredients:
For the dough:
- 250 g butter (instead of Unirea Original margarine)
- 200 g granulated sugar
- 3 egg yolks
- 500 g flour
- 1 packet baking powder (10 g)
- 1 tsp vanilla extract
- 1 tsp rum extract (optional, but adds a distinctive aroma)
For the cream:
- 3 egg whites
- 400 g plum jam (or other preferred jam)
- 150 g ground walnuts
- 1 tsp rum extract
Preparation time: 30 minutes
Difficulty: Medium
1. Preparing the dough:
- In a large bowl, place 250 g room-temperature butter and 200 g sugar. Mix well with a mixer or spatula until the butter is soft and the sugar dissolves.
- Add the 3 egg yolks and stir until fully incorporated.
- In another bowl, sift together the flour and baking powder. Add the vanilla and rum extracts, mixing the dry ingredients to blend them evenly.
- Gradually fold the flour mixture into the butter-sugar yolk mixture, stirring by hand or with a spatula until you obtain a crumbly dough.
- Divide the dough into three equal parts. Two parts will form the base and top of the cake, and the remaining third will be used to cover the cream.
2. Preparing the cream:
- Beat the 3 egg whites with a pinch of salt until stiff peaks form.
- Gently fold the 400 g plum jam into the beaten egg whites. For extra aroma, you can add a bit of rum extract.
- Stir in the 150 g ground walnuts until you have a uniform cream.
3. Assembling the cake:
- Line a 20×30 cm baking tray with parchment paper or grease it with butter and dust with flour.
- Spread two-thirds of the dough evenly over the bottom of the tray—this will be the cake’s base.
- Spoon the plum-walnut cream over the dough layer and spread it uniformly.
- Grate the remaining third of the dough over the cream layer, covering the filling completely.
4. Baking the cake:
- Preheat the oven to 180 °C (fan) or 200 °C (static).
- Bake the cake for 25–30 minutes, or until the top dough turns golden and crisp.
- Check doneness with a skewer—if it comes out clean, the cake is ready.
5. Cooling and serving:
- Let the cake cool completely in the tray before cutting into portions.
- Optionally dust with powdered sugar once fully cooled for an elegant finish.
- Serve the cake cold, alongside a cup of tea or coffee for a perfect treat.
Additional Tips:
- For an intensified flavor, add a dash of rum or almond extract to the jam cream.
- If you don’t have plum jam, substitute with sour cherry or berry jam for a different aroma.
- For extra decoration, sprinkle toasted almond flakes or more ground walnuts over the top.
Figaro Cake is a delightful dessert, with the perfect combination of tender dough, plum-jam cream, and a crunchy topping. It’s an excellent choice for family gatherings or any special occasion!
Pufișor Cake Recipe

Pufișor Cake is a refined dessert, featuring a fluffy sponge, a delicate cream, and a layer of crunchy meringue. To make this recipe healthier, we replace margarine with butter. Here are the detailed steps to prepare this cake, step by step.
Ingredients:
For the sponge:
- 150 g butter (instead of margarine)
- 1 tbsp cocoa powder
- 50 g chocolate (preferably dark)
- 100 g flour
- 200 ml milk
- 1 packet baking powder (10 g)
- 150 g powdered sugar
- 250 g granulated sugar
- 2 packets vanilla sugar
- Pinch of salt
- 2 tbsp vinegar
- Juice of 1 lemon
- 50 g couverture chocolate
- 10 eggs (for sponge and meringue)
For the cream:
- 150 g butter (instead of margarine)
- 150 g powdered sugar
- 200 ml milk
- 4 egg yolks
- 1 packet vanilla sugar
- 1 tbsp flour
- Juice of 1 lemon
For the meringue:
- 4 egg whites
- 100 g granulated sugar
- 1 packet vanilla sugar
For the glaze:
- 50 g couverture chocolate
Preparation time: 60 minutes
Difficulty: Medium
1. Preparing the sponge:
- In a large bowl, cream 250 g granulated sugar with the yolks of 6 eggs until you obtain a creamy, light mixture.
- Add 1 tbsp cocoa powder, the baking powder, the vinegar, and a pinch of salt. Stir gently to combine.
- Gradually fold in the flour with a spatula or mixer on low speed.
- In a small saucepan, heat the milk with 50 g chocolate, stirring until the chocolate melts completely.
- Incorporate the warm chocolate milk into the egg mixture, stirring constantly.
- In another bowl, beat the 6 egg whites until stiff peaks form. Gently fold them into the batter, mixing from bottom to top to preserve the airy texture.
- Line a baking tray with parchment paper and lightly grease it with butter. Pour in the batter and bake at 175 °C for about 30 minutes, or until a skewer comes out clean.
2. Preparing the cream:
- In a small saucepan, heat the milk and add 4 egg yolks, 1 packet vanilla sugar, and 1 tbsp flour. Stir continuously over low heat until the cream thickens.
- Remove from heat and let cool. Meanwhile, beat 150 g butter with the powdered sugar until you obtain a smooth, creamy frosting.
- Once the custard has cooled, gradually incorporate it into the butter mixture. Mix well and add lemon juice for a fresh, balanced flavor.
3. Preparing the meringue:
- Beat the 4 egg whites until stiff peaks form. Add 100 g granulated sugar and 1 packet vanilla sugar, continuing to beat until the meringue is glossy and firm.
- Place the meringue over a bain-marie and continue beating for another 5–10 minutes, until the sugar is fully dissolved and the meringue is dense.
4. Assembling the cake:
- Once the sponge has cooled completely, slice it into two or three layers.
- Spread the cream evenly over the first layer.
- Place the second sponge layer on top and cover it with the meringue, distributing it uniformly.
- Melt 50 g couverture chocolate over a bain-marie and use it to decorate the meringue with thin chocolate drizzles.
5. Final bake and serving:
- Return the assembled cake to the preheated oven at 180 °C for about 10–15 minutes, or until the meringue is slightly browned and crisp.
- Let the cake cool completely before slicing—this step is crucial to allow the meringue to set and maintain the cake’s shape.
- Cut into small portions and serve chilled, alongside a cup of tea or coffee.
Additional Tips:
- Intensify the chocolate flavor by adding a few tablespoons of cocoa powder to the custard cream.
- For extra decoration, sprinkle the meringue with chopped nuts or chocolate flakes.
Pufișor Cake is a sophisticated dessert, offering a delightful contrast between the puffy sponge, the delicate cream, and the crunchy meringue. It will add an elegant touch to any meal and is sure to impress all your guests!
Traditional Cozonac with Walnuts, Cocoa, and Turkish Delight Recipe
Cozonac with walnuts, cocoa, and Turkish delight is a classic holiday dessert that delivers a wonderful flavor and a fluffy texture. This traditional Romanian recipe combines a tender dough with a rich walnut-cocoa filling, while the Turkish delight adds extra aroma and color. Here are the detailed steps to prepare the best cozonac.
Ingredients:
For the dough:
- 1 kg flour (preferably type 000)
- 250 ml warm milk
- 200 g sugar
- 150 g butter (or margarine, if you prefer)
- 5 eggs (4 yolks + 1 whole egg for brushing)
- 50 g fresh yeast
- 1 tsp vanilla extract
- 1 tsp grated lemon zest
- Pinch of salt
- 50 ml oil (for brushing)
- 100 ml warm water (to dissolve the yeast)
- 2 tbsp sour cream (for a more tender dough)
For the filling:
- 300 g ground walnuts
- 100 g sugar
- 3 tbsp cocoa powder
- 150 ml milk
- 100 g Turkish delight, diced
- 1 tsp rum extract (optional)
For brushing before baking:
- 1 egg
- 2 tbsp milk
1. Preparing the dough:
- In a small bowl, dissolve the yeast and 1 tsp sugar in the 100 ml warm water. Let it activate for 10–15 minutes until foamy.
- In a large bowl, combine the flour, 200 g sugar, salt, and lemon zest. Make a well in the center and add the egg yolks, whole egg, vanilla, activated yeast, and warm milk. Mix gradually, integrating the flour into the liquids.
- Once the dough starts to come together, add the melted (and slightly cooled) butter and knead until smooth and elastic.
- Continue kneading for 10–15 minutes, adding oil gradually to make the dough finer. If it’s too sticky, add a little flour, but avoid over-adding.
- Cover the bowl with a clean towel and let the dough rise in a warm place for 1–2 hours, until it doubles in volume.
2. Preparing the filling:
- In a saucepan over low heat, combine 150 ml milk and 100 g sugar. Cook, stirring, until the sugar dissolves.
- Stir in the 3 tbsp cocoa powder to form a smooth cocoa paste. Let it cool slightly.
- Add the ground walnuts and rum extract, mixing until well combined.
- Fold in the diced Turkish delight.
3. Assembling the cozonac:
- After the dough has risen, divide it into two equal parts.
- Roll out the first portion on a floured surface into a rectangle.
- Spread half of the walnut-cocoa-Turkish delight filling onto the dough, leaving a few centimeters clear at the edges.
- Roll the dough into a log; if too long, cut it in two.
- Place the roll into a greased cozonac pan, tucking the ends under to seal. Repeat with the second dough portion and filling.
- Cover the pans with a towel and let the cozonaci rise for another 30–40 minutes.
4. Baking the cozonac:
- Preheat the oven to 180 °C.
- Beat the egg with 2 tbsp milk and brush the risen cozonaci to give a beautiful glossy crust.
- Bake for 40–50 minutes, until golden and passing the skewer test (it should come out clean).
- If they brown too quickly, tent with foil for the last 10 minutes.
5. Cooling and serving:
- Once baked, let the cozonaci cool in their pans for 10–15 minutes, then remove and cool completely on a rack.
- Slice and serve with a cup of tea or coffee.
Additional Tips:
- For extra fragrance, add a pinch of cinnamon or orange extract to the filling.
- If you prefer no Turkish delight, substitute with candied fruit or small chocolate pieces.
- To enrich the filling further, stir in raisins or coconut flakes.
This walnut, cocoa, and Turkish delight cozonac is perfect for the holidays, with its fluffy texture and incredible aroma. It’s sure to become a family favorite!
Do you enjoy the content on Agenda Creativa?
Your contributions help me create new articles, share creative ideas, and keep this platform alive! If you like what I do and want to support my work, you can buy us a coffee.
Every cup of coffee means more than just a gesture – it's direct support for my passion to create inspiring and useful content. Thank you for being part of this journey!
☕ Buy me a coffee