Burdock Root: Properties, Benefits, and Uses

Burdock root (Arctium lappa) is a valuable ingredient in traditional medicine and in skin and hair care. Burdock, a biennial herbaceous plant, is renowned for its detoxifying and nourishing properties and has been used for centuries to treat skin disorders, support liver function, and promote overall health.


Scientific Name and Origin

Burdock belongs to the Asteraceae family and is known by the scientific name Arctium lappa. The plant is native to Europe and Asia but has spread worldwide due to its ability to grow in diverse soil types. While recognized for its violet flowers and large leaves, it is the root that is used for medicinal purposes.


Botanical Description

Burdock is a robust plant that can grow to a height of 1.5–2 meters. It is covered in large leaves with wavy margins and a slightly hairy texture on the underside. The flowers are globular and violet in color, surrounded by small hooks that allow the plants to cling to clothing and fur, promoting seed dispersal. The root, which is the part used in herbal medicine, is long, fleshy, and brown, containing numerous bioactive substances.

Nutritional Composition and active compounds

Burdock root is rich in nutrients and active compounds with significant health benefits:

  • Inulin: A prebiotic fiber that helps support intestinal health and regulate blood sugar levels.
  • Antioxidants: Burdock contains quercetin, luteolin, and phenolic acids—powerful antioxidants that protect the body from free radical damage.
  • Tannins: Compounds with astringent and anti-inflammatory properties, beneficial for the skin.
  • Essential Oils: The root contains volatile oils that help reduce inflammation and provide a soothing effect.

BBurdock Root: Properties, Benefits, and Uses

Burdock root (Arctium lappa) is a valuable ingredient in traditional medicine and in skin and hair care. Burdock, a biennial herbaceous plant, is renowned for its detoxifying and nourishing properties and has been used for centuries to treat skin conditions, support liver function, and promote overall health.

Health Benefits of Burdock Root

  1. Detoxifying Effect and Liver Support
    Burdock is a natural detoxifier that helps eliminate toxins from the blood and liver. The root stimulates bile production and supports hepatic function, making it beneficial in detoxification regimens.
  2. Digestive Support
    The inulin in burdock root is a prebiotic fiber that nourishes beneficial gut bacteria, improving digestion and bolstering a healthy immune system. Burdock root is also used to alleviate gastrointestinal discomfort, such as bloating and constipation.
  3. Skin Benefits
    Burdock is prized for its anti-inflammatory and antibacterial properties. It is used in the treatment of skin conditions such as acne, eczema, and psoriasis by reducing inflammation and combating infection-causing bacteria.
  4. Anti-Inflammatory Effects
    Thanks to its powerful antioxidants, burdock helps reduce inflammation throughout the body. This makes it useful in treating inflammatory conditions like arthritis and in alleviating joint pain.
  5. Blood Sugar Regulation
    The inulin in burdock root can help stabilize blood sugar levels, making this plant a good option for those seeking to manage glycemia.

Culinary Uses

In some Asian cultures, burdock root is consumed as a food ingredient in various recipes:

  • Stir-Fries and Soups: Burdock is often added to soups and stir-fries, offering a texture similar to carrot but with a slightly sweet, earthy flavor.
  • Pickles: In Japan, burdock is pickled and known as gobo, prized for its crisp texture.
  • Smoothies: Freshly grated burdock root can be added to smoothies to boost fiber and nutrient content.

Traditional Herbal Uses

Burdock root has been used for centuries in herbal medicine for its medicinal properties:

Tincture Recipe: Burdock Root Tincture
A concentrated remedy traditionally used for its detoxifying, anti-inflammatory, and skin- and liver-supporting benefits. It can be taken in small doses to harness burdock’s therapeutic effects.

Ingredients:

  • 1 cup fresh burdock root, washed and cut into small pieces (or ½ cup dried root)
  • 250 ml food-grade alcohol (vodka at least 40% or grain alcohol)
  • A glass jar with an airtight lid

Instructions:

  1. Prepare the root: Wash fresh burdock root thoroughly and chop into small pieces. If using dried root, ensure it’s finely crushed for efficient extraction.
  2. Jar filling: Place burdock pieces in the jar, filling about one-third.
  3. Add alcohol: Pour alcohol over the root to fully cover it; seal the jar tightly.
  4. Maceration: Store in a cool, dark place for 4–6 weeks, shaking daily to help extract active compounds.
  5. Straining: After maceration, strain through a fine sieve or cheesecloth, discarding solids. Transfer the tincture to a dark bottle to protect from light.
  6. Storage: Keep in a cool, dark place; shelf life is about one year due to the alcohol content.

Usage:

  • For detoxification and liver support: 10–15 drops diluted in water, twice daily.
  • For skin health (acne, eczema): same dosage.
  • For digestion: 5–10 drops before meals to improve gut function.

Infusions and Teas

Burdock root infusions and teas offer a simple, effective way to consume this plant, especially during detox programs or for general health support.

  1. Simple Burdock Root Tea
    Ingredients:
    • 1 tablespoon dried burdock root (or 2 tablespoons finely chopped fresh root)
    • 2 cups water
      Instructions:
    1. Bring water to a boil.
    2. Add burdock root, reduce heat, and simmer for 10–15 minutes.
    3. Strain and serve. Sweeten with honey if desired.
      Benefits: Supports liver detoxification, reduces inflammation, and promotes skin health.
  2. Burdock and Dandelion Tea
    A potent detox blend that supports liver and kidney health.
    Ingredients:
    • 1 tablespoon dried burdock root
    • 1 tablespoon dried dandelion root
    • 3 cups water
      Instructions: Simmer roots together for 10–15 minutes, strain, and serve. Add lemon or honey for flavor.
      Benefits: Combines the detoxifying properties of burdock and dandelion, aiding toxin elimination.
  3. Cold Infusion of Burdock Root
    A slow extraction method yielding a mild-flavored, concentrated infusion.
    Ingredients:
    • 1 tablespoon dried burdock root (or 2 tablespoons fresh)
    • 4 cups cold water
      Instructions: Steep root in cold water in the fridge for 8–12 hours or overnight, strain, and enjoy chilled or at room temperature.
      Benefits: A refreshing way to support gentle detoxification throughout the day.
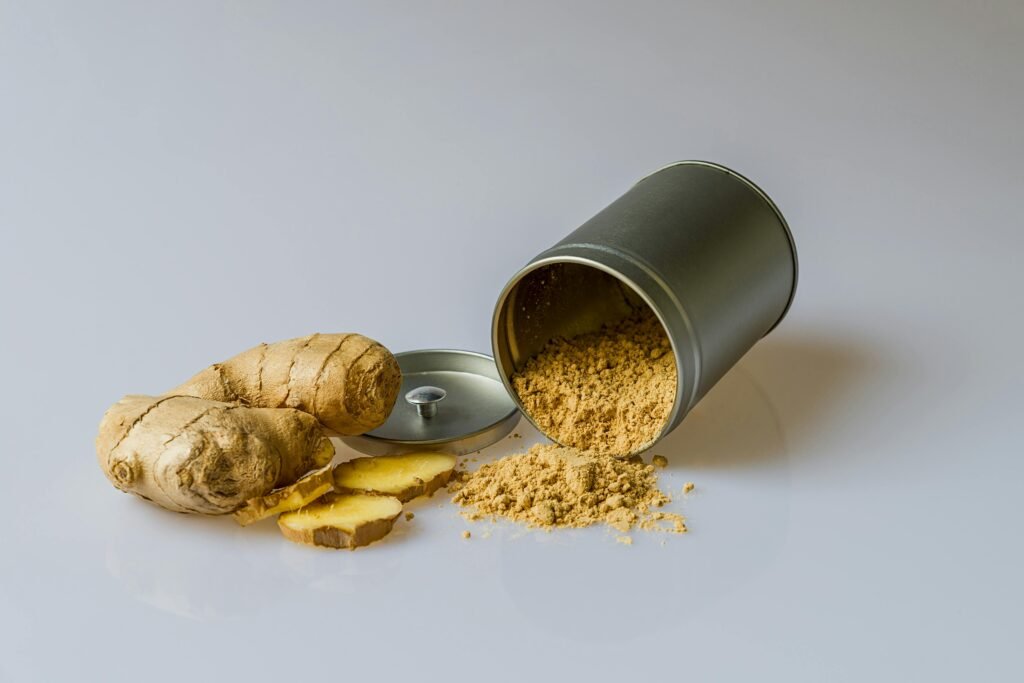
  4. Burdock and Ginger Tea
    Combines burdock’s anti-inflammatory and detoxifying effects with ginger’s digestive benefits.
    Ingredients:
    • 1 tablespoon dried burdock root
    • 1 teaspoon fresh grated ginger (or ½ teaspoon ginger powder)
    • 2 cups water
      Instructions: Simmer together for 10–15 minutes, strain, and serve warm with honey or lemon.
      Benefits: Promotes digestion, reduces bloating, and supports skin and liver health.
  5. Burdock and Mint Tea for Digestion
    A soothing blend to ease intestinal discomfort and support liver function.
    Ingredients:
    • 1 tablespoon dried burdock root
    • 1 teaspoon dried mint leaves (or 1 tablespoon fresh)
    • 2 cups water
      Instructions: Boil water, add burdock, simmer 10 minutes, then add mint off heat and steep 5 minutes. Strain and serve.
      Benefits: Enhances digestion, calms the stomach, and reduces bloating.

General Recommendations:

  • Frequency: Consume burdock teas 1–2 times daily for detoxification effects, but avoid continuous use for more than a few weeks without a break.
  • Precautions: Do not overconsume and consult a physician if you have medical conditions, as burdock has diuretic effects and may interact with medications.
  • Flavoring: Burdock has a slightly bitter, earthy taste. Sweeten with honey, lemon, or aromatic herbs like cinnamon as desired.

Extracts and Capsules
Burdock root is also available as supplements, indicated for supporting liver health and skin conditions.

These burdock root preparations—tinctures, infusions, and supplements—provide a natural, versatile means to harness its detoxifying, anti-inflammatory, and nutritive benefits, easily integrating into daily health and wellness routines.

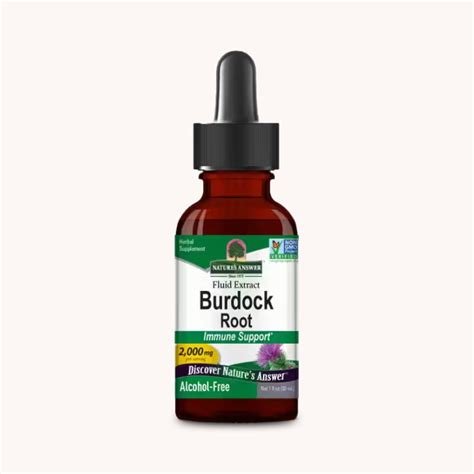
Burdock Root Extracts and Capsules are convenient forms for benefiting from the therapeutic properties of burdock without the need for daily preparation. These supplements are available in health-food stores and specialized pharmacies, offering an easy way to integrate burdock into your daily health routine—especially for those seeking natural detoxification or support for skin and liver.


What Are Burdock Root Extracts and Capsules?

Extracts: Burdock root extracts are concentrated solutions obtained by macerating the root in alcohol or glycerin. Extracts are more potent than teas and provide a higher dose of active compounds in a small amount of liquid.

Capsules: Burdock root capsules contain either dried root powder or concentrated extract. They are an ideal option for those who prefer a simple, precise method of administration without the characteristic earthy taste of burdock.


Benefits of Burdock Root Extracts and Capsules

Detoxification and Liver Health: Burdock supports the elimination of toxins from the body by stimulating liver function and helps purify the blood. Extracts and capsules are often used in detox regimens due to their ability to support the liver.

Skin Support: Burdock is renowned for its beneficial properties in skin conditions such as acne, eczema, and psoriasis. Its anti-inflammatory and antibacterial compounds contribute to healthier skin.

Digestive Health: Burdock extracts and capsules contain inulin, a prebiotic fiber that nourishes beneficial gut flora. These supplements can improve digestion and help reduce abdominal discomfort, bloating, and constipation.

Immune System: Thanks to its antioxidant content, burdock can support immune function and protect cells from damage caused by free radicals.

Inflammation Reduction: Burdock contains anti-inflammatory compounds that can help reduce inflammation, making it beneficial for those suffering from inflammatory conditions such as arthritis.


Method of Administration

  • Extract: Burdock root extracts are typically taken in doses of 10–15 drops, 2–3 times per day, diluted in a glass of water. It is important to follow the manufacturer’s instructions, as concentrations may vary.
  • Capsules: Capsule dosages vary depending on the concentration. Generally, 1–2 capsules twice daily are recommended, but you should follow the manufacturer’s guidelines or a specialist’s advice.

Precautions and Contraindications

  • Medical Consultation: Before taking burdock supplements, it is advisable to consult a physician, especially if you have liver or kidney conditions, or if you are pregnant or breastfeeding.
  • Drug Interactions: Burdock may have a diuretic effect and interact with diuretic medications or other treatments. Consult a specialist if you are on medication for a chronic condition.
  • Allergies: Individuals allergic to plants in the Asteraceae family (daisies, chrysanthemums) should avoid burdock.

Purchasing and Quality Recommendations

When acquiring burdock root extracts and capsules:

  • Choose high-quality products from reputable brands with strict testing and manufacturing standards.
  • Check the concentration and ingredients: Opt for products without additives or artificial flavors.
  • Review user feedback and specialist recommendations.

Conclusion

Burdock root extracts and capsules offer a convenient way for those wishing to enjoy the therapeutic benefits of burdock without daily preparation of infusions or teas. These concentrated supplement forms are easy to integrate into a daily routine, supporting liver health, skin, digestive function, and immunity.


Cosmetic Uses

Burdock root is a popular ingredient in skin care and hair care products, thanks to its soothing properties and its ability to regulate sebum:

  • Lotions and Serums for Acne: Burdock has anti-inflammatory and antibacterial properties, making it effective for treating acne and oily skin issues.
  • Scalp Masks: Burdock is used in scalp treatments, as it helps reduce dandruff and soothe scalp irritation.
  • Hair Products: Burdock extract is often included in shampoos and conditioners to stimulate hair growth, prevent hair loss, and improve scalp health.

Hair Care Recipes with Burdock

Burdock root is known for its scalp and hair benefits. The active compounds in burdock help strengthen roots, reduce hair loss, soothe scalp irritations, and stimulate healthy hair growth. Here are a few natural hair treatment recipes using burdock root.

  1. Burdock Oil for Scalp and Roots

Ingredients:

  • ¼ cup fresh burdock root, grated (or 2 tablespoons dried root)
  • ½ cup olive oil or coconut oil

Instructions:

  1. In a small saucepan, combine the oil and burdock root.
  2. Warm the oil over low heat for 30 minutes—do not allow it to boil—to extract the beneficial compounds from the burdock.
  3. Let the oil cool, then strain to remove the root pieces.
  4. Apply the oil to your scalp, gently massaging it in. Cover your hair with a warm towel and leave on for at least 1 hour or overnight, then wash your hair with a gentle shampoo.

Benefits: Burdock oil nourishes the scalp, strengthens roots, and can help reduce hair loss.


Burdock Tea Rinse for Hair Growth

Ingredients:

  • 2 tablespoons of dried burdock root (or ¼ cup of finely chopped fresh root)
  • 500 ml water

Instructions:

  1. Bring the water to a boil in a saucepan, then add the burdock root.
  2. Reduce the heat and simmer for 10–15 minutes.
  3. Allow the tea to cool, then strain out the root pieces.
  4. After shampooing and rinsing, pour the burdock tea over your hair and scalp as a final rinse. Do not rinse out with water—leave the tea in your hair.

Benefits: This tea rinse promotes scalp stimulation, strengthens the hair, and can help reduce dandruff and scalp irritations.


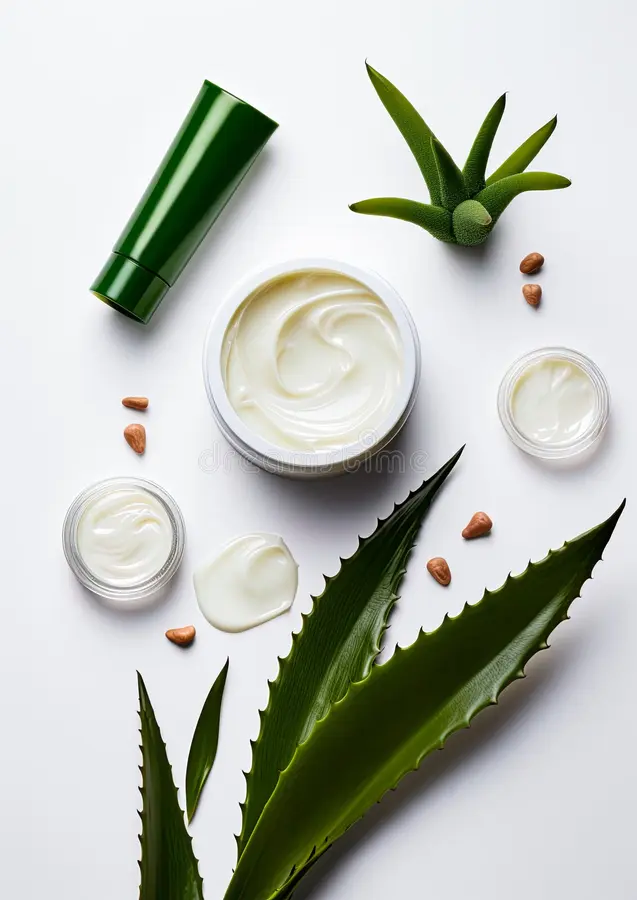
3. Burdock and Aloe Vera Mask for a Healthy Scalp

IIngredients:

  • 1 tablespoon of burdock root powder (or 1 tablespoon of finely ground dried burdock root)
  • 2 tablespoons of aloe vera gel
  • 1 tablespoon of castor oil or jojoba oil

Instructions:

  1. In a small bowl, mix the burdock root powder with the aloe vera gel and oil until you obtain a smooth paste.
  2. Apply the mask to your scalp, gently massaging to stimulate circulation.
  3. Cover your hair with a towel or shower cap and leave on for 30–45 minutes.
  4. Wash your hair with a gentle shampoo and rinse thoroughly.

Benefits: This mask soothes the scalp, helps reduce dandruff, and nourishes hair roots, promoting healthier, shinier hair.

Recommendations:

  • Frequency: Use burdock treatments 1–2 times per week for visible results.
  • Patch Test: Before application, test on a small skin area to avoid allergic reactions.
  • Natural Ingredients: Choose high-quality, preferably organic ingredients to ensure treatment efficacy.

These natural hair care recipes with burdock offer an effective alternative to support scalp health and hair strength, helping to reduce hair loss and achieve stronger, more radiant hair.


Recommendations:

  • Frequency: Use burdock treatments 1–2 times per week for visible results.
  • Patch Test: Before application, test on a small area of skin to avoid allergic reactions.
  • Natural Ingredients: Choose high-quality, preferably organic ingredients, to ensure treatment efficacy.

These burdock hair care recipes offer a natural and effective alternative to support scalp and hair health, helping reduce hair loss and promote stronger, shinier hair.


Burdock Tea and Other Burdock Beverages

Burdock tea is one of the most common ways to consume burdock root and is known for its detoxifying and diuretic effects.

  • Simple Burdock Tea: Infused for 10–15 minutes, this tea has an earthy, slightly bitter taste and helps eliminate toxins.
  • Burdock and Dandelion Tea: Combines the detoxifying properties of burdock and dandelion, offering additional liver and kidney support.

This burdock-and-dandelion tea is a natural remedy, easy to prepare, that supports overall health by stimulating the body’s natural detoxification processes.

Ingredients:

  • 1 teaspoon dried burdock root (or 1 tablespoon finely chopped fresh root)
  • 1 teaspoon dried dandelion root (or 1 tablespoon finely chopped fresh root)
  • 500 ml water
  • Honey and lemon, to taste (optional)

Instructions:

  1. Boil the water: Bring water to a boil in a small pot or kettle.
  2. Add the roots: When boiling, add the burdock root and dandelion root.
  3. Simmer: Reduce heat and simmer gently for 10–15 minutes to extract the active compounds.
  4. Strain and serve: Strain into a cup. Add honey or lemon, if desired.

Consumption Recommendations:

  • Light Detox: Drink 1–2 cups per day for one week for a gentle detox.
  • Digestive Support: Regular consumption can aid digestion and toxin elimination.

Benefits:

  • Burdock aids liver detoxification and blood purification, supporting skin health and reducing inflammation.
  • Dandelion has diuretic properties and supports kidney function, helping eliminate excess fluids and toxins.

This burdock-and-dandelion tea is a natural, easy-to-prepare remedy that supports general health by boosting the body’s detoxification.


Detoxifying Smoothie with Burdock Root

This detoxifying smoothie with burdock root is a healthy option…ătoasă și revigorantă pentru a începe ziua sau ca gustare nutritivă. Rădăcina de brusture, împreună cu fructe și legume bogate în antioxidanți, contribuie la eliminarea toxinelor și susținerea sistemului digestiv și imunitar.

Ingredients:

1 tablespoon of fresh burdock root, cleaned and finely chopped (or ½ teaspoon of burdock root powder)
1 green apple, diced
½ cucumber, sliced
1 cup of fresh spinach (or kale)
½ banana, for texture and sweetness
1 tablespoon of fresh lemon juice
1 cup of coconut water (or filtered water)
Ice cubes (optional)

Instructions:

  1. Prepare the ingredients: Clean and chop the apple, cucumber, banana, and burdock root into small pieces to facilitate blending.
  2. Combine in blender: Add the burdock root, green apple, cucumber, spinach, banana, lemon juice, and coconut water to the blender.
  3. Blend: Mix on high speed until you achieve a creamy, homogenized consistency. For a more refreshing detoxifying smoothie, add a few ice cubes and blend again.
  4. Serve: Pour the smoothie into a glass and consume immediately to enjoy all the nutrients.

Benefits:

  • Burdock root supports body detoxification, benefiting the liver and skin.
  • Green apple and cucumber add fiber and antioxidants, contributing to digestive health and hydration.
  • Spinach is rich in iron and minerals, supporting blood health and energy levels.
  • Lemon juice stimulates digestion and enhances the detoxification process.

This detoxifying smoothie with burdock root is an excellent way to support your daily health, providing an energy boost and essential nutrients to improve bodily functions and promote radiant skin.


Precautions and Adverse Effects

Although burdock root is considered safe for most people, there are a few precautions:

  • Allergies: Individuals allergic to plants in the Asteraceae family (such as daisies or chrysanthemums) should avoid burdock.
  • Drug Interactions: Burdock may have a diuretic effect, so those taking diuretic medications should consult a physician before consuming burdock.
  • Pregnancy and Breastfeeding: There are not enough studies to confirm burdock’s safety during pregnancy and lactation, so its use is not recommended in these cases.

Conclusion

Burdock root is a valuable ingredient with numerous benefits for health, skin, and hair. With its detoxifying, anti-inflammatory, and antioxidant properties, burdock is an excellent choice for those looking to support liver health, improve skin appearance, and promote healthy digestion. This natural remedy is easy to integrate into a daily routine—whether as tea, tincture, or in cosmetic products.


What is burdock root and what is its scientific name?
Answer:
Burdock root comes from the biennial herb Arctium lappa, of the Asteraceae family. Native to Europe and Asia, it’s now widely cultivated for its medicinal and nutritional benefits. Recognized by its violet flowers and long, fleshy root, burdock is used in traditional medicine for detoxification and skin support.

What are the main active compounds in burdock root?
Answer:
Burdock root is rich in:

  • Inulin: A prebiotic fiber beneficial for intestinal health and blood sugar regulation.
  • Antioxidants: Quercetin, luteolin, and phenolic acids that protect cells from oxidative stress.
  • Tannins: Astringent compounds with anti-inflammatory effects.
  • Essential Oils: Volatile oils that reduce inflammation and provide a soothing effect.

How does burdock root support detoxification?
Answer:
Burdock root aids detoxification by:

  • Stimulating liver function and bile production.
  • Eliminating toxins through its diuretic effect.
  • Improving blood circulation, which helps remove metabolic waste.
    Consuming burdock tea or tincture during detox regimens is a traditional and effective method.

What skin benefits does burdock root offer?
Answer:
Burdock root is acclaimed for treating acne, eczema, and psoriasis due to its:

  • Anti-inflammatory effects: Reduces redness and irritation.
  • Antibacterial action: Prevents skin infections.
  • Sebum regulation: Effective for oily skin.
    Topical use in lotions or masks can noticeably improve skin appearance.

How does burdock root support digestive health?
Answer:
The inulin in burdock root acts as a prebiotic, promoting beneficial gut bacteria. This:

  • Helps reduce bloating and constipation.
  • Improves nutrient absorption.
  • Contributes to a healthy immune system.
    Burdock teas are commonly used to support digestion.

What are the culinary uses of burdock root?
Answer:
In Asia, burdock root is enjoyed as a healthful food:

  • Soups: Adds an earthy flavor and satisfying texture.
  • Pickles: Popular in Japanese cuisine as gobo.
  • Smoothies: Grated root boosts fiber and antioxidants.
    It’s a nutritious addition to the daily diet.

How is burdock root tincture prepared and what is it used for?
Answer:

Preparation:

  1. Wash and chop fresh or dried burdock root.
  2. Place in a jar and cover with food-grade alcohol (vodka).
  3. Macerate for 4–6 weeks, shaking daily.
  4. Strain the liquid and store the tincture in a dark container.

Use: 10–15 drops diluted in water, twice daily, for detoxification or liver support.

How does burdock root help lower blood sugar?
Answer:
Thanks to its high inulin content, burdock root:

  • Improves insulin sensitivity.
  • Helps regulate blood sugar levels, preventing spikes.
    Tea or capsules are recommended for those monitoring glucose control.

What are burdock root’s uses in hair care?
Answer:
Burdock root stimulates scalp circulation and helps reduce dandruff and hair loss. Examples include:

  • Burdock oil: Massaged into the scalp to fortify roots.
  • Burdock tea rinses: Revitalize hair and soothe irritated scalp.
    It is a common ingredient in hair-growth shampoos.

Are there contraindications for burdock root use?
Answer:
Though safe for most, note:

Pregnancy and breastfeeding: Safety is not well studied, so avoid use.
Consult a healthcare professional before therapeutic use.

Allergies: Those sensitive to Asteraceae plants should avoid use.

Diuretic effect: May interact with diuretic medications.

Ginger: Properties, Benefits, and Uses

Ginger (Zingiber officinale) is an aromatic plant known for thousands of years for its medicinal and culinary properties. Originating in Southeast Asia, ginger is appreciated worldwide for its therapeutic benefits and its distinct, mildly spicy and invigorating flavor. The ginger root is the most commonly used part, and its active compounds – especially gingerol – are responsible for its numerous positive effects on health.


Scientific Name and Origin

Ginger belongs to the Zingiberaceae family and is closely related to other medicinal plants such as turmeric and cardamom. Its scientific name, Zingiber officinale, is derived from the Sanskrit word singabera, meaning “horn-shaped,” referring to its rhizome’s form. This plant is native to tropical Asia—particularly India and China—but has become a popular crop throughout tropical regions worldwide.

Botanical Description

Ginger is a perennial plant that grows to approximately one meter in height. The plant has narrow, lanceolate leaves and delicate yellowish-green flowers that appear in spike-like inflorescences. Its underground stem—the rhizome—has a knobby texture and a thin skin ranging from yellow to light brown. This root is intensely aromatic and contains volatile oils as well as potent bioactive compounds.

Nutritional Composition and Active Compounds

The ginger rhizome is rich in bioactive compounds and essential nutrients:

  • Gingerol: The primary compound in ginger, responsible for its spicy flavor and anti-inflammatory and antioxidant effects.
  • Vitamins and Minerals: Ginger contains B-complex vitamins (B1, B2, B3), vitamin C, and minerals such as magnesium, manganese, copper, and iron.
  • Essential Oils: Aromatic compounds like zingiberene contribute to its soothing effects and pain-relief properties.
  • Fiber: Although not consumed for fiber intake, fresh ginger contains a small amount of fiber that supports digestive health.

Health Benefits

Ginger is recognized for a wide range of health benefits and is widely used in traditional medicine.

  1. Anti-Inflammatory and Antioxidant Effects
    Gingerol and other phenolic compounds in ginger exhibit strong anti-inflammatory properties. They reduce inflammation in the body and help alleviate joint and muscle pain.
  2. Support for the Digestive System
    Ginger is renowned for its ability to relieve digestive discomfort. It is a traditional remedy for nausea and vomiting and is often recommended for motion sickness and pregnancy-related nausea. It also stimulates the production of digestive enzymes, contributing to more efficient digestion.
  3. Enhancement of Blood Circulation
    Ginger can help dilate blood vessels and lower blood pressure, promoting healthy circulation and reducing the risk of cardiovascular conditions. Its content of magnesium and potassium supports heart health.
  4. Antimicrobial and Immunomodulatory Effects
    Studies have shown that ginger possesses antimicrobial properties, potentially aiding in the fight against bacterial and fungal infections. It is also used to strengthen the immune system and prevent colds and flu.
  5. Glycemic Control
    Regular consumption of ginger may help improve insulin sensitivity and reduce blood glucose levels, making it useful for individuals at risk of type 2 diabetes.

Culinary Uses

Ginger is a versatile ingredient used in both sweet and savory dishes. Its mildly spicy and slightly sweet flavor enhances a variety of recipes, including:

  • Teas: Ginger tea, made from fresh root, is popular for its invigorating and soothing effect.
  • Soups and Broths: Ginger adds a distinctive flavor to Asian soups such as miso soup.

Chicken and Ginger Soup

This soup is ideal for cold days or periods when you need an energy and immune boost. Ginger adds a mildly spicy and refreshing aroma, and paired with chicken, it creates a nutritious and light soup.

Ingredients:

1 chicken breast or 2 chicken thighs, skinless
1.5 liters of water
1 piece of fresh ginger (approximately 5 cm), peeled and thinly sliced
2–3 cloves of garlic, crushed
1 carrot, cut into rounds
1 small onion, finely chopped
1 stalk of celery, chopped
1–2 tablespoons of soy sauce (optional, for extra flavor)
Salt and pepper to taste
Green onion and fresh cilantro for garnish (optional)
Lemon or lime, for serving (optional)

Instructions:

  1. Boil the chicken: In a large pot, place the chicken and water, and bring to a boil. Skim off any foam that forms on the surface to achieve a clear broth.
  2. Add the ginger and vegetables: Add the sliced ginger, garlic, carrot, onion, and celery to the pot. Reduce the heat and let the soup simmer gently for 30–40 minutes, until the chicken is cooked through and the vegetables are tender.
  3. Season: Add salt, pepper, and soy sauce to taste. The soy sauce adds an extra layer of umami and saltiness but can be omitted if you prefer a simpler soup.
  4. Remove and shred the chicken: Take the chicken out of the pot, let it cool slightly, then cut it into small pieces or strips. Return it to the soup.
  5. Serve: Ladle the soup into bowls and sprinkle with green onion and fresh cilantro for a burst of color and flavor. Serve with lemon or lime wedges on the side for a light, tangy finish, if desired.

This chicken and ginger soup is delicious and easy to digest, perfect for strengthening the immune system and warming the body during the cold season.

Marinades and Sauces: Ginger is also a key ingredient in meat marinades and in sauces such as soy-ginger sauce for Asian dishes. Ginger sauce is a flavorful and versatile option, ideal for accompanying fish, chicken, grilled vegetables, or rice. Its fresh, mildly spicy aroma adds a delightful boost of flavor to any dish.

Ingredients:

  • 2 tablespoons of fresh ginger, finely grated
  • 2 cloves of garlic, crushed
  • 3 tablespoons of soy sauce
  • 2 tablespoons of rice vinegar (or lemon juice)
  • 1 tablespoon of sesame oil (optional, for extra aroma)
  • 1 tablespoon of honey or brown sugar (for a touch of sweetness)
  • ¼ cup of water
  • Finely chopped green onion (optional, for garnish)

Instructions:

  1. Prepare the ginger and garlic: In a small bowl, combine the grated ginger and crushed garlic.
  2. Add the liquid ingredients: Pour the soy sauce, rice vinegar, and sesame oil over the ginger and garlic. Stir well.
  3. Sweeten: Add the honey or brown sugar and mix until fully dissolved.
  4. Dilute with water: Gradually add the water, stirring to achieve your desired consistency. Adjust the amount of water depending on how thick you want the sauce.
  5. Serve: Sprinkle finely chopped green onion on top for garnish, if desired. The sauce is now ready to serve.

Serving Suggestions:

  • For meats: Ideal as a marinade for chicken or pork. Let the meat marinate for 30 minutes before cooking.
  • For vegetables: Use as a dressing for salads or as a dip for fresh vegetables.
  • For Asian dishes: Serve as a sauce for sushi, spring rolls, or noodles.

This ginger sauce is quick to prepare and offers a balanced combination of sweet, spicy, and salty flavors, bringing an exotic and refreshing taste to your dishes.

Desserts: Ginger appears in baked goods such as gingerbread, as well as in recipes for ginger ice cream or candied ginger.


Traditional Methods of Use

Ginger is a traditional remedy in Ayurveda and Chinese medicine. These ancient practices use ginger to balance the body and support overall health:

  1. Ginger Tincture: Used to stimulate digestion and alleviate inflammation. The ginger tincture is a concentrated natural remedy for various ailments, especially digestive issues, nausea, and muscle or joint pain. It can be taken in small doses and is an effective way to benefit from ginger’s therapeutic properties. Ingredients:
    • ½ cup of fresh ginger, cleaned and cut into small cubes (or ¼ cup of dried, ground ginger)
    • 250 ml of food-grade alcohol (vodka of at least 40%, pure ethyl alcohol, or grain alcohol)
    • A glass jar with an airtight lid
    Instructions:
    1. Prepare the ginger: Wash and peel the fresh ginger, then cut it into small pieces to facilitate the extraction of active compounds. If using dried ginger, measure a smaller amount, as it is more concentrated.
    2. Place the ginger in the jar: Fill about one-third of the jar with the ginger pieces.
    3. Pour in the alcohol: Add the alcohol, ensuring the ginger is completely covered. Seal the jar tightly.
    4. Maceration period: Store the jar in a cool, dark place for 2–4 weeks. Shake the jar daily to help extract the active compounds.
    5. Strain the tincture: After 2–4 weeks, strain the liquid through a fine sieve or cheesecloth to remove the ginger pieces. Transfer the tincture to a dark-colored bottle to protect it from light.
    6. Storage: Keep the tincture in a cool, dark place. It has a shelf life of about one year due to its alcohol content.
    Usage:
    • For digestion: 5–10 drops diluted in a glass of water, before or after meals, to stimulate digestion and reduce bloating.
    • For nausea and motion sickness: 5 drops diluted in water, taken before travel.
    • For joint or muscle pain: 10–15 drops, twice daily, to reduce inflammation and discomfort.
    The ginger tincture is an effective natural alternative to support digestive health and reduce inflammation.
  2. Ginger Compresses: Used externally to soothe muscle and joint pain. Ginger compresses are a natural way to relieve muscle and joint pain, stimulate blood circulation, and reduce inflammation. The essential oils and active compounds in ginger, such as gingerol, are absorbed through the skin and act directly on the affected area. a. Simple Fresh Ginger Compress Ingredients:
    • 1 piece of fresh ginger (5–7 cm)
    • 500 ml of hot water
    • A cotton cloth or cheesecloth
    Instructions:
    1. Grate the ginger and place it in a pot with hot water. Let it infuse for 5–10 minutes.
    2. Soak the cotton cloth or cheesecloth in the ginger-infused water, then wring out excess liquid.
    3. Apply the compress to the painful area (back, joints, muscles). You may cover with a dry towel to retain heat.
    4. Leave the compress on the affected area for 15–20 minutes. Re-soak the cloth in hot ginger water if needed.
    Indications: This compress is ideal for relieving muscle and joint pain, as well as relaxing the back. b. Soothing Ginger and Sea Salt Compress Ingredients:
    • 1 piece of fresh ginger, finely grated
    • 2 tablespoons of sea salt
    • A small cotton cloth or towel
    Instructions:
    1. Mix the grated ginger with the sea salt.
    2. Heat the mixture in a dry pan over low heat for a few minutes, until warm.
    3. Place the mixture in a cloth and tie it to form a small pouch.
    4. Apply the compress to the painful area, especially on joints or muscles, and leave it for 15–20 minutes.
    Indications: The sea salt compress is recommended for reducing inflammation and rheumatic pain, thanks to the combined heat and ginger effect. c. Ginger and Olive Oil Compress for Menstrual Pain Ingredients:
    • 1 piece of fresh ginger, grated
    • 1 tablespoon of olive oil or coconut oil (optional)
    • 500 ml of hot water
    • A soft cloth
    Instructions:
    1. Grate the ginger and add it to the hot water. Let it infuse for 5–10 minutes.
    2. Remove the ginger and add olive oil for an additional soothing effect.
    3. Soak the cloth in the mixture, wring out excess, and apply to the lower abdominal area.
    4. Leave the compress on for 15–20 minutes, covering with a dry towel to retain heat.
    Indications: This compress is beneficial for relieving menstrual cramps and promoting muscle relaxation. d. Ginger and Lavender Essential Oil Compress for Relaxation Ingredients:
    • 1 piece of fresh ginger
    • 3–4 drops of lavender essential oil (optional)
    • 500 ml of hot water
    • A cotton cloth
    Instructions:
    1. Grate the ginger and infuse in hot water for 5–10 minutes.
    2. Add a few drops of lavender essential oil to the ginger water.
    3. Soak the cloth, wring out excess, and apply to the back, neck, or shoulders for a relaxing sensation.
    4. Leave on for 15–20 minutes, adding more hot water if necessary.
    Indications: This compress is excellent for relieving muscle tension and stress, offering the soothing aroma of lavender.
  3. Inhalation: Ginger essential oil is used to open sinus passages and relax the respiratory tract. Ginger Essential Oil Inhalation Method Ingredients & Materials:
    • 3–4 drops of ginger essential oil
    • 1 liter of hot water
    • A large bowl or heatproof vessel
    • A large towel
    Step-by-Step Instructions:
    1. Prepare the hot water: Boil water and pour it into a large bowl or heatproof vessel.
    2. Add the essential oil: Place 3–4 drops of ginger essential oil into the hot water. Stir gently to disperse the oil.
    3. Position yourself for inhalation: Lean over the bowl at a distance of about 20–30 cm, so you can inhale the steam without burning yourself.
    4. Cover your head with the towel: Drape a large towel over your head and the bowl, creating a tent to trap the steam. This concentrates the ginger-infused steam.
    5. Inhale deeply: Breathe in deeply through your nose and exhale through your mouth for 5–10 minutes, taking short breaks if the steam feels too intense.
    6. Conclude the inhalation: After you finish, remain in a comfortable position for a few minutes to acclimate.
    Recommendations & Precautions:
    • Frequency: Perform inhalations 1–2 times per day, but avoid overuse, as essential oils are concentrated and can irritate respiratory mucosa.
    • Water temperature: Ensure the water isn’t too hot to avoid burns.
    • Sensitivities: Individuals with asthma or other respiratory conditions should consult a physician before using ginger oil inhalations, as steam inhalation may worsen symptoms.
    • Allergies: Discontinue immediately if you experience discomfort or irritation during inhalation.
    Benefits of Ginger Oil Inhalation:
    • Relieves nasal congestion and cough: The steam and ginger help open airways and reduce mucus.
    • Antimicrobial effect: Ginger may aid in fighting bacteria and viruses that cause colds.
    • Mental stimulation: The scent of ginger is energizing, helping alleviate mental fatigue.
    Ginger oil inhalations are a natural method to support respiratory health, especially during the cold season or when you need a revitalizing boost.

Cosmetic Uses

In skincare products, ginger is often used for its antioxidant and anti-inflammatory properties:

  • Cellulite-reducing cream: Ginger stimulates circulation, diminishing the appearance of cellulite.

Recipe: Anti-Cellulite Cream with Ginger

The ginger cream for reducing cellulite is an effective natural remedy thanks to its circulation-stimulating, local warming, and anti-inflammatory effects. The active compounds in ginger help improve skin texture, tone, and reduce cellulite when used regularly.

Ingredients:

  • 2 tablespoons of fresh ginger, finely grated
  • ½ cup of coconut oil (or olive oil)
  • ¼ cup of coffee grounds (optional, for an exfoliating and stimulating effect)
  • 10 drops of ginger essential oil
  • 5 drops of cinnamon or black pepper essential oil (optional, to intensify the warming effect)
  • 2 tablespoons of aloe vera gel (optional, for hydration)

Instructions:

  1. Prepare the oil base: In a small bowl, combine the coconut (or olive) oil with the coffee grounds, if you want an exfoliating and circulation-boosting effect. Mix well.
  2. Add the fresh ginger: Grate the fresh ginger and stir into the mixture. Fresh ginger will contribute additional active compounds that stimulate circulation and provide a gentle warming sensation.
  3. Add the essential oils: Add 10 drops of ginger essential oil and, optionally, 5 drops of cinnamon or black pepper essential oil to enhance the thermal effect. Mix thoroughly.
  4. Add the aloe vera gel: If you prefer a more hydrating texture, stir in 2 tablespoons of aloe vera gel. Aloe vera soothes and hydrates the skin.
  5. Mix and store: Transfer the cream to a clean, lidded container and store in a cool place. The cream can be kept for about 1–2 weeks, especially if refrigerated.

How to Use:

  • Application: Apply the cream to areas with cellulite (thighs, abdomen, buttocks) using circular motions, massaging until fully absorbed. You can focus on problem areas with firmer massage movements.
  • Wrap treatment: For a more intense effect, apply the cream, then wrap the area in cling film, leaving it on for 20–30 minutes before rinsing with warm water.
  • Frequency: Use the cream 2–3 times per week for visible results.

Precautions:

  • Allergy test: Before use, patch-test the cream on a small skin area to ensure it does not cause irritation.
  • Warming sensation: Ginger and cinnamon essential oils may produce a warming sensation. If it becomes too intense, rinse the area immediately with cool water.
  • Avoid sun exposure: After applying the cream, avoid direct sun exposure for several hours, as essential oils can sensitize the skin.

This natural anti-cellulite cream helps reduce the orange peel appearance and improve skin texture when used regularly.


Mask for Oily Skin: Its antibacterial properties help control excess sebum.

Mask for Oily Skin with Ginger

This face mask with ginger is suitable for oily skin, helping reduce excess sebum and cleanse pores. Ginger has antibacterial and anti-inflammatory properties, while other ingredients like honey and clay help balance and nourish the skin.

Ingredients:

  • 1 teaspoon of fresh ginger, finely grated (or ½ teaspoon of ginger powder)
  • 1 tablespoon of green or white clay (ideal for oily skin)
  • 1 teaspoon of honey (preferably organic)
  • 1–2 teaspoons of water or green tea (to achieve the desired consistency)

Instructions:

  1. Prepare the clay: In a small bowl, combine the clay with the grated ginger. Stir well to blend the dry ingredients.
  2. Add the honey: Incorporate the honey into the mixture. Honey adds an antibacterial and hydrating effect, helping maintain skin balance.
  3. Adjust consistency: Gradually add water or green tea, one teaspoon at a time, until you obtain a smooth, easy-to-apply paste.
  4. Application: Wash your face with warm water to open pores, then apply the mask to your face, avoiding the eye and mouth areas.
  5. Leave on: Let the mask sit for 10–15 minutes, or until it begins to dry (do not allow it to dry completely to avoid irritation).
  6. Rinse: Remove the mask with warm water, gently massaging for an exfoliating effect. Finish with a cold water rinse to close the pores.

Recommendations:

  • Frequency: Use the mask once a week to help control sebum and cleanse oily skin.
  • Sensitivity test: Patch-test the mask on a small skin area before full application to prevent allergic reactions.

This ginger mask for oily skin helps reduce shine, balance sebum production, and leaves the skin looking clean and refreshed.


Shampoos and Hair Products: Ginger is used to stimulate scalp circulation, promoting hair growth.

3 Ginger Hair Masks: Nourishment, Stimulation, and Shine

Ginger is an excellent ingredient for hair care, thanks to its scalp-stimulating, hair-loss-preventing, and shine-enhancing properties. Here are three recipes for ginger hair masks, for different needs:

  1. Hair Growth Mask with Ginger and Coconut Oil
    • Ingredients:
      • 1 tablespoon of fresh ginger, finely grated
      • 2 tablespoons of coconut oil
    • Instructions:
      1. Mix the grated ginger with coconut oil in a bowl until you obtain a smooth paste.
      2. Apply the mask to the scalp, massaging gently to stimulate circulation.
      3. Spread the mask along the hair length, then wrap your hair in a warm towel.
      4. Leave the mask on for 30–40 minutes, then wash your hair with shampoo.
    • Benefits: Ginger stimulates hair growth and improves circulation, while coconut oil nourishes and hydrates the hair shaft.
  2. Dandruff-Reducing Mask with Ginger and Lemon Juice
    • Ingredients:
      • 1 tablespoon of grated ginger or ½ tablespoon of ginger powder
      • 1 tablespoon of fresh lemon juice
      • 2 tablespoons of plain yogurt
    • Instructions:
      1. Combine the ginger with lemon juice and yogurt until you obtain a creamy paste.
      2. Apply the mixture to the scalp, focusing on areas with dandruff.
      3. Leave on for 20–30 minutes, then rinse thoroughly and shampoo.
    • Benefits: Ginger and lemon have antimicrobial properties that help reduce dandruff, and yogurt hydrates and soothes the scalp.
  3. Shine and Volume Mask with Ginger and Aloe Vera
    • Ingredients:
      • 1 tablespoon of grated ginger or ½ tablespoon of ginger powder
      • 2 tablespoons of aloe vera gel
      • 1 tablespoon of honey (optional)
    • Instructions:
      1. Mix the ginger with aloe vera gel and honey until you obtain a smooth paste.
      2. Apply the mask to the scalp and along the hair length, massaging gently.
      3. Leave on for 20–30 minutes, then rinse thoroughly and shampoo.
    • Benefits: Aloe vera and ginger add shine and volume, and honey provides hydration, leaving hair soft and healthy.

General Recommendations:

  • Frequency: Use these masks once a week for visible results.
  • Sensitivity test: Patch-test on a small skin area before full application to prevent irritation.
  • Rinse thoroughly: Ensure you wash your hair well after use, especially if using fresh ginger, to remove all residues.

These natural ginger masks provide intensive hair treatment, leaving it healthier, shinier, and full of vitality.


Ginger Tea and Other Ginger-Based Beverages

Ginger tea is one of the simplest and most effective ways to consume ginger. It is used to relieve digestive issues, boost immunity, and promote overall relaxation. Examples of ginger-based teas and beverages include:

  • Simple ginger tea: Made by infusing fresh ginger slices in hot water.
  • Ginger and lemon tea: An ideal drink for the cold season, with antiviral and antioxidant properties.

Ginger Smoothie:

Added to smoothies, ginger provides a spicy and energizing note.

Revitalizing Ginger Smoothie

This smoothie is a healthy, refreshing, and nutrient-packed drink, perfect for starting your day or as an energizing snack. Ginger adds a burst of freshness and a spicy kick that supports digestion and immunity.

Ingredients:

  • 1 piece of fresh ginger (about 2 cm), peeled and grated
  • 1 banana, sliced
  • 1 apple, cut into cubes
  • ½ cup of fresh or frozen pineapple, chopped
  • ½ cup of spinach or kale (optional, for extra nutrients)
  • 1 cup of coconut water or orange juice (for liquid)
  • 1 teaspoon of honey or maple syrup (optional, for sweetness)
  • Ice cubes (optional)

Instructions:

  1. Prepare the ingredients: Peel and finely chop the ginger. Wash and cut the other fruits into smaller pieces to facilitate blending.
  2. Combine everything: In a blender, add the ginger, banana, apple, pineapple, spinach or kale, and coconut water or orange juice.
  3. Blend: Process until smooth. For a colder, thicker smoothie, add a few ice cubes and blend again.
  4. Taste and sweeten: If you prefer a sweeter drink, add honey or maple syrup to taste and blend briefly.
  5. Serve immediately: Pour into a glass and enjoy right away to benefit from its full nutritional properties and freshness.

Benefits:

  • Ginger aids digestion, reduces inflammation, and strengthens immunity.
  • Banana provides natural sweetness and is a good source of potassium.
  • Apple and pineapple deliver vitamins and antioxidants.
  • Spinach or kale contribute iron and fiber, making the smoothie more nutritious.

This ginger smoothie is an excellent choice for a healthy breakfast, mid-day snack, or an energy boost before a workout.


Ginger Tinctures

Ginger tinctures are concentrated extracts made by macerating the root in alcohol. They are used to relieve nausea and joint pain:

  • Simple ginger tincture: A few drops diluted in water to support digestion.
  • Ginger and turmeric tincture: A combination with strong anti-inflammatory and antioxidant effects, recommended for pain and inflammation.

Precautions and Adverse Effects

Ginger is generally safe for most people, but there are some precautions:

  • Gastrointestinal Reactions: Excessive consumption may cause heartburn or digestive discomfort in some individuals.
  • Drug Interactions: Ginger can interact with anticoagulant or diabetes medications, so consult a physician before using large amounts.
  • Allergies: Rare but possible. If symptoms such as itching, rash, or difficulty breathing occur, discontinue use immediately.

Conclusion

Ginger is a plant with numerous health benefits, used across diverse fields—from cooking to traditional medicine and cosmetics. Its anti-inflammatory, digestive, and antioxidant properties make ginger a valuable and versatile ingredient. It’s an excellent choice for supporting daily health and can be easily integrated into your care and dietary routines, adding both flavor and vitality.

Mint: The Aromatic Herb and Its Beneficial Properties

Mint, known for its refreshing aroma and taste, is an aromatic plant revered through the centuries. From ancient medicinal traditions to modern kitchens and cosmetic products, mint maintains its popularity and relevance. Rich in nutrients and active compounds, this plant offers a wide range of benefits and uses.

Scientific Name and Origin

Mint belongs to the genus Mentha, in the family Lamiaceae, and includes over 20 species and numerous hybrids. The best-known species are Mentha piperita (peppermint) and Mentha spicata (spearmint). The plant’s name originates from Greek mythology, where Minthe, a nymph transformed into this plant, symbolizes cooling and refreshment.

Description and Taxonomy

Mint is a perennial herbaceous plant that grows in bushy clumps. Its green, oval leaves have a slightly serrated surface and are covered with tiny hairs that trap the essential oils responsible for its distinct aroma. The plant bears small flowers clustered in inflorescences ranging in color from white and pink to pale purple. Mint oil contains menthol, a compound with cooling and soothing effects.

In botanical taxonomy, mint is classified as follows:

  • Kingdom: Plantae
  • Class: Angiospermae
  • Order: Lamiales
  • Family: Lamiaceae
  • Genus: Mentha

Species and Hybrids

The genus Mentha comprises numerous species, each with distinct characteristics and varied uses. Among the most popular are:

  • Mentha piperita (peppermint): A natural hybrid of Mentha aquatica and Mentha spicata, most commonly used for its high concentration of menthol in essential oils.
  • Mentha spicata (spearmint): Has a milder flavor than peppermint, preferred in culinary applications.
  • Mentha × villosa: Another popular hybrid, with a gentle taste, often used in cooking.

Habitat and Propagation

Mint is native to Europe and Asia but has spread worldwide thanks to its adaptability and utility. The plant prefers moist, well-drained soils and thrives in shady or partially shaded locations. A notable characteristic of mint is its aggressive growth; its roots spread quickly and, if uncontrolled, can overrun an entire garden.

Cultivating Mint

Growing mint is relatively simple. The plant can be propagated by cuttings or by dividing clumps and is usually planted in spring. Mint favors fertile, organically rich soils and requires frequent watering to prevent root drying. To control excessive spread, mint is often grown in pots or confined beds.

Cultivating mint in a pot is an excellent way to have fresh aromatic herbs at hand, easy to care for and use in culinary preparations. Mint adapts well to container growth and spreads rapidly, but to maintain a healthy and abundant plant, it’s important to provide the proper conditions.

  1. Choosing the Pot
    • Size: Select a wide, deep pot, as mint spreads quickly and its roots need space. A diameter of 20–30 cm is ideal for a mint plant.
    • Drainage: The pot must have drainage holes to prevent waterlogging, as mint does not tolerate soggy soil.

2. Soil

  • Soil type: Use a well-drained, fertile potting mix. You can opt for a universal potting soil enriched with a bit of compost to provide the nutrients necessary for healthy growth.
  • pH: Mint prefers a slightly acidic to neutral pH (pH 6–7), but it is quite resilient and can adapt to other soil types as well.

3. Planting

Plant mint in early spring, when temperatures are milder.

You can sow mint seeds or use cuttings (young plants), but the fastest method is to use a young plant purchased from a nursery or a root piece from a mature mint plant.

4. Light

Mint needs light but not intense, direct sun, especially on very hot days.

Provide a bright location, preferably in partial shade or near an east- or west-facing window where it receives indirect light.

5. Watering

Mint requires consistently moist but not waterlogged soil. Water the plant regularly, keeping the soil damp while ensuring excess water drains away.

During summer or dry spells, you may need to water more frequently. Generally, watering 2–3 times per week is sufficient.

6. Fertilizer

Use an organic or liquid houseplant fertilizer once a month during the growing season (spring and summer).

Avoid over-fertilizing, as mint is quite hardy and does not require large amounts of nutrients.

7. Pruning and Maintenance

  • Prune mint leaves frequently to encourage lateral growth and keep the plant dense and healthy.
  • Remove any yellow or dried leaves, and pinch out the plant’s tips to prevent flowering, as mint loses some of its intense aroma once it blooms.

8. Controlling Spread

Mint tends to spread and can invade the space of other plants if grown alongside them. For this reason, it’s recommended to cultivate mint in a separate pot.

If mint grows too vigorously, you can divide the plant and replant part of it in another container.

9. Overwintering

Mint is hardy, but if you keep it outdoors in a pot, provide protection during winter or move it to a warmer spot.

Indoors, the plant will need less water during the cold season but should maintain access to natural light.

Cultivating mint in a pot is a wonderful way to have a fresh, aromatic plant on hand that is easy to care for. With appropriate conditions, mint will grow quickly and bring a burst of freshness to your kitchen!


Culinary Uses

In gastronomy, mint is used in both sweet and savory dishes. Its fresh flavor complements desserts such as ice cream, cakes, and cocktails. In salads, it adds an extra layer of aroma and freshness, and in Middle Eastern cuisine it is essential for recipes like tabbouleh and hummus. Some popular preparations featuring mint include:


Mint Sauce for Lamb

A classic English sauce, served alongside roast lamb.

Recipe: Mint Sauce for Lamb

This classic mint sauce is ideal for accompanying roast lamb, imparting a refreshing, slightly tangy flavor. It’s simple to prepare and retains its fresh aroma thanks to fresh mint.

Ingredients:

  • 1 bunch of fresh mint (about 20–30 leaves)
  • 2–3 tablespoons of white wine vinegar or apple cider vinegar
  • 2 tablespoons of sugar (adjustable to taste)
  • ½ cup of hot water
  • Salt, to taste

Instructions:

  1. Prepare the mint: Wash and finely chop the mint leaves.
  2. Dissolve the sugar: In a small bowl, combine the sugar with the hot water and stir until the sugar is completely dissolved.
  3. Add the vinegar: Stir the vinegar into the sugar-water mixture. The vinegar brings a light tang that complements the lamb.
  4. Add the mint: Stir the chopped mint into the sugar-vinegar liquid. For a more intense flavor, let the sauce sit for a few minutes before serving.
  5. Season with salt: Add salt to taste and mix gently.
  6. Serve: The mint sauce can be served at room temperature alongside roast lamb.

Tip: If you prefer a thicker sauce, reduce the amount of water or add more chopped mint to achieve a denser consistency.

This mint sauce adds freshness and balance to roast lamb, offering a refined, slightly tangy note that is perfect for special occasions.

Mint Lemonade

Mint lemonade is a perfect drink for hot days—refreshing and aromatic, bringing an extra burst of freshness thanks to mint.

Ingredients:

  • 4–5 large lemons (enough to yield about 1 cup of fresh lemon juice)
  • 1 liter of cold water
  • ½ cup of sugar (or to taste)
  • 1 bunch of fresh mint (about 10–15 leaves)
  • Ice cubes
  • Lemon slices and mint leaves for garnish (optional)

Instructions:

  1. Make the sugar syrup: In a small saucepan, combine ½ cup of water with the sugar and heat until the sugar is completely dissolved. Allow the syrup to cool.
  2. Juice the lemons: Squeeze the lemons to obtain 1 cup of fresh lemon juice.
  3. Combine the ingredients: In a large pitcher, mix the lemon juice, cooled sugar syrup, and the remaining cold water. Adjust the taste by adding more sugar or lemon juice, as desired.
  4. Add the mint: Gently bruise the mint leaves between your palms or with the back of a spoon to release their aroma, then add them to the lemonade.
  5. Serve: Place ice cubes and lemon slices in glasses, pour in the lemonade, and garnish with fresh mint leaves.

Tip:
For a more intense mint flavor, allow the mint to infuse in the lemonade for 15–30 minutes before serving.

This mint lemonade is naturally cooling and brings a unique, vibrant taste to any summer day!


Mojito:

The Mojito is a classic Cuban cocktail, famous for its blend of mint, lime, and rum, offering a refreshing and slightly tangy drink—perfect for hot days or any special occasion.

Ingredients:

  • 45 ml white rum
  • 1 lime (cut into 4 wedges)
  • 6–8 fresh mint leaves
  • 2 teaspoons of sugar (or to taste)
  • Sparkling mineral water
  • Ice cubes
  • Mint leaves and lime slices, for garnish

Instructions:

  1. Prepare the lime and mint: In a large highball glass, place the lime wedges and sugar.
  2. Muddle: Use a spoon or muddler to crush the lime and sugar together. This releases the lime juice and the essential oils from the peel, mixing with the sugar to create a sweet-tart base.
  3. Add the mint: Add the mint leaves to the glass and gently muddle them (without tearing them completely) to release their aroma, but avoid making them bitter.
  4. Add the rum: Pour the white rum over the lime, sugar, and mint mixture.
  5. Add ice: Fill the glass with ice cubes nearly to the top.
  6. Top with mineral water: Pour sparkling mineral water to fill the glass, according to your preference. Stir gently.
  7. Garnish and serve: Add a few fresh mint leaves and a lime slice to the rim of the glass for decoration.

Tip:
For a sweeter version, adjust the amount of sugar to taste. You can also use simple syrup (sugar syrup) instead of granulated sugar for easier dissolution.

The Mojito is a fresh and revitalizing drink, perfect for enjoying on a sunny day or at a gathering with friends.


Traditional and Cosmetic Uses

Mint has been used throughout history for its medicinal properties. In traditional medicine, it is prized for its soothing effects on the digestive system and its ability to relieve cold symptoms and headaches. Mint oil is used in massages to relax muscles, and steam baths with mint are recommended for sinus cleansing.

In cosmetics, mint appears in shampoos and shower gels due to its invigorating effect. It stimulates blood circulation at the scalp, which may promote healthy hair growth. Additionally, mint has antibacterial properties, making it a common ingredient in toothpastes and mouthwashes.

Mint Teas

Mint Tea is known for its soothing and digestive effects. Its popularity stems both from its health benefits and its refreshing taste. Examples of teas that include mint:

  • Simple mint tea: Made from fresh or dried leaves, it is ideal for calming the stomach and reducing stress.
  • Mint and chamomile tea: A calming blend that combines the soothing properties of both plants, perfect before bedtime.
  • Mint and ginger tea: Used for digestion, the combination of mint and ginger adds energy and helps relieve bloating.

Mint-Based Tinctures

Tinctures of mint are another popular form of using this plant, offering a higher concentration of active compounds and allowing for varied use:

  • Simple mint tincture: Made by macerating mint leaves in alcohol, used for digestive issues and headaches.

The mint tincture is an effective way to preserve mint’s therapeutic properties for an extended period. Used for its calming, digestive, and invigorating effects, mint tincture is easy to prepare at home.

Ingredients:

  • 1 cup fresh mint leaves or ½ cup dried mint leaves
  • 250 ml food-grade alcohol (vodka at least 40% or pure ethyl alcohol)
  • A glass jar with a tight-fitting lid

Instructions:

  1. Prepare the mint: Wash fresh mint leaves and let them dry completely to avoid adding water to the tincture.
  2. Add mint to the jar: Place the mint leaves in the glass jar. If using dried mint, ensure the leaves are crumbled for more efficient oil extraction.
  3. Pour in the alcohol: Cover the leaves completely with alcohol. Seal the jar tightly.
  4. Maceration: Store the jar in a cool, dark place for 2–4 weeks, shaking daily to aid extraction of active compounds.
  5. Strain the tincture: After maceration, strain the liquid through a fine sieve or cheesecloth to remove the leaves. Transfer the tincture to a dark-colored bottle to protect it from light.
  6. Storage: Keep the tincture in a cool, dark place. It can be stored for up to one year due to its alcohol content.

Use:

  • For digestion: 5–10 drops diluted in a glass of water before meals.
  • For headaches: 2–3 drops applied to the temples, massaging gently.
  • For freshening breath: 1–2 drops in a glass of water as a mouthwash.

The mint tincture is a versatile natural remedy, effective for soothing stomach aches, reducing bloating, and providing a cooling, refreshing effect.


2. Mint and Rosemary Tincture: A blend known for its energizing effect and ability to stimulate circulation.

The combined mint and rosemary tincture is a versatile natural remedy, recognized for its stimulating effects on digestion, circulation, and for reducing mental fatigue. Both plants have complementary properties, offering an aromatic, energizing tincture.

Ingredients:

  • ½ cup mint leaves (fresh or dried)
  • ½ cup rosemary leaves (fresh or dried)
  • 250 ml food-grade alcohol (vodka at least 40% or pure ethyl alcohol)
  • A glass jar with a lid

Instructions:

  1. Prepare the herbs: If using fresh plants, wash and dry them completely. You may crumble the leaves to maximize extraction.
  2. Fill the jar: Place the mint and rosemary in the jar, filling it halfway with the herbs.
  3. Add alcohol: Cover the herbs completely with alcohol, ensuring they are fully submerged. Seal the jar tightly.
  4. Maceration period: Store the jar in a cool, dark place for 3–4 weeks, shaking daily to facilitate extraction of essential oils and other beneficial compounds.
  5. Strain the tincture: After maceration, strain the liquid through a fine sieve or cheesecloth to remove the plant material. Transfer the tincture to a dark bottle to protect it from light.
  6. Storage: Keep in a cool, dark place; it remains potent for about one year.

Use:

  • To stimulate digestion: 10–15 drops diluted in water before meals.
  • To improve circulation: 5–10 drops in the morning, diluted in water.
  • For mental fatigue: Inhale a few drops on a handkerchief or use in an aromatherapy diffuser.

This mint and rosemary tincture is a powerful combination for supporting digestive health, combating mental fatigue, and stimulating circulation, providing an effective, natural remedy.


3. Mint and Fennel Tincture: Used to support digestion and reduce intestinal discomfort.

The mint and fennel tincture is an excellent natural remedy for promoting digestion, reducing bloating, and relieving abdominal discomfort. Both mint and fennel are known for their beneficial effects on the digestive system, together forming an effective and aromatic tincture.

Ingredients:

  • ½ cup mint leaves (fresh or dried)
  • ½ cup fennel seeds (lightly crushed)
  • 250 ml food-grade alcohol (vodka at least 40% or pure ethyl alcohol)
  • A glass jar with a lid

Instructions:

  1. Prepare the plants: If using fresh mint, wash and dry thoroughly. Lightly crush the fennel seeds to release their essential oils and aromas.
  2. Fill the jar: Place the mint leaves and fennel seeds in the jar, filling it halfway with the plant mixture.
  3. Add alcohol: Cover completely with alcohol, ensuring all plant material is submerged. Seal tightly.
  4. Maceration period: Store in a cool, dark place for 2–4 weeks, shaking daily to aid extraction.
  5. Strain the tincture: After maceration, strain through a fine sieve or cheesecloth to remove solids. Transfer to a dark bottle to protect from light.
  6. Storage: Keep in a cool, dark place; it remains effective for about one year.

Use:

  • For digestion: 10–15 drops diluted in water before or after meals to support digestion and reduce bloating.
  • For abdominal discomfort: 5–10 drops in warm water as needed to ease cramps and intestinal discomfort.

This mint and fennel tincture is an easy-to-administer remedy suitable for daily use or as needed, supporting a healthy digestive system and reducing bloating naturally.


Health Benefits

Mint is a plant with numerous health benefits. Thanks to menthol and other active compounds, mint helps with:

  • Relieving digestive issues: It soothes the gastric mucosa and is used to combat bloating, nausea, and indigestion.
  • Calming headaches: Applying mint oil to the temples can reduce headache pain due to its cooling effect.
  • Refreshing breath: A common ingredient in mouthwashes and toothpastes because of its antibacterial properties.

Mint remains one of the most versatile plants, used both in culinary applications and for its therapeutic and cosmetic properties. Easily grown at home, it adds a burst of freshness to various recipes and serves as a natural remedy for many common ailments. This aromatic and beneficial plant deserves a place in daily life for its taste and revitalizing effects.


Although mint is prized for its many benefits, it can cause allergic reactions in some individuals. Reactions may range from mild to severe and can occur after internal consumption or external application of mint-based products. Here are common allergic reactions and precautions to consider:

1. Dermatological Reactions
Topical application of mint essential oil or mint-containing products may cause skin reactions, including:

  • Irritation: Redness, burning, or itching of the skin.
  • Rash: Small red spots, similar to dermatitis, appearing shortly after application.
  • Contact dermatitis: A more severe reaction that can include swelling and pain; more common in those with sensitive or allergy-prone skin.

2. Respiratory Reactions
Inhaling menthol from mint may trigger allergic reactions in some:

  • Breathing difficulties: Chest tightness or labored breathing, especially in individuals with asthma or respiratory allergies.
  • Congestion and cough: Mint essential oil inhalation can irritate the airways and provoke coughing.

3. Gastrointestinal Reactions
Consuming mint or menthol-containing products may cause digestive upset in some:

  • Nausea and vomiting: Menthol can irritate the stomach lining, leading to nausea, particularly in large amounts.
  • Heartburn and acid reflux: Mint relaxes the esophageal sphincter, which can promote acid reflux.

4. Systemic Reactions
In rare cases, highly sensitive individuals may experience systemic allergic reactions:

  • Anaphylaxis: A severe, potentially life-threatening reaction, including breathing difficulty, low blood pressure, facial and throat swelling, requiring emergency medical attention.
  • Angioedema: Sudden swelling of the face, tongue, or throat, which can compromise the airways.

Precautions

  • Sensitivity test: Before applying mint oil or mint-based products to the skin, perform a patch test on a small area.
  • Avoid excessive consumption: Large amounts of mint or menthol increase the risk of adverse reactions.
  • Consult a physician: Individuals with allergies, asthma, or respiratory issues should seek medical advice before using mint products.
  • If unpleasant symptoms occur after using or consuming mint, discontinue use and consult a specialist to determine the nature of the reaction.

1. What is mint and what is its scientific name?

Answer:
Mint is a perennial aromatic plant in the family Lamiaceae, prized for its cooling aroma and therapeutic benefits. Its scientific name depends on the species; the most common are:

  • Mentha piperita (peppermint): Frequently used in pharmaceuticals and essential oils for its high menthol content.
  • Mentha spicata (spearmint): Used in cooking for its milder flavor.
    Mint is native to Europe and Asia but is cultivated worldwide due to its adaptability.

2. What are the main therapeutic properties of mint?

Answer:
Mint offers multiple beneficial properties:

  • Calming: Reduces stress and anxiety.
  • Digestive: Relieves indigestion, bloating, and nausea.
  • Antibacterial: Fights bacteria and freshens breath.
  • Cooling: Provides a sense of freshness thanks to menthol.
  • Analgesic: Mint oil can soothe headaches and muscle pain.
    These benefits make it essential in herbal medicine and cosmetic products.

3. How does mint help relieve digestive problems?

Answer:
Mint relaxes the smooth muscles of the digestive tract, helping to:

  • Reduce bloating and abdominal cramps.
  • Alleviate symptoms of irritable bowel syndrome (IBS).
  • Stimulate bile flow, aiding fat digestion.
    Usage:
  • Drink mint tea before or after meals.
  • Apply diluted mint essential oil to the abdomen, massaging gently to ease cramps.

4. How can mint be used for headaches?

Answer:
Mint essential oil has analgesic and cooling properties, effective for headache relief.
How to use:

  • Dilute 1–2 drops of mint essential oil in a carrier oil (coconut or almond oil).
  • Apply to temples and forehead, massaging gently.
    Benefits:
  • Relaxes tense muscles.
  • Improves local blood circulation, reducing pressure.

5. How is mint tea prepared and what are its benefits?

Answer:
Ingredients:

  • 1–2 teaspoons of mint leaves (fresh or dried).
  • 250 ml of hot water.
    Preparation:
  • Pour hot water over the mint leaves.
  • Steep for 5–10 minutes, then strain.
    Benefits:
  • Calms the stomach and reduces bloating.
  • Promotes relaxation and relieves stress.
  • Alleviates cold symptoms such as nasal congestion.

6. How is mint used in natural cosmetics?

Answer:
Mint is popular for its invigorating and antibacterial effects:

  • For hair: Stimulates scalp circulation, promoting hair growth.
    • Recipe: Add 2–3 drops of mint essential oil to regular shampoo.
  • For skin: Reduces redness and acne due to its antibacterial properties.
    • Recipe: Mix 1 teaspoon of mint oil with green clay and water for a facial mask.

7. How can mint tincture be used for health?

Answer:
Mint tincture supports digestion and soothes pain.
Ingredients:

  • 50 g mint leaves.
  • 250 ml food-grade alcohol (vodka).
    Preparation:
  • Place leaves in a jar and add alcohol.
  • Macerate for 2–4 weeks, shaking daily.
  • Strain and store in an opaque bottle.
    Use:
  • 10–15 drops diluted in water after meals for digestion.
  • Topical application to relieve muscle pain.

8. How does mint help freshen breath?

Answer:
Mint contains menthol, which combats bacteria causing bad breath.
Ways to use:

  • Mouthwash: Add a few drops of mint essential oil to a glass of water.
  • Chewing gum: Chew gum with mint extract for immediate effect.
    Benefits:
  • Provides long-lasting freshness.
  • Protects gums with its antibacterial properties.

9. How can mint be used in cooking?

Answer:
Mint adds freshness and flavor to various dishes:

  • Salads: Fresh mint leaves complement fruit or vegetable salads.
  • Beverages: Lemonade or cocktails like Mojito feature mint for a refreshing taste.
  • Desserts: Used to garnish cakes or ice creams.
    Tip: Add fresh leaves at the end to preserve their intense aroma.

10. What are possible side effects of mint?

Answer:
Although mint is generally safe, excessive use can cause:

Consult a physician before using during pregnancy or breastfeeding.

Heartburn: Relaxation of the esophageal sphincter can worsen acid reflux.

Allergic reactions: Itching or rashes, especially with undiluted essential oil.

Respiratory irritation: Excessive inhalation of menthol may cause breathing difficulties.
Precautions:

Perform a sensitivity test before topical application of essential oil.

Ginseng – Detailed Description, Properties, Benefits, and Uses

Ginseng is a perennial plant native to the eastern regions of Asia and North America, known for thousands of years for its medicinal properties and health benefits. It is especially valued in traditional Chinese and Korean medicine, as well as in other cultures, for its revitalising and tonic effects. The plant is used to boost energy, improve mental and physical performance, and increase the body’s resistance.

Scientific and Common Names

  • Scientific name: Panax ginseng (Asian ginseng) and Panax quinquefolius (American ginseng)
  • Common names: Ginseng, “root of life,” “red ginseng” (for Asian ginseng)

Ginseng grows in the cool, damp forests of East Asia and North America, and its root is the most commonly used part due to its high content of active substances, including ginsenosides and panaxosides.

ProprieProperties of Ginseng

Ginseng is renowned for its numerous beneficial properties, being considered an adaptogen, that is, a plant that helps the body adapt to physical and mental stress. Among its most important properties are:

  • Stimulant properties: Ginseng is known for its energising effects. It helps combat fatigue and improves physical and mental performance.
  • Antioxidant properties: Ginseng contains antioxidant compounds that help protect the body from oxidative stress and prevent premature ageing.
  • Immune-stimulating properties: Ginseng supports the immune system and helps the body fight infections, exhibiting antiviral and antibacterial effects.
  • Anti-inflammatory properties: Ginseng reduces inflammation, with beneficial effects in treatments for arthritis and other inflammatory conditions.
  • Adaptogenic properties: Ginseng helps the body cope with stress and regulate its response to external factors, whether physical, psychological, or emotional.

Benefits of Ginseng

Thanks to its active compounds, ginseng offers a wide range of health benefits. Here are some of the most important:

  • Improved energy and vitality: Ginseng is excellent for combating chronic fatigue and stimulating energy levels, often used by people who feel exhausted due to stress or overwork.
  • Enhanced cognitive function: Ginseng is used to improve memory, concentration, and mental performance. It is said to help counteract age-related memory loss and may be beneficial in preventing dementia.
  • Immune support: Due to its immune-stimulating properties, ginseng helps strengthen the immune system and prevent colds and other infections.
  • Stress and anxiety reduction: Ginseng helps lower cortisol (the “stress hormone”) in the body, having a calming effect on the nervous system.
  • Support for sexual health: Ginseng is used as an aphrodisiac and is often recommended to improve erectile function and libido, traditionally employed to treat erectile dysfunction.

Ginseng Teas – Benefits and Examples

Ginseng tea is a popular way to enjoy the plant’s effects. It can be consumed for revitalisation, improved concentration, and immune support.

Ginseng Tea for Energy

Ingredients:

  • 1 teaspoon of ginseng root (either fresh or dried)
  • 250 ml of hot water

Preparation Method:

  1. Place the ginseng root in a cup and pour over the hot water.
  2. Let it infuse for 5–10 minutes, then strain.

Benefits: This tea is ideal for boosting energy levels and combating fatigue. It can be enjoyed in the morning or afternoon for an added dose of vitality.

2. Ginseng Tea with Lemon for Immunity

Ingrediente:Ingredients:

  • 1 teaspoon of ginseng root
  • Juice of half a lemon
  • 250 ml of hot water
  • 1 teaspoon of honey (optional)

Preparation Method:

  1. Infuse the ginseng in hot water for 5–10 minutes.
  2. Add lemon juice and honey for a pleasant taste and additional immune-boosting benefits.

Benefits: The lemon provides vitamin C, which helps strengthen the immune system, while ginseng supports combating infections and increases the body’s overall resilience.


Ginseng Tincture – How to Prepare and Uses

A tincture of ginseng is a concentrated way to benefit from the plant’s properties, offering rapid and effective effects.

Ingredients:

  • 50 g dried ginseng root
  • 250 ml of 40% alcohol (vodka or food-grade ethanol)

Preparation Method:

  1. Cut the ginseng root into small pieces and place them in a glass jar.
  2. Add the alcohol and seal the jar tightly.
  3. Let it macerate for 2–3 weeks in a cool, dark place, shaking the jar daily.
  4. Strain the tincture and store the liquid in a dark glass bottle.

Usage:
The recommended dose is 15–20 drops diluted in a glass of water, 2–3 times a day, to boost energy and support the immune system.


Ginseng in Natural Cosmetics

Ginseng is a valuable ingredient in natural cosmetics due to its antioxidant and revitalising effects. It is used in products aimed at improving skin elasticity, fighting signs of ageing, and revitalising the complexion.

Anti-Ageing Cream with Ginseng

Ingredients:

  • 2 tablespoons of ginseng extract
  • 2 tablespoons of shea butter or jojoba oil
  • 10 drops of lavender essential oil (optional)

Preparation Method:

  1. Warm the jojoba oil or shea butter in a small saucepan over low heat until melted.
  2. Add the ginseng extract and stir well.
  3. Allow the mixture to cool, then add the essential oil if desired.
  4. Apply the cream to the face and neck, massaging gently.

Benefits: This cream helps to hydrate and tone the skin, reducing the appearance of wrinkles and signs of ageing.

2. Ginseng Face Mask for Revitalisation

Ingredients:

  • 1 tablespoon of ginseng powder
  • 1 tablespoon of honey
  • 1 teaspoon of milk

Preparation Method:

  1. Mix the ginseng powder with honey and milk until you obtain a smooth paste.
  2. Apply to a clean face and leave on for 15–20 minutes.
  3. Rinse off with warm water.

Benefits: This mask helps revitalise tired skin, providing an energy boost and hydration.


Ginseng in Cooking and Juices

Ginseng can also be used in the kitchen to add a mildly spicy, energising note to various dishes. Fresh ginseng root can be added to juices or smoothies to increase energy levels and deliver additional health benefits.

Example of Energising Ginseng Juice:

  • 1 small fresh ginseng root
  • 1 apple
  • 1 carrot
  • Juice of one lemon
  • 1 teaspoon of honey (optional)

How to Prepare:

  1. Peel the ginseng root and cut it into small pieces.
  2. Add the ginseng, apple, carrot, and lemon juice to a blender.
  3. Blend until smooth and add honey for extra sweetness, if desired.

Benefits: This juice is packed with vitamins and antioxidants, offering an energy boost and supporting the immune system.


Chicken Soup with Ginseng

Ingredients:

  • 1 fresh ginseng root or 1 teaspoon of ginseng powder
  • 1 chicken breast
  • 2 cups of water
  • 1 carrot, diced
  • 1 stalk of celery, diced
  • Salt and pepper to taste

Instructions:

  1. Boil the chicken breast in a pot of water until half-cooked.
  2. Add the ginseng, carrot, and celery, and simmer for another 20–25 minutes.
  3. Season with salt and pepper to taste, and serve hot.

Salad with Ginseng and Fresh Vegetables

Ingredients:

  • 1 fresh ginseng root, thinly sliced
  • 1 cucumber, sliced into rounds
  • 1 carrot, grated
  • Salad leaves
  • 1 teaspoon of olive oil
  • Juice of one lemon
  • Salt and pepper to taste

Instructions:

  1. In a large bowl, combine the ginseng, cucumber, carrot, and salad leaves.
  2. Drizzle with olive oil and lemon juice.
  3. Season with salt and pepper and serve immediately for freshness.

Revitalising Ginseng and Fruit Smoothie

Ingredients:

  • 1 banana
  • 1 apple, diced
  • 1 teaspoon of ginseng powder
  • 1 cup of almond milk or other plant-based milk
  • 1 tablespoon of honey or maple syrup (optional)

Instructions:

  • Pour into a glass and enjoy for an energising start to your day.
  • Place the banana, apple, ginseng powder, and almond milk in a blender.
  • Blend until smooth.
  • Add honey or maple syrup to sweeten, if desired, and blend briefly.

Conclusion

Ginseng is an extremely versatile plant, with remarkable benefits for both physical and mental health. From boosting energy and enhancing cognitive performance to use in natural cosmetics and the kitchen, ginseng remains an invaluable ally in your daily routine. Whether you choose to consume it as tea, tincture, or use it in personal care products, ginseng will add a dose of vitality and wellness to your life.


1. What is the scientific name of ginseng and where does it grow?

Answer:
Ginseng is known by the scientific names Panax ginseng (Asian ginseng) and Panax quinquefolius (American ginseng). It grows in the cool, damp forests of East Asia (China, Korea, Japan) and the temperate regions of North America. The most-used part of the plant is the root, prized for its high concentration of active compounds such as ginsenosides.


2. What are ginsenosides and what role do they play in ginseng’s benefits?

Answer:
Ginsenosides are the active adaptogenic compounds specific to ginseng, with anti-inflammatory and antioxidant properties. These substances:

  • Help the body better adapt to physical and psychological stress.
  • Combat free radicals, reducing oxidative stress.
  • Support cognitive functions, enhancing memory and concentration.
    Ginsenosides are responsible for many of ginseng’s therapeutic benefits, including immune support and increased energy.

3. What are the main properties of ginseng?

Answer:
Ginseng boasts the following remarkable properties:

  • Energising: Fights fatigue and increases energy levels.
  • Antioxidant: Protects cells from damage caused by free radicals.
  • Immune-stimulating: Strengthens the immune system.
  • Anti-inflammatory: Reduces inflammation in conditions such as arthritis.
  • Adaptogen: Helps the body adapt to external stressors.
    These properties make ginseng a popular remedy for overall health.

4. How does ginseng contribute to improved cognitive function?

Answer:
Ginseng stimulates brain activity by improving blood circulation and increasing levels of neurotransmitters. It helps with:

  • Enhancing memory and concentration.
  • Combating age-related memory decline.
  • Preventing cognitive decline and neurodegenerative diseases such as dementia.
    Regular consumption of ginseng, in the form of tea or supplements, is associated with enhanced mental performance.

5. How does ginseng help reduce stress and anxiety?

Answer:
As an adaptogen, ginseng lowers cortisol, the “stress hormone,” and stabilises emotional state. It:

  • Soothes the nervous system.
  • Supports the body during periods of intense mental or physical exertion.
  • Improves mood and reduces anxiety symptoms.
    Usage: Ginseng tea or tincture can be consumed daily to help manage stress.

6. How does ginseng support sexual health?

Answer:
Ginseng is renowned as a natural aphrodisiac, used for:

  • Improving erectile function by increasing blood flow to reproductive organs.
  • Stimulating libido in both men and women.
  • Balancing hormones by supporting the production of sex hormones.
    It is often recommended for treating erectile dysfunction and low libido.

7. How is ginseng tincture prepared and used?

Answer:
Ingredients:

  • 50 g dried ginseng root
  • 250 ml of 40% alcohol (vodka)

Preparation:

  1. Place the ginseng root in a jar and add the alcohol.
  2. Macerate for 2–3 weeks, shaking daily.
  3. Strain and store the tincture in an opaque bottle.

Use:
The recommended dose is 15–20 drops diluted in water, 2–3 times a day, for energy and immune support.


8. What benefits does ginseng tea offer and how is it prepared?

Answer:
Ginseng tea is ideal for stimulating energy and enhancing immunity.
Preparation:

  • Add 1 teaspoon of ginseng root to 250 ml hot water.
  • Infuse for 5–10 minutes, then strain.
    Benefits:
  • Combats fatigue.
  • Boosts immunity.
  • Reduces stress.
    This tea can be enhanced with honey and lemon for a pleasant flavour.

9. How can ginseng be used in natural cosmetics?

Answer:
Ginseng is valued for its antioxidant and anti-ageing properties.
Natural products with ginseng:

  • Anti-wrinkle cream: Ginseng stimulates collagen production, reducing fine lines.
  • Revitalising mask: Hydrates and revitalises tired skin.
    • Mask recipe: Mix 1 tablespoon of ginseng powder with honey and milk. Apply to the face for 15 minutes, then rinse with warm water.

10. What are the contraindications for ginseng?

Answer:
Although beneficial, ginseng should be used with caution in certain situations:

Pregnant or breastfeeding women: Consultation with a doctor is recommended.
Ginseng should be consumed in recommended doses to avoid adverse effects such as insomnia or headaches.

Drug interactions: May interact with anticoagulants and diabetes medications.

High blood pressure: Excessive consumption can raise blood pressure.

St John’s Wort – Scientific Name, Properties, Benefits, and Uses

St John’s Wort (Hypericum perforatum) is a perennial herbaceous plant renowned in traditional and folk medicine for its remarkable healing properties. Throughout history, St John’s Wort has been used in natural remedies due to its calming, wound-healing, and revitalising effects. In this article, we will explore in detail the benefits and uses of this wonderful plant, from consumption as teas and tinctures to applications in natural cosmetics and sitz baths.

DScientific and Common Names of St John’s Wort

  • Scientific name: Hypericum perforatum
  • Common names: St John’s Wort, herb of St John, tătănească, sânziene, etc.

St John’s Wort is an herbaceous plant with bright yellow flowers and small, deep-green leaves. It is found in meadows, woodlands, and grasslands and is particularly valued for its rich content of active substances such as hypericin and flavonoids, making it an excellent remedy for various ailments.

Properties of St John’s Wort
St John’s Wort is celebrated for its multiple therapeutic properties, suitable for both internal and external use. The most important include:

  • Anti-inflammatory properties: St John’s Wort helps reduce inflammation, being effective in treating inflammatory skin conditions and nervous system disorders.
  • Calming and antidepressant properties: Known for its sedative effects, it is used to relieve stress, anxiety, and mild depression. Hypericin, the main active ingredient, is often employed to combat depressive symptoms.
  • Antibacterial and antiviral properties: It assists in fighting bacterial and viral infections and is effective for treating wounds and mild skin infections.
  • Wound-healing properties: St John’s Wort is an excellent remedy for healing minor wounds, burns, and other skin lesions, thanks to its regenerative effects.
  • Antioxidant properties: The plant contains flavonoids and other antioxidant substances that protect the body from oxidative stress, contributing to the prevention of premature ageing.

Benefits of St John’s Wort
St John’s Wort is used for a variety of conditions due to its therapeutic benefits:

  • Relief of depression and anxiety: Often used in natural treatments for mild depression and anxiety, it may stimulate the production of serotonin, a neurotransmitter that regulates mood.
  • Treatment for insomnia: Thanks to its calming effect, St John’s Wort tea is an effective remedy against insomnia and sleep disturbances.
  • Alleviation of stomach aches and slow digestion: It can help reduce abdominal discomfort, bloating, and indigestion by stimulating gastric secretions and soothing stomach cramps.
  • Improvement of skin health: When applied topically, it aids in treating wounds, burns, and skin irritations. It is a natural, effective treatment for eczema and dermatitis.
  • Immune system support: Teas and tinctures of St John’s Wort can help strengthen the immune system, thanks to their antioxidant and antiviral effects.

St John’s Wort Teas – Benefits and Uses
St John’s Wort tea is one of the most popular forms of administering the plant, serving as a natural remedy for various ailments. Examples of teas and their benefits include:

1. St John’s Wort Tea for Depression and Anxiety

Ingredients:

  • 1–2 tablespoons of dried St John’s Wort flowers
  • 250 ml of water

Preparation Method:

  1. Bring the water to a boil and add the dried flowers of St John’s Wort.
  2. Let the mixture infuse for 10–15 minutes.
  3. Strain and drink the warm tea.

BeneBenefits: This tea is effective for reducing mild depressive symptoms and alleviating anxiety. It can be consumed daily to support mental health.


2. St John’s Wort Tea for Insomnia

Ingredients:

  • 1 tablespoon of St John’s Wort flowers
  • 250 ml of hot water
  • 1 teaspoon of honey (optional)

Preparation Method:

  1. Place the St John’s Wort flowers in a cup and pour the hot water over them.
  2. Let the tea infuse for 10 minutes, then strain.
  3. Add honey if you prefer a sweeter taste.

Benefits: St John’s Wort is a natural remedy for insomnia, helping you relax and enjoy restful sleep. You can drink this tea 30 minutes before bedtime.


3. St John’s Wort Tea for Digestion

Ingredients:

  • 1 teaspoon of St John’s Wort flowers
  • 250 ml of hot water

Preparation Method:

  1. Place the St John’s Wort flowers in the hot water.
  2. Let the tea infuse for 10 minutes, then strain.

Benefits: This tea helps relieve abdominal discomfort, bloating, and slow digestion. It can be consumed after main meals.


St John’s Wort in Natural Cosmetics

St John’s Wort is a popular ingredient in natural cosmetics thanks to its soothing and regenerative effects on the skin. Here are some common uses:

  1. Regenerating Cream with St John’s Wort
    St John’s Wort is an excellent ingredient for skincare products, aiding in cellular regeneration and reducing inflammation. A cream containing St John’s Wort can be used to treat burns, irritations, and minor wounds.
  2. St John’s Wort Massage Oil
    St John’s Wort oil is used to relieve tired muscles and ease joint pain. It can be applied topically to painful areas to reduce inflammation and accelerate recovery.

St John’s Wort oil is a popular remedy in natural medicine due to its regenerative, anti-inflammatory, and antibacterial properties. It is made by infusing the flowers in a carrier oil, usually olive oil, sunflower oil, or sweet almond oil. Here’s how to prepare it at home:


How to Make St John’s Wort Oil

Required Ingredients:

  • Dried St John’s Wort flowers (approximately 100 g)
  • Carrier oil (olive oil, sweet almond oil, or coconut oil) – approximately 200–250 ml
  • A glass jar with an airtight lid, preferably opaque (to protect the oil from direct light)

Cold Infusion Method:

  1. Prepare the flowers:
    • Gather fresh or dried St John’s Wort flowers. If using dried flowers, ensure they are clean and free from moisture or impurities.
    • Break or chop the flowers finely to facilitate the release of their active compounds into the oil.
  2. Fill the jar with flowers:
    • Place the flowers in a clean glass jar, filling it about halfway.
    • You may use fresh or dried flowers; fresh flowers will release active compounds more quickly.
  3. Add the carrier oil:
    • Pour your chosen carrier oil (olive, sweet almond, or sunflower) over the flowers.
    • Ensure the flowers are completely covered by the oil to prevent oxidation or mould. Add more oil if necessary.
  4. Seal the jar:
    • Close the jar tightly with its lid. A clean, dry jar is essential to prevent contamination.
  5. Infusion (maceration):
    • Place the jar in a warm, dark spot, avoiding direct sunlight. Let the flowers macerate in the oil for 2–4 weeks.
    • Shake the jar daily to mix the flowers with the oil and encourage the extraction of active compounds.
  6. Strain the oil:
    • After the infusion period, open the jar and strain the oil through a fine sieve or cheesecloth to remove flower material.
    • Transfer the resulting oil into a dark glass bottle to protect it from light, which can degrade its potency.
  7. Storage:
    • Store the St John’s Wort oil in a cool, dark place, preferably in an opaque bottle, to preserve its regenerative and anti-inflammatory properties.

Warm Infusion Method:

This quicker method uses gentle heat to accelerate extraction:

  1. Follow steps 1–3 as above to prepare flowers and oil in a jar.
  2. Apply gentle heat:
    • Place the sealed jar in a saucepan of hot water (a bain-marie) maintained at approximately 50–60 °C.
    • Leave the jar in the hot water for 2–3 hours.
  3. Allow the jar to cool completely, then strain and store the oil as described in the cold infusion method.

Uses for St John’s Wort Oil:

  • Skin care: Excellent for soothing irritated skin, promoting wound healing, treating minor burns, and relieving skin inflammations such as eczema or dermatitis. Apply to the affected area and massage gently.
  • Muscle and joint pain: Massage the oil into sore muscles and joints to reduce inflammation and accelerate recovery.
  • Natural cosmetics: Commonly added to anti-ageing creams to support skin regeneration and combat wrinkles. It also hydrates dry, dehydrated skin and helps prevent premature ageing.
  • Massage oil: Ideal for full-body massage, especially when blended with other essential oils, thanks to its soothing and relaxing effects.

Precautions:

  • Perform a patch test before widespread application: apply a small amount to the inner forearm and wait for 24 hours. Discontinue use if itching or redness occurs.
  • Pregnant or breastfeeding women should consult a healthcare professional before use, as St John’s Wort can interact with certain medications.

Conclusion

St John’s Wort oil is a potent natural remedy with a wide range of applications for skin and body care. Preparing it at home is a simple and effective way to obtain a pure, natural product that supports healing, soothes pain, and enhances natural cosmetics. A valuable addition to any household remedy kit.

St John’s Wort Sitz Baths

St John’s Wort is also used for sitz baths, especially to soothe inflammation and irritation of the intimate area. St John’s Wort tea or tincture can be added to a basin of warm water to reduce discomfort caused by conditions such as haemorrhoids, mild vaginal infections, or irritations.

How to prepare a St John’s Wort sitz bath:

  • Sit in the basin for 15–20 minutes to enjoy its soothing and antibacterial effects.
  • Brew a concentrated St John’s Wort tea (2–3 tablespoons of flowers per 1 litre of water).
  • Pour the tea into a basin of warm water.

Conclusion

St John’s Wort is a remarkable plant with multiple uses in medicine, natural cosmetics, and personal care. With a wide range of benefits—from calming the nervous system to caring for the skin and hair—it represents an important resource for treating minor ailments and maintaining overall well-being. Whether you use it as tea, tincture, oil, or in cosmetics, St John’s Wort remains a valuable ally in natural body care.


1. What is the scientific name of St John’s Wort and where is it found?

Answer:
The scientific name of St John’s Wort is Hypericum perforatum, a perennial herb in the family Hypericaceae. St John’s Wort grows naturally in temperate regions, found in meadows, fields, roadsides, and woodlands across Europe, Asia, and North America. It is popularly known as “St John’s herb” or “tătăneasca.”


2. What are the main therapeutic properties of St John’s Wort?

Answer:
St John’s Wort is renowned for its numerous therapeutic properties:

  • Anti-inflammatory: Reduces inflammation of the skin and nervous system.
  • Calming and antidepressant: Hypericin, the main active compound, helps alleviate depression and anxiety.
  • Antibacterial and antiviral: Aids in treating mild skin infections and wounds.
  • Wound-healing: Promotes the regeneration of tissues and healing of minor burns.
  • Antioxidant: Protects cells against free radicals.

3. How does St John’s Wort help alleviate depression and anxiety?

Answer:
Hypericin and hyperforin, active compounds in St John’s Wort, stimulate the production of serotonin, dopamine, and norepinephrine—neurotransmitters involved in mood regulation.
Administration:

  • Tea: Drink 1–2 cups per day.
  • Tincture: 20–30 drops diluted in water, 2–3 times daily.

St John’s Wort is effective for mild depression and anxiety, but should be used with caution as it can interact with certain medications.


4. How can St John’s Wort improve sleep?

Answer:
Due to its calming effect on the nervous system, St John’s Wort helps promote relaxation and induce sleep. It is useful for mild insomnia.
Usage:
Prepare a tea from 1 teaspoon of flowers and 250 ml boiling water. Drink 30 minutes before bedtime.
It reduces stress and fosters restful sleep.


5. What digestive benefits does St John’s Wort offer?

Answer:
St John’s Wort stimulates gastric secretions and helps soothe stomach cramps, reducing abdominal discomfort, bloating, and slow digestion.
Usage:
Drink St John’s Wort tea after main meals to improve digestion. It also aids in relieving irritable bowel syndrome symptoms.


6. How is St John’s Wort used for skin health?

Answer:
St John’s Wort has wound-healing and antibacterial properties, making it ideal for treating minor wounds, burns, and skin irritations.
Usage:

  • Oil: Apply topically to the affected area.
  • Cream: Use for eczema, dermatitis, and other skin conditions.

These products promote tissue regeneration and reduce inflammation.


7. How is St John’s Wort tincture prepared and used?

Answer:
Ingredients:

  • 50 g dried St John’s Wort flowers
  • 250 ml 40% alcohol

Preparation:
Place flowers in a jar, cover with alcohol, and macerate for 2–3 weeks, shaking daily. Strain and store in a dark bottle.
Usage:

  • For anxiety: 20–30 drops, 2–3 times daily.
  • For immune support: 10–15 drops daily.

8. How is St John’s Wort oil prepared and used?

Answer:
Ingredients:

  • 100 g St John’s Wort flowers
  • 250 ml olive oil

Preparation:
Place flowers in a jar, cover with oil, and infuse for 2–4 weeks in a warm spot, shaking daily. Strain and store in an opaque container.
Usage:
Apply to the skin for regeneration or use for massage to relieve muscle pain. Ideal for hydrating dry skin and reducing inflammation.


9. What are the contraindications of St John’s Wort?

Answer:
Although beneficial, St John’s Wort may cause adverse effects:

  • Drug interactions: Can reduce the efficacy of oral contraceptives, anticoagulants, and other medications.
  • Photosensitivity: Increases skin’s sensitivity to UV rays.
  • Pregnancy: Use only under medical supervision.

It is essential to follow recommended dosages and avoid excessive use.


10. How is a St John’s Wort sitz bath prepared?

Answer:
A St John’s Wort sitz bath is effective for soothing inflammation and irritation of the intimate area.
Preparation method:

  1. Brew a concentrated tea using 2–3 tablespoons of St John’s Wort flowers in 1 litre of water.
  2. Pour the tea into a basin of warm water.
  3. Sit in the basin for 15–20 minutes.
    It is useful for treating haemorrhoids, mild vaginal infections, and calming irritations.

What is the scientific name of St John’s Wort and what other common names does it have?

Answer:
The scientific name of St John’s Wort is Hypericum perforatum. In folk usage, the plant is also known as “St John’s herb”, “tătăneasca”, “sânziene”, or “pojărnicuță”. It is a perennial herb with bright yellow flowers and perforated leaves, commonly found in meadows, fields, and roadsides across Europe, Asia, and North America.


What are the main therapeutic properties of St John’s Wort?

Answer:
St John’s Wort is renowned for its multiple therapeutic properties:

  • Anti-inflammatory: Alleviates inflammation of the skin and nervous system.
  • Calming and antidepressant: Hypericin, the principal active compound, helps reduce depression and anxiety.
  • Antibacterial and antiviral: Aids in treating mild skin infections and wounds.
  • Wound-healing: Promotes healing of minor burns and skin lesions.
  • Antioxidant: Protects the body against damage from free radicals.

How does St John’s Wort help treat depression and anxiety?

Answer:
Hypericin and hyperforin, the active compounds in St John’s Wort, regulate the levels of neurotransmitters such as serotonin and dopamine, which are responsible for mood.
Administration:

  • Tea: Consume 1–2 cups per day.
  • Tincture: 20–30 drops diluted in water, 2–3 times per day.
    It is important to note that St John’s Wort can interact with certain medications, so consulting a specialist is essential.

What benefits does St John’s Wort tea offer for general health?

Answer:
St John’s Wort tea is effective in:

  • Alleviating mild depression and anxiety.
  • Combatting insomnia: Drinking before bedtime induces relaxation.
  • Supporting digestion: Reducing bloating and abdominal discomfort.
    It is prepared by infusing 1 teaspoon of dried flowers in 250 ml of hot water for 10–15 minutes.

How does St John’s Wort contribute to skin health?

Answer:
St John’s Wort is an effective remedy for:

  • Healing minor wounds and burns.
  • Treating eczema and dermatitis.
  • Reducing inflammation and redness.
    Use:
  • St John’s Wort oil: Apply topically to affected areas.
  • St John’s Wort cream: Use for eczemas, dermatitis, or other skin conditions.
    These products promote tissue regeneration and decrease inflammation.

How is St John’s Wort tincture prepared and what is it useful for?

Answer:
Ingredients:

  • 50 g dried St John’s Wort flowers
  • 250 ml food-grade 40% alcohol

Preparation:

  1. Place the flowers in a glass jar and cover with alcohol.
  2. Macerate for 2–3 weeks, shaking daily.
  3. Strain and store the liquid in a dark bottle.

Use:

  • For anxiety: 20–30 drops, 2–3 times per day.
  • For immune support: 10–15 drops daily.

How is St John’s Wort oil prepared and what benefits does it have?

Answer:
Ingredients:

  • 100 g St John’s Wort flowers
  • 250 ml olive oil

Preparation:

  1. Place the flowers in a jar and cover with oil.
  2. Infuse for 2–4 weeks in a warm spot, shaking daily.
  3. Strain the oil and store it in an opaque container.

Use:
Apply to the skin for hydration or use as a massage oil for muscle pain. It is effective for sunburn and soothing irritations.


What are the contraindications of St John’s Wort?

Answer:
Although beneficial, St John’s Wort may have adverse effects:

  • Drug interactions: Can reduce the efficacy of oral contraceptives, anticoagulants, and other medications.
  • Photosensitivity: Increases the skin’s sensitivity to UV rays.
  • Pregnancy and breastfeeding: Use only under medical supervision.
    It is essential to follow recommended dosages and consult a specialist before use.

How are St John’s Wort sitz baths used?

Answer:
St John’s Wort sitz baths are useful for soothing irritations and inflammation of the intimate area.
Preparation:

  1. Boil 2–3 tablespoons of flowers in 1 litre of water.
  2. Pour the tea into a basin of warm water.
  3. Sit in the bath for 15–20 minutes.
    It is recommended for treating haemorrhoids, vaginal infections, and relieving local discomfort.

How does St John’s Wort help combat insomnia?

Answer:
St John’s Wort has calming effects that relax the nervous system and improve sleep quality.
Usage:

Alternatively, use the tincture: 20–25 drops diluted in water.
These methods are natural and safe for alleviating insomnia and agitation.

Drink a cup of St John’s Wort tea 30 minutes before bedtime.

Aloe Vera – Scientific Name, Properties, Uses, and Benefits

Aloe Vera is a succulent plant that has been used for thousands of years due to its healing and health-promoting properties. It is renowned for the gel found in its thick, fleshy leaves. Aloe Vera is often hailed as a “miracle of nature” because of its versatility, being employed in traditional medicine as well as in cosmetic and skincare products.

Scientific Name and Origin of the Plant

  • Scientific name: Aloe barbadensis Miller
  • Family: Asphodelaceae
  • Origin: Aloe Vera is native to the northern regions of Africa, but is now cultivated in many warm and subtropical areas worldwide, such as South America, India, and parts of Europe.

The plant is known by various popular names, including “medicinal lily” or “miracle plant,” owing to its wide range of natural treatment applications.

Properties of Aloe Vera

Aloe Vera is extremely valuable due to the active compounds it contains—vitamins, minerals, amino acids, and enzymes—all contributing to its health benefits. Key properties include:

  • Anti-inflammatory properties: Aloe Vera is famous for its ability to reduce inflammation, making it ideal for treating burns, skin irritations, and other inflammatory conditions. Its gel helps soothe the skin and diminish redness and irritation.
  • Antioxidant properties: Aloe Vera contains compounds that neutralise free radicals, thereby protecting cells from the harmful effects of oxidative stress, which can lead to premature skin ageing.
  • Antibacterial and antimicrobial properties: The Aloe Vera gel can combat bacteria, viruses, and fungi, making it effective in treating and preventing minor skin infections.
  • Wound-healing properties: Aloe Vera accelerates the healing of wounds and burns (both first- and second-degree). It can stimulate collagen production and reduce tissue recovery time.
  • Moisturising properties: Aloe Vera gel is an excellent natural hydrator, helping to maintain skin moisture and alleviate dry, dehydrated skin—hence its popularity in skincare formulations.

Aloe Vera is an incredibly versatile plant with numerous applications in health, beauty, and personal care. Here are some of the most common ways to use Aloe Vera:

  1. Treatment for sunburn and skin irritations

Aloe Vera is an excellent remedy for soothing sunburn and other skin irritations. Its cooling gel helps reduce inflammation and support skin cell regeneration.

How to use: Apply fresh Aloe Vera gel to sunburned or irritated skin. Allow it to fully absorb for a refreshing, hydrating sensation.

2. Treatment for Acne and Blackheads

Aloe Vera has antibacterial and anti-inflammatory properties, making it effective for treating mild acne.

How to use: Apply Aloe Vera gel directly to the acne-affected area, leave on for 15–20 minutes, then rinse with warm water. You can do this twice a day.


3. Hair Hydration

Aloe Vera is a natural hydrator, excellent for dry hair and an irritated scalp. It can help prevent dandruff and stimulate hair growth.

How to use: Apply Aloe Vera gel to the scalp and along the length of the hair, massage gently, and leave on for 30 minutes. Rinse with warm water and shampoo as usual.


4. Foot Care (for tired feet and cracks)

Aloe Vera helps hydrate and soothe the cracked or dry skin of the soles and heels.

How to use: Apply Aloe Vera gel to the feet, massaging thoroughly—especially on heels and soles. You can leave it on overnight, wearing cotton socks to improve absorption.


5. Fighting Dandruff and Scalp Hydration

Aloe Vera can help cleanse the scalp, reduce dandruff, and soothe scalp irritations.

How to use: Apply Aloe Vera gel to the scalp, leave on for 15–20 minutes, then rinse with cool water.


6. In Beverages and Juices (for Detox and Digestive Health)

Aloe Vera can be consumed as a juice to aid digestion, detoxification, and immune support.

How to use: Add Aloe Vera gel to a blender with water or fruit juice. Do not consume more than one tablespoon per day, as Aloe Vera has a laxative effect.


7. Lip Care (for Dry and Cracked Lips)

Aloe Vera gel helps hydrate and prevent lip dryness and cracking.

How to use: Apply Aloe Vera gel to the lips several times a day to keep them soft and hydrated.


8. Remedy for Muscle and Joint Pain

Aloe Vera has anti-inflammatory and analgesic properties, making it effective for soothing muscle and joint pain.

How to use: Apply Aloe Vera gel to the painful area and massage gently. You can repeat this treatment several times a day.


9. Using Aloe Vera in Cosmetics (for Creams and Serums)

Aloe Vera gel is a popular cosmetic ingredient because of its hydrating and regenerative properties.

How to use: Add Aloe Vera gel to body lotions, face creams, or serums to boost moisture and soothe irritated skin.


10. Face Mask for Rejuvenation and Hydration

Aloe Vera can be used to create face masks that improve skin appearance, giving it a youthful, radiant look.

How to use: Mix Aloe Vera gel with honey or olive oil, apply to clean skin, leave on for 15–20 minutes, and rinse with cool water.


11. Preventing Premature Skin Ageing

Aloe Vera stimulates collagen production, helping reduce wrinkles and maintain firm skin.

How to use: Apply Aloe Vera gel directly to the skin, focusing on areas with fine lines such as the forehead or eye corners.


12. Aloe Vera for Detoxification (to Boost the Immune System)

Regular consumption of Aloe Vera can help detoxify the body and improve immune function.

How to use: Mix one tablespoon of Aloe Vera gel with water or fruit juice to create a detox drink.


Precautions

  • Moderate consumption: Aloe Vera can have a laxative effect, so do not consume in excess. Ensure the Aloe Vera gel you use comes from a safe source.
  • Allergies: Before applying Aloe Vera to the skin or scalp, perform a patch test on a small area to confirm no allergic reaction.

Uses of Aloe Vera
Aloe Vera can be used in a variety of ways, both internally and externally. Here are some of the most popular uses of this miracle plant:

1. External Uses (for Skincare)

  • Burn and cut treatment: Extremely effective for soothing sunburn, first-degree burns, and cuts. The gel applied topically helps reduce inflammation and accelerate healing.
  • Skin hydration: Aloe Vera gel is a superb natural moisturiser. It can be applied to the face or body to combat dry, dehydrated skin.
  • Acne treatment: Its antibacterial and anti-inflammatory properties make it effective against acne. Gel applied to the affected skin reduces redness and speeds recovery.
  • Hair care: Used for scalp hydration and preventing hair loss. Aloe Vera gel or oil applied to the scalp can stimulate hair growth and fight dandruff.

Hair Masks for Scalp with Aloe Vera – Benefits and Recipes
Aloe Vera is remarkable not only for skin benefits but also for hair and scalp care. Its hydrating, soothing, antibacterial, and antifungal properties help maintain a healthy scalp and stimulate hair growth. Aloe Vera hair masks can combat dandruff, scalp irritation, and dryness while providing hydration and protection to the hair shaft.

Benefits of Aloe Vera for the Scalp:

  • Hydrates the scalp: High water content maintains scalp moisture.
  • Soothes irritation: Its anti-inflammatory effects reduce itching.
  • Controls dandruff: Antibacterial and antifungal properties combat scalp microbes.
  • Stimulates hair growth: Enzymes improve blood circulation to the scalp.
  • Regulates sebum: Helps balance oil production, preventing greasy hair.

Hair Mask Recipes for Scalp with Aloe Vera

  1. Aloe Vera & Coconut Oil Mask for Dry Scalp
    • Ingredients: 2 tablespoons Aloe Vera gel, 1 tablespoon coconut oil, 1 teaspoon honey
    • Preparation: Mix Aloe Vera gel with coconut oil and honey until a smooth paste forms. Apply to a clean, dry scalp, massaging gently to boost circulation. Leave on for 20–30 minutes, then rinse with warm water and shampoo as usual.
    • Benefits: Provides intense hydration and soothing for a dry scalp.
  2. Aloe Vera & Olive Oil Mask for Irritated Scalp
    • Ingredients: 3 tablespoons Aloe Vera gel, 1 tablespoon olive oil, 5–6 drops lavender essential oil (optional)
    • Preparation: Combine Aloe Vera gel, olive oil, and lavender oil. Apply to a clean scalp, massaging gently for even distribution. Leave on for 15–20 minutes, then rinse and shampoo.
    • Benefits: Calms irritation, reduces inflammation, and hydrates.
  3. Aloe Vera & Argan Oil Mask for Fragile Hair & Sensitive Scalp
    • Ingredients: 2 tablespoons Aloe Vera gel, 1 tablespoon argan oil, 1 egg (for extra protein)
    • Preparation: Mix Aloe Vera gel, argan oil, and beaten egg. Apply to the scalp and hair, focusing on roots. Cover with a towel or plastic wrap and leave on for 30–45 minutes. Rinse with warm water and shampoo.
    • Benefits: Strengthens fragile hair, provides regeneration, and adds protein.
  4. Aloe Vera & Lemon Juice Mask for Oily Scalp
    • Ingredients: 2 tablespoons Aloe Vera gel, 1 teaspoon lemon juice, 1 teaspoon jojoba oil (optional)
    • Preparation: Mix Aloe Vera gel with lemon juice and jojoba oil. Apply to the scalp, focusing on the roots, and massage gently. Leave on for 15–20 minutes, then rinse with warm water and shampoo.
    • Benefits: Reduces excess sebum, balances oil, and keeps the scalp clean.
  5. Aloe Vera & Honey Mask for Irritated Scalp & Dry Hair
    • Ingredients: 2 tablespoons Aloe Vera gel, 1 teaspoon honey, 1 teaspoon coconut oil
    • Preparation: Mix Aloe Vera gel with honey and coconut oil until smooth. Apply to the scalp and leave on for 20–25 minutes. Rinse with warm water and shampoo.
    • Benefits: Offers intensive hydration for dry, irritated scalp and hair.

How to Apply Aloe Vera Scalp Masks:

  • Clean the scalp: Ensure the scalp is clean and dry before masking.
  • Apply evenly: Use fingers or a brush to distribute the mask, massaging gently.
  • Processing time: Leave on 15–45 minutes depending on the mask type.
  • Rinse thoroughly: Rinse with warm water and shampoo to remove all residues.

2. Internal Uses (for Digestive Health)

  • Improving digestion: Consuming Aloe Vera gel can help relieve constipation and irritable bowel syndrome. It has a mild laxative effect and stimulates intestinal movement.
  • Detoxification: Aloe Vera is a good detoxifier, aiding in toxin elimination and maintaining a healthy digestive system. It also helps reduce internal inflammation and boosts immune function.
  • Immune support: Rich in antioxidants and vitamins (A, C, and E), Aloe Vera can strengthen the immune system and protect against infections.

3. In Cosmetics and Personal Care Products

  • Soaps and lotions: Aloe Vera is popular in hydrating soaps and lotions for its ability to keep the skin soft and moisturised.
  • Anti-ageing creams: Aloe Vera oil is used in anti-ageing formulations for its collagen-stimulating effects, helping reduce wrinkles and premature ageing.
  • Shampoos and conditioners: Aloe Vera is frequently included in hair care products for its hydrating and scalp-protecting properties.

Face Mask Recipes with Aloe Vera for Different Skin Types

  1. Dry Skin Mask
    • Ingredients: 2 tablespoons Aloe Vera gel, 1 teaspoon honey, 1 teaspoon olive oil or coconut oil
    • Preparation: Mix Aloe Vera gel, honey, and oil until smooth. Apply to clean skin for 15–20 minutes, then rinse with warm water and apply moisturizer.
    • Benefits: Provides strong hydration and seals in moisture.
  2. Oily Skin Mask
    • Ingredients: 2 tablespoons Aloe Vera gel, 1 teaspoon lemon juice, 1 teaspoon green clay
    • Preparation: Combine Aloe Vera gel, lemon juice, and clay until thick. Apply to clean skin, avoiding the eyes, for 10–15 minutes, then rinse with cool water.
    • Benefits: Soothes skin,, absorbs excess oil, and cleanses pores.
  3. Sensitive Skin Mask
    • Ingredients: 2 tablespoons Aloe Vera gel, 1 teaspoon grated cucumber, 1 teaspoon rose water
    • Preparation: Mix Aloe Vera gel, cucumber, and rose water. Apply to clean skin for 15–20 minutes, then rinse with cool water and apply a calming cream.
    • Benefits: Gentle, soothing, reduces redness, and hydrates.
  4. Combination Skin Mask
    • Ingredients: 2 tablespoons Aloe Vera gel, 1 teaspoon honey, 1 teaspoon jojoba oil
    • Preparation: Mix until smooth. Apply for 15–20 minutes, then rinse and apply a light moisturizer.
    • Benefits: Balances dry and oily zones, hydrates, and regulates sebum.
  5. Mature Skin Mask
    • Ingredients: 2 tablespoons Aloe Vera gel, 1 teaspoon argan oil, 1 teaspoon honey
    • Preparation: Mix ingredients and apply for 15–20 minutes, then rinse and apply anti-age cream.
    • Benefits: Stimulates cell regeneration, provides antioxidant hydration, and reduces aging signs.

How to Apply Aloe Vera Face Masks:

  • Cleanse the face thoroughly before application.
  • Apply evenly with fingers or a brush, avoiding eyes and lips.
  • Relax for 15–20 minutes, misting if too dry.
  • Rinse with warm water and pat dry with a clean towel.

Conclusion
Aloe Vera face masks are excellent for all skin types, offering hydration, soothing, and regeneration. This natural and effective ingredient combats various skin issues, and when combined with honey, oils, or natural extracts, these masks become even more beneficial. Regardless of your skin type, there is an Aloe Vera mask to enhance your skin’s health and appearance!

Aloe Vera in Beauty Products:

Aloe Vera is widely used in the cosmetic industry for its benefits to skin and hair. Aloe Vera gel can be found in many beauty products, such as:

  • Cleansing Gels: Aloe Vera is included in skin cleansers for its anti-inflammatory and antibacterial effects, which help gently cleanse the skin without irritation.
  • Face Masks: Aloe Vera can be applied as a face mask to hydrate and revitalise the skin, leaving it soft and radiant.
  • Lip Balms: Aloe Vera gel is used to moisturise and soothe dry or chapped lips.

Aloe Vera in Nutrition:

Aloe Vera can be consumed as juice or gel, and in many cultures is used to address various health concerns, from digestion to detoxification.

Aloe Vera Juice: Commercially available Aloe Vera juice can be consumed for its digestive and detoxifying benefits. Moderate intake is advised, as it can have a strong laxative effect.

How to Use Aloe Vera at Home:

  • Extract the Gel: If you have a live Aloe Vera plant, cut a leaf and slice it open to harvest the transparent gel, which you can apply directly to the skin or ingest for internal benefits.
  • Commercial Gels and Juices: If you don’t have a plant, Aloe Vera gels and juices are available in health stores for both cosmetic and internal use.

Conclusion:

Aloe Vera is a remarkable plant with a broad spectrum of health and beauty benefits. From skin and hair treatments to improving digestive health, Aloe Vera is a versatile, natural ingredient that belongs in every home. Whether you use it to hydrate the skin, relieve pain, or enhance digestive wellness, Aloe Vera truly is a miraculous plant worth keeping on hand.


Caring for Your Aloe Vera Plant is relatively simple and requires minimal attention. Aloe Vera is a resilient succulent that thrives in warm, dry conditions. Here are some tips for proper care:

1. Light

Aloe Vera loves bright, direct light, so place it in a well-lit spot. Indoors, position it near a south- or east-facing window for maximum natural light. It can survive in indirect light, but will not grow as robustly.

Ideal Light: 6–8 hours of direct sunlight per day.

2. Temperature

  • Aloe Vera prefers warm temperatures between 18–24 °C. As a tropical plant, it does not tolerate cold. In winter, ensure it is never exposed to temperatures below 10 °C, as this can cause damage.
  • Ideal Temperature: 18–24 °C.
  • Avoid: Temperatures below 10 °C.

3. UWatering

Aloe Vera is a drought-tolerant plant, meaning it does not require frequent watering. The most important aspect is to avoid overwatering, as the roots can rot. Allow the soil to dry out completely between waterings and avoid excessive moisture.

How to water: Water the plant every 2–3 weeks during summer and less frequently in winter.
Drainage system: Ensure the pot has drainage holes to allow excess water to escape.


4. Soil

Aloe Vera prefers a well-drained soil. You can use a special succulent or cactus mix, which provides proper drainage. If using a regular potting mix, add sand or perlite to improve drainage.

  • Soil type: Well-drained, with additives such as sand or perlite.
  • Recommended mix: Succulent and cactus soil.

5. Fertilising

Aloe Vera does not need frequent fertilisation. You can feed it lightly once a month during its active growth period (spring and summer) using a diluted liquid fertiliser for succulents.

  • Fertilisation frequency: Once a month during active growth.
  • Fertiliser type: Diluted succulent plant fertiliser.

6. Repotting

Aloe Vera grows fairly quickly and, although it does not require frequent repotting, it is advisable to repot every 1–2 years to ensure a healthy root system and adequate space for growth.

  • When to repot: Every 1–2 years, in spring.
  • Pot size: Choose a pot slightly larger than the current one—but not too large, as an oversized pot can lead to waterlogging.

7. Pruning and Leaf Care

Aloe Vera’s leaves are thick and fleshy, and with proper care, the plant will grow naturally. You can remove old or damaged leaves to encourage new growth. When cutting leaves, use a clean knife or scissors to avoid infection.

  • How to prune: Cut old or damaged leaves at their base, near the root.
  • Pruning tips: Avoid removing too many leaves, as they are the plant’s source of energy and help maintain health.

8. Common Problems

  • Root rot: Caused by overwatering. Yellowing or wilting leaves may indicate drainage or watering issues.
  • Yellow leaves: Can signal too much water or insufficient light.
  • Pests: Aloe Vera is generally pest-resistant but may attract mealybugs or aphids. If insects appear, wipe leaves with a damp cloth or use a natural insecticide.

Conclusion

Aloe Vera is an easy-care, hardy succulent that can thrive even for novice plant owners. Ensure you place it in a bright spot, water in moderation, and keep it in well-drained soil to maintain its health and vigor. Aloe Vera not only adds decorative beauty to your home but also serves numerous health and beauty applications.

1. What is Aloe Vera and what is its scientific name?

Answer:
Aloe Vera is a succulent plant renowned for its therapeutic and cosmetic properties. Its scientific name is Aloe barbadensis Miller and it belongs to the Asphodelaceae family. Native to the arid regions of Africa, Aloe Vera is now cultivated globally due to its extensive benefits.


2. What are the main therapeutic properties of Aloe Vera?

Answer:
Aloe Vera has numerous therapeutic properties, including:

  • Anti-inflammatory: Reduces skin inflammation, including burns and irritations.
  • Antioxidant: Neutralises free radicals and prevents premature ageing.
  • Antibacterial and antimicrobial: Helps combat skin infections and prevent acne.
  • Wound-healing: Accelerates the healing process and stimulates collagen production.
  • Moisturising: Deeply hydrates skin and hair, making it ideal for cosmetic products.

3. How is Aloe Vera used for sunburn and skin irritations?

Answer:
Aloe Vera is extremely effective for soothing sunburn and skin irritations due to its cooling and anti-inflammatory effects.
How to use:

  • Apply fresh gel extracted from the Aloe Vera leaf to the affected area.
  • Let it fully absorb without rinsing.
  • Repeat 2–3 times per day for optimal results.

4. How can Aloe Vera help in treating acne?

Answer:
Aloe Vera’s antibacterial and anti-inflammatory properties make it effective against acne.
How to use:

  • Apply Aloe Vera gel to acne-prone areas and leave on for 15–20 minutes.
  • Rinse with warm water and repeat morning and evening.
    Aloe Vera soothes redness, reduces inflammation, and prevents scarring.

5. What are the benefits of consuming Aloe Vera juice?

Answer:
Aloe Vera juice offers multiple internal health benefits:

  • Detoxification: Helps eliminate toxins from the body.
  • Improved digestion: Relieves constipation and regulates intestinal transit.
  • Immune support: Its antioxidant content strengthens the immune system.
  • Reduced internal inflammation: Beneficial for irritable bowel syndrome and other digestive conditions.
    Note: Consume in moderation, as it can have a strong laxative effect.

6. How can Aloe Vera help hydrate hair and scalp?

Answer:
Aloe Vera is a natural hydrator that supports hair and scalp health.
How to use:

  • Apply Aloe Vera gel to the scalp and full length of hair.
  • Gently massage the scalp to stimulate circulation.
  • Leave on for 30 minutes, then rinse with warm water and shampoo.
    This procedure helps prevent dandruff, soothes an irritated scalp, and stimulates hair growth.

7. How do you prepare and use an Aloe Vera face mask?

Answer:
Ingredients:

  • 2 tablespoons Aloe Vera gel
  • 1 teaspoon honey
  • 1 teaspoon coconut oil (for dry skin) or lemon juice (for oily skin)

How to use:

  • Mix ingredients into a smooth paste.
  • Apply to clean skin and leave on for 15–20 minutes.
  • Rinse with warm water.
    This mask hydrates, soothes, and improves skin appearance.

8. How does Aloe Vera help treat dandruff?

Answer:
Aloe Vera combats dandruff thanks to its antifungal and hydrating properties.
How to use:

  • Apply Aloe Vera gel directly to the scalp.
  • Leave on for 15–20 minutes.
  • Rinse thoroughly and shampoo with a gentle shampoo.
    Repeat twice weekly for visible results.

9. How is Aloe Vera used for dry and chapped lips?

Answer:
Aloe Vera is an excellent natural remedy for lip hydration.
How to use:

  • Apply Aloe Vera gel to the lips and leave on without wiping away.
  • Repeat 2–3 times per day to maintain soft, hydrated lips.
    The gel helps heal cracks and prevent dryness.

10. What precautions should be taken when using Aloe Vera?

Answer:
Although Aloe Vera is generally safe for internal and external use, consider the following:

  • Allergy test: Apply a small amount of gel to a small skin area to check for reactions.
  • Internal use: Avoid excessive consumption due to its laxative effect.
  • Pregnancy and breastfeeding: Consult a physician before use, as it may affect uterine contractions.
  • Open wounds: Do not apply directly to deep wounds without medical advice.

Lavender – Scientific Description, Properties, Uses, and Benefits

Lavender (Lavandula angustifolia) is a perennial herbaceous plant in the Lamiaceae family, native to the Mediterranean regions. It is one of the world’s most beloved aromatic plants, cherished not only for its pleasant, soothing fragrance but also for its wide array of benefits across fields—from traditional medicine to cosmetics and aromatherapy.

Properties of Lavender:

Lavender is truly a gift of nature, offering a broad spectrum of beneficial properties. Here are some of the most important:

  • Calming and Relaxing Properties: Lavender is renowned for its soothing effect on the nervous system. Lavender essential oil is often used in aromatherapy to reduce anxiety, stress, and insomnia. Its aroma helps induce deep relaxation, making it ideal for improving sleep.
  • Anti-inflammatory and Analgesic Properties: Lavender also exhibits anti-inflammatory effects, used to treat headaches, migraines, and other types of body pain. It is also applied topically to soothe skin irritations and minor inflammations.
  • Antioxidant: This plant contains antioxidant compounds that help counteract free radicals, protecting cells from premature ageing and the harmful effects of oxidative stress.
  • Antibacterial and Antimicrobial: Lavender possesses antibacterial and antimicrobial properties, making it useful in hygiene products and treatments for mild acne, skin infections, or insect bites.

Lavender Teas – Preparation and Benefits

Lavender tea is a calming and comforting beverage, perfect for relaxing evenings or enhancing sleep. Here’s how to prepare it:

Ingredients:

  • 1–2 teaspoons of dried lavender flowers
  • 250 ml of boiling water

Preparation:

  1. Place the dried lavender flowers in a cup.
  2. Pour the boiling water over the flowers.
  3. Cover and let it steep for 5–10 minutes.
  4. Strain the tea into another cup.

Benefits:

  • Promotes relaxation and helps reduce stress.
  • Supports restful sleep and alleviates mild insomnia.
  • Calms the digestive system, easing indigestion and stomach discomfort.

Enjoy your lavender tea in the evening to unwind and prepare for a peaceful night’s rest.

Lavender Syrups – Preparation and Uses

Lavender syrup is a versatile ingredient that can be used to sweeten beverages, desserts, or to add a distinctive flavour to various culinary dishes. It’s very simple to prepare at home:

Ingredients:

  • 1 cup of dried lavender flowers
  • 2 cups of sugar
  • 2 cups of water
  • 1 lemon (optional)

Preparation:

  1. Place the lavender flowers and water in a saucepan and bring to a boil.
  2. When the water boils, reduce heat and let the infusion simmer for 10–15 minutes.
  3. Strain the infusion and add the sugar, stirring until it dissolves completely.
  4. If desired, add the juice of one lemon for a more tangy flavour.
  5. Pour the syrup into a sterilized jar and allow it to cool.

Uses:

  • Add to plain or sparkling water for a refreshing drink.
  • Use in cocktail or alcoholic beverage preparations.
  • Incorporate into desserts such as ice creams or cakes.

Lavender in Beauty Products – Soaps, Creams, and Essential Oils

Lavender is extremely popular in the cosmetic industry for its cleansing, soothing, and skin-revitalising properties. Here are some of its uses in beauty products:

  • Lavender Soaps: These soaps are excellent for gentle skin cleansing while providing a calming and relaxing effect thanks to lavender essential oil. They suit all skin types, including sensitive skin, and are often used to reduce irritations and remove bacteria.
  • Lavender Face and Body Creams: Lavender face cream is ideal for skin hydration and reducing inflammation. The essential oil is an active ingredient in many creams for sensitive skin, also offering antibacterial benefits that help fight acne.
  • Lavender Essential Oils: One of the most widely used oils in aromatherapy, lavender essential oil offers calming, mood-enhancing, and well-being benefits. It can be used in skin massages or added to steam baths for relaxation. Additionally, lavender essential oil helps relieve headaches and migraines.

How to Use Lavender Essential Oil:

  • For Sleep: Place a few drops of lavender oil on your pillow or use an aroma diffuser to induce relaxation and calm before bedtime.
  • For Relaxation: Add a few drops of lavender oil to a hot bath to help you unwind after a long day.
  • For Skin Care: Dilute lavender essential oil with a carrier oil (e.g., sweet almond oil) and apply to dry or irritated skin areas to hydrate and soothe.

How to Prepare Lavender Oil at Home

Lavender oil is one of the most versatile and widely used essential oils, renowned for its calming, relaxing, and therapeutic benefits. Making lavender oil at home is a simple, natural process that gives you access to a pure, effective product. Lavender essential oil can be used in aromatherapy, cosmetic formulations, skin care, or as an adjunct in various health applications.


Required Ingredients:

  • Fresh or dried lavender flowers (approximately 100 g)
  • 250 ml carrier oil (sweet almond oil, coconut oil, or olive oil)
  • A clean glass jar (preferably dark or covered to protect from direct light)

Infusion Method (Maceration)

This straightforward method extracts the active compounds from the lavender flowers into a carrier oil. The maceration process takes a few weeks, but the result is a fragrant, potent lavender oil.

Steps for Preparing Lavender Oil by Infusion:

  1. Collect the Lavender Flowers:
    Gather quality lavender flowers, fresh or dried. If using fresh, ensure they are clean and free from impurities and insects.
  2. Prepare the Jar:
    Choose a dark glass jar to protect the oil from light, which can degrade essential compounds.
  3. Add the Lavender Flowers:
    Fill the jar with roughly 100 g of lavender flowers. You may lightly crush them with a fork to release active substances, though it’s not required.
  4. Pour in the Carrier Oil:
    Pour your chosen carrier oil over the flowers until they are completely submerged without air pockets.
  5. Seal and Macerate:
    Seal the jar tightly and place it in a warm, sunlight-free location. A gently heated spot (but not too hot) encourages a slow, effective infusion.
  6. Daily Agitation:
    Shake the jar daily to mix the contents and help extract the lavender’s active compounds. If the flowers float, gently press them down to keep them submerged.
  7. Infusion Period:
    Allow the mixture to macerate for 2–3 weeks. The longer it steeps, the more concentrated and aromatic the oil becomes.
  8. Strain the Oil:
    After maceration, strain the oil through a fine sieve or cheesecloth to remove the flowers, yielding a pure lavender oil ready for use.
  9. Store the Oil:
    Transfer the oil to a dark glass bottle and keep it in a cool, dry place. Properly prepared lavender oil can last up to one year.

Uses of Lavender Oil

  • For Aromatherapy:
    Use in a diffuser to calm nerves and improve sleep. Lavender oil is highly effective in reducing stress and anxiety.
  • For Skin Care:
    Apply diluted lavender oil to the skin to soothe irritations, treat acne, or relieve minor burns. It also reduces scars and post-acne marks.
    Lavender oil is an excellent addition to moisturisers and anti-ageing products.
  • For Muscle and Joint Pain:
    Dilute with a carrier oil and massage onto tired muscles or sore joints to reduce inflammation and alleviate pain.
  • In Cosmetic Products:
    Lavender oil is used in soaps, shampoos, and skin lotions for its antibacterial and soothing properties.

Conclusion

Preparing lavender oil at home is a simple and effective way to harness the therapeutic properties of this wonderful plant. Whether used in aromatherapy, skin care, or cosmetic creations, lavender oil offers calming, revitalising effects, making it a valuable addition to any home.

Benefits of Lavender:

Lavender is a true “elixir” of nature, offering a multitude of health and beauty benefits:

  • Stress and anxiety reduction
  • Relief of headaches and migraines
  • Improved sleep quality
  • Skin hydration and soothing
  • Combatting bacteria and skin infections

Lavender Tincture – Benefits, Preparation, and Usage

Lavender tincture is a concentrated solution obtained by macerating lavender flowers in a solvent (usually ethyl alcohol or vodka), which extracts the plant’s active compounds. It has multiple uses, both therapeutic and cosmetic, thanks to its calming, anti-inflammatory, and antioxidant properties.

Benefits of Lavender Tincture
Lavender tincture offers numerous health and well-being benefits due to its active compounds like linalool and linalyl acetate, which have calming and anti-inflammatory effects:

  • Anxiety and stress reduction: Known for its sedative and soothing effects, used to combat daily stress and promote restful sleep.
  • Headache and migraine relief: Its analgesic and calming properties help reduce migraines and headaches when applied topically or inhaled.
  • Improved sleep quality: An effective natural remedy for insomnia, aiding in deep, restorative sleep when taken before bedtime.
  • Digestive support: Eases bloating, colic, and abdominal discomfort by stimulating digestion and calming intestinal spasms.
  • Antimicrobial and anti-inflammatory: Used to treat acne, eczema, and minor burns thanks to its antibacterial and anti-inflammatory action.

How to Prepare Lavender Tincture
Preparation is simple and requires a 2–4 week maceration period.

Ingredients:

  • 50 g dried lavender flowers (or 100 g fresh)
  • 250 ml ethyl alcohol or vodka (40%+ ABV)
  • Glass jar (dark or covered to block light)

Method:

  1. Prepare the flowers: Clean fresh flowers of impurities or lightly crush dried flowers.
  2. Macerate: Place flowers in the jar, add alcohol, seal, and shake gently.
  3. Infuse: Store in a cool, dark place for 2–4 weeks, shaking daily.
  4. Strain: After maceration, filter the liquid through a fine sieve or cheesecloth to remove solids.
  5. Store: Transfer to a dark bottle and keep in a cool, dark location.

How to Use Lavender Tincture
Tincture can be used internally or externally:

  • Internal use:
    • Anxiety & sleep: 10–15 drops in water or tea before bed for relaxation and better sleep.
    • Headache relief: 10 drops in water, 2–3 times daily to ease headaches and migraines.
    • Digestive aid: 10 drops in water to calm abdominal discomfort and bloating.
  • External use:
    • Skin irritations: Dilute a few drops in water and apply to calm acne, eczema, or minor irritations.
    • Muscle & joint pain: Mix with a carrier oil (e.g., sweet almond) and massage into sore areas to reduce inflammation and pain.

Precautions & Contraindications

  • Pregnant or nursing: Consult a healthcare provider before use.
  • Allergies: Those sensitive to Lamiaceae plants (e.g., mint, oregano) may react.
  • Moderation: Avoid excessive use to prevent over-sedation or digestive upset.

Lavender Sitz Bath – Benefits, Preparation, and Usage

A lavender sitz bath is an excellent way to relax and harness lavender’s therapeutic properties, helping to calm the nervous system, reduce stress, and improve skin health. It can effectively soothe conditions such as skin irritations, haemorrhoids, mild vaginal infections, or general discomfort, and is ideal for muscle relaxation after a long day.

Benefits of a Lavender Sitz Bath

  • Calming & relaxation: Lavender’s soothing scent reduces anxiety and stress, promoting mental calmness.
  • Relief of irritations & inflammation: Lavender’s anti-inflammatory and antibacterial properties soothe irritated or inflamed skin.
  • Haemorrhoid relief: Calms pain and inflammation associated with haemorrhoids.
  • Improved intimate hygiene: Helps prevent vaginal infections and maintain pH balance via its antimicrobial action.
  • Detox & muscle relaxation: Lavender’s detoxifying effect and warm steam relax tired muscles and relieve tension.

How to Prepare a Lavender Sitz Bath
Ingredients:

  • 3–4 tablespoons dried lavender flowers (or 10–15 drops lavender essential oil)
  • 1 cup Epsom salt (optional, for detox & relaxation)
  • 1 litre warm water
  • 1–2 tablespoons olive oil or coconut oil (optional, for skin hydration)

Method:

  1. Prepare lavender: Place dried flowers in a cheesecloth bag or add essential oil directly to water.
  2. Heat water: Warm water to comfortable temperature (not scalding).
  3. Combine ingredients: Add lavender (in bag) and Epsom salt to the water; if using essential oil, mix it with the water and oil.
  4. Take the sitz bath: Sit comfortably in a suitable basin, immersing the lower body for 15–20 minutes, allowing lavender to work its calming magic.
  5. Aftercare: Use in the evening before bed for maximum relaxation. If skin feels dry afterwards, apply a moisturiser.

Specific Uses:

  • Haemorrhoids: Daily 10–15 minute baths to ease pain and inflammation.
  • Intimate hygiene: 2–3 times per week to maintain hygiene and prevent infections.
  • Relaxation & detox: Add Epsom salt for enhanced detox and muscle relief.

Precautions & Recommendations

  • Allergy test: Patch-test essential oil on a small skin area.
  • Pregnancy: Consult a healthcare provider before use.
  • Moderation: Suitable for most, but avoid excessive use if you have sensitive skin or dermatological conditions.

Conclusion

A lavender sitz bath is an effective natural remedy for relaxation, skin care, and the alleviation of certain conditions, such as haemorrhoids or vaginal infections. Thanks to lavender’s calming and antiseptic properties, it is an excellent option to naturally and pleasantly improve both your physical and mental well-being.

In summary:

Lavender is a versatile and highly beneficial plant, with a wide range of uses in traditional medicine, cosmetics, food, and beverages. Whether you use it as a tea, syrup, or in skin care products, lavender will add a touch of wellness to your daily routine, offering not only a delightful fragrance but also genuine benefits for both body and mind.

1. Ce este la1. What is lavender and where is it naturally found?
Lavender (Lavandula angustifolia) is a perennial aromatic plant in the Lamiaceae family, native to the Mediterranean regions. It thrives in sunny, well-drained soils and is widely cultivated in France, Spain, Italy, and other temperate regions. The plant is known for its violet flowers and distinctive fragrance.


2. What are the main therapeutic properties of lavender?
Lavender offers multiple therapeutic properties, including:

  • Calming and relaxing: Effective at reducing stress, anxiety, and improving sleep.
  • Anti-inflammatory: Helps soothe skin irritations and muscular pain.
  • Antibacterial and antimicrobial: Useful for treating acne, minor wounds, and skin infections.
  • Antioxidant: Protects cells from oxidative stress and prevents premature ageing.

3. How do you prepare lavender tea and what are its benefits?
Preparation:

  • Add 1–2 teaspoons of dried lavender flowers to 250 ml of hot water.
  • Let it steep for 5–10 minutes, then strain.
  • You may add honey or lemon for extra flavour.

Benefits:

  • Promotes relaxation and combats insomnia.
  • Reduces bloating and improves digestion.
  • Alleviates headaches and stress.

4. How is lavender essential oil used for sleep?
Lavender essential oil is an excellent remedy for improving sleep quality. You can:

  • Add 2–3 drops to your pillow before bed.
  • Use a diffuser to spread the aroma in the room.
  • Apply diluted oil to your temples or neck, gently massaging to induce relaxation.

5. What are the culinary uses of lavender syrup?
Lavender syrup is versatile and can be used for:

  • Beverages: Added to sparkling water, teas, or cocktails.
  • Desserts: Used as a topping for ice cream, cakes, or pancakes.
  • Marinades: To flavour meats or fish in sophisticated recipes.

6. How do you prepare lavender tincture and what benefits does it offer?
Preparation:

  • Place 50 g of dried lavender flowers in a jar and add 250 ml of alcohol (vodka or ethyl alcohol).
  • Macerate for 2–4 weeks in a dark place, shaking daily.
  • Strain and store in a dark bottle.

Benefits:

  • Calms anxiety and stress.
  • Alleviates migraines and headaches.
  • Can be used externally for skin irritations or muscular pain.

7. How does lavender help combat acne?
Lavender’s antibacterial and anti-inflammatory properties help reduce acne. When applied as diluted essential oil, lavender:

  • Reduces redness and inflammation.
  • Prevents bacterial growth that causes breakouts.
  • Soothes the skin and accelerates healing.

8. How do you prepare a relaxing lavender bath?
Add to your warm bath water:

  • 10–15 drops of lavender essential oil.
  • 1 cup of Epsom salt for detoxification and muscle relaxation.
  • Dried lavender flowers (optional).

This bath helps reduce stress, relax muscles, and enhance overall well-being.


9. What precautions should be taken when using lavender?

  • Pregnant or breastfeeding women should consult a doctor before use.
  • Essential oil must be diluted before skin application to avoid irritation.
  • Avoid excessive consumption of tincture or tea, as it may cause drowsiness or nausea.
  • Individuals allergic to Lamiaceae plants (e.g., basil, mint) should exercise caution.

10. What are lavender’s uses in cosmetic products?
Lavender is widely used in cosmetics for its properties:

  • Soaps: Gently cleanse the skin while providing a calming effect.
  • Creams and lotions: Hydrate and soothe the skin, reducing irritations and inflammations.
  • Shampoos: Help reduce dandruff and improve scalp health.
  • Perfumes: Offer a natural, fresh, and relaxing aroma.

Research

ChatGPT can make mistake

Ramen Soup

Ingredients:

  • 200 g ramen noodles
  • 500 ml chicken or pork broth
  • 2 tablespoons miso paste (optional)
  • 1 boiled egg (for garnish)
  • 100 g pork, thinly sliced
  • 1 spring onion, chopped
  • 1 tablespoon soy sauce
  • 1 tablespoon sesame oil
  • 1 slice of fresh ginger
  • 1/4 cup nori seaweed (optional)

Instructions:

  1. Cook the ramen noodles according to the package instructions.
  2. In a large pot, combine the broth and miso paste. Bring to a gentle simmer, then stir in the soy sauce and sesame oil.
  3. Thinly slice the pork and quickly sear it in a pan with a little sesame oil until just cooked.
  4. Add the cooked noodles to the simmering broth and cook for another 2–3 minutes.
  5. Serve in bowls, topping each with the seared pork, boiled egg, spring onion, and nori.
Bestseller #1
  • Versatile Small Bowls: This delightful set of 300 ml bowls proves incredibly practical for serving and food preparation….
  • Portion Control for a Healthy Lifestyle: The 300 ml small bowls are the ideal size for children or health-conscious adul…
  • Sturdy and Handy: Crafted at the perfect size for little hands, these small bowls are easy to hold. The stackable solid …
Bestseller #2
  • MICROWAVE OVEN SAFE: The ceramic bowl is fired at a high temperature to enable normal use in the microwave and oven.
  • STACKABLE: This ceramic bowl can be perfectly stacked, which saves a lot of cupboard space.
  • GREAT GIFT: The vertical pattern and green rim make this bowl look great and make it an excellent gift choice.
Bestseller #3
  • Exceptional Quality: These small serving bowls are made of durable ceramic and food-safe color glaze, they are lead-free…
  • Gorgeous Bowls with Unique Design: Unlike the plain dinnerware with the same design, our ceramic bowls set has vibrant d…
  • Various functions: The capacity of each bowl is 10 oz (1.25 Cup), 4.75 inch in diameter. The 6 bowl sets is perfect for …
Bestseller #4
  • 【Deeper Bowls without Spilling】Size: Φ14cm, H9cm, hold up to 750ml. Deeper than nomal bowls, great for microwaving oats …
  • 【Food Grade Ceramic】No plastic issues, chemicals, or odors, ensuring food safety and retaining the original taste of foo…
  • 【Easy to Clean】Shallow ribbing design avoiding hold food when rinsing. Smooth interior and finish maskes cleaning extra …
Bestseller #5
  • PERFECT SIZE:Diameter: 11.5 cm, height: 6 cm. Capacity: 9.5 oz, perfect for ice cream, dessert, fruit, parfait, condimen…
  • MATERIAL:bowls are made of the highest grade porcelain and fired at a high temperature to maximize the strength of the p…
  • NATURE AND EIEGANT DESIGN:Designers bring the natural elements of the fine into inspiration, with simple and smooth gree…
Bestseller #6
  • This set of 6 White China Breakfast Cereal Bowls from Argon Tableware brings classic style and minimalist sophistication…
  • Crafted from durable porcelain, these ceramic dishes have been fully vitrified against the absorption of strong colours …
  • Contents: 6 Cereal Bowls Dimensions: Height 5.5cm Width: 18cm Diameter: 18 cm. Material: Porcelain.
Bestseller #7
  • Multi Colors and patterns:Your kitchen might need these colorful bowls. The inside and outside of the kitchen bowls are …
  • Versatile Bowls: Each bowl’s size is of 23 ounce capacity, 6 inches in diameter. These kitchen bowls are suitable for ev…
  • Premium Quality: These six mixed cute bowls are made of durable Lead-free & Non toxic food safe ceramic. The surface fin…
Bestseller #8
  • MATERIAL: These stackable bowls are made of high quality ceramic, coming with lovely gift box for presenting as a gift
  • SIZE: Each bowl measures 11.5cm in diameter and 6cm in height, holding up to 300ml, suitable size to hold rice, soup, de…
  • HONEYCOMB TEXTURE: With honeycomb texture on the outside of the bowls, slide-proof and comfortable when hold in hand
Bestseller #9
  • Cereal Bowls: Package include 6 small serving bowls are made of durable ceramic and food-safe color glaze, they are lead…
  • Boho Small Bowls: Capacity 300ml, 11.5cm diameter. Unlike the plain dinnerware with the same design, our ceramic bowls s…
  • Stackable & Easy to Clean: Dishwasher & microwave & oven & freezer safe. Bowls are stackable, save your space.
Bestseller #10
  • 【Versatile Bowl Set】Introducing our 12oz Six-color small cereal bowls – a perfect addition to your kitchenware collectio…
  • 【Colorful Ceramic Bowls】Designed with a unique touch, these bowls feature a charming brown eyelash pattern around the ri…
  • 【Fine Stoneware Material】Made from more carefully selected and blended dense stoneware, twice fired at high temperatures…

What is ramen soup and why is it popular?
Ramen soup is a traditional Japanese dish made of ramen noodles served in a flavourful broth—often chicken, pork, or fish-based—and topped with various garnishes such as meat, eggs, spring onions, and seaweed. Its popularity comes from the perfect balance of flavours and textures, and the ability to customise it to individual tastes.

What types of broth are used for ramen?
There are several popular ramen broths, including:

  • Shoyu (soy sauce): a soy-flavoured broth with a slightly salty, complex taste.
  • Miso: made with miso paste, yielding a rich, creamy flavour.
  • Shio (salt): a lighter, clear broth seasoned primarily with salt.
  • Tonkotsu: a creamy broth created by long-simmering pork bones, prized for its intense, savory taste.

Why is miso paste used in ramen soup?
Miso paste adds a deep umami flavour and gives the broth a slightly creamy texture. It also contains natural probiotics that support digestive health, making it an excellent choice for those who enjoy a rich, hearty bowl of ramen.

How do you boil the egg for a ramen garnish?
For a perfect ramen egg:

  • Boil the egg for 6–7 minutes to achieve a soft but set yolk.
  • Immediately transfer the egg to an ice bath to stop cooking.
  • Once cooled, peel the egg and, if desired, marinate in diluted soy sauce to infuse additional flavour.

What type of meat is most commonly used in ramen?
Pork—known as chashu—is the most common. It is either slow-roasted or quick-seared to achieve a tender, flavourful texture. Other options include chicken or even seafood, depending on the recipe and personal preference.

What are ramen noodles and how do you cook them correctly?
Ramen noodles are wheat noodles with an elastic, slightly chewy texture. To cook them properly:

  • Boil in a large pot of rapidly boiling water for 2–4 minutes (per the package).
  • Drain immediately and rinse briefly under cold water to stop the cooking process.
  • This prevents the noodles from sticking and preserves their ideal texture.

What role do nori seaweed sheets play in ramen soup?
Nori adds an additional layer of umami and a light marine note. It also provides a textural contrast and a traditional touch, complementing the other ingredients without overpowering them.

How can you make ramen healthier?
To create a healthier bowl:

  • Use rice noodles or whole wheat noodles.
  • Opt for a homemade broth with reduced salt.
  • Add more vegetables like spinach, broccoli, or mushrooms.
  • Cut back on the amount of oil used for searing.

What seasonings and sauces enhance ramen’s flavour?
For a deeper taste, you can add:

  • Soy sauce: for extra saltiness and umami.
  • Sesame oil: for a nutty aroma.
  • Chili flakes or chili paste: for a spicy kick.
  • Fresh ginger: for a bright, fresh note.
    These additions blend harmoniously with the base recipe.

What other garnishes can you add to ramen soup?
Beyond egg, meat, and spring onions, popular garnishes include:

  • Shiitake mushrooms: add umami and earthiness.
  • Sweetcorn: for a touch of natural sweetness.
  • Crispy fried noodles or garlic chips: for a crispy contrast.
  • Bok choy or spinach: add freshness and balance.
    These ingredients make ramen an even richer, more personalised culinary experience.

Oriental Potato Salad

Ingredients:

  • 1 kg potatoes
  • 1 large onion, finely chopped
  • 2–3 pickled cucumbers, diced
  • 1 red bell pepper, diced
  • 200 g pitted green olives
  • 2 boiled eggs, diced (optional)
  • 3 tablespoons olive oil
  • 1 tablespoon vinegar (or to taste)
  • 1 teaspoon mustard (optional)
  • Salt and pepper, to taste
  • Fresh parsley for garnish

Instructions:

  1. Prepare the potatoes:
    Boil the potatoes in their skins in salted water for 20–25 minutes, until tender. Let them cool, then peel and dice.
  2. Prepare the vegetables:
    Finely chop the onion, bell pepper, and pickled cucumbers. Slice the olives if desired.
  3. Combine the ingredients:
    In a large bowl, place the diced potatoes, onion, bell pepper, cucumbers, and olives. If using, add the diced boiled eggs.
  4. Make the dressing:
    In a small bowl, whisk together the olive oil, vinegar, mustard (if using), and season with salt and pepper.
  5. Finish the salad:
    Pour the dressing over the salad and gently toss to combine.
  6. Garnish:
    Sprinkle with freshly chopped parsley before serving.

This Oriental potato salad is a light, flavourful dish—perfect alongside grilled meats or as a summer snack. Enjoy!


  1. Why should potatoes be boiled in their skins for this salad?
    Boiling potatoes in their skins helps them retain firmness and prevents them from absorbing too much water, ensuring they don’t become mushy. The skin also protects the flavour and texture, resulting in a better-balanced salad.
  2. What type of potatoes is best for Oriental potato salad?
    Firm-textured potatoes, such as red or yellow varieties, hold their shape well after boiling and mixing, preventing a too-soft or crumbly texture.
  3. How can the salad be adjusted for a vegetarian or vegan variant?
    For a vegetarian or vegan variant:
    • Omit the boiled eggs.
    • Add plant-based proteins like chickpeas or lentils for extra substance.
    • Ensure the mustard used is vegan.
      This keeps the salad nutritious and balanced.
  4. How does mustard influence the salad’s flavour?
    Mustard adds a slightly spicy note and depth to the dressing, balancing the vinegar’s acidity and the potatoes’ natural sweetness. It’s optional but lends complexity to the overall taste.
  5. What other vegetables can be added to diversify the salad?
    To vary the salad, you can add:
    • Cherry tomatoes: for freshness and sweetness.
    • Blanched green beans: for extra texture.
    • Thinly sliced radishes: for a mild peppery bite.
      These ingredients provide a colourful, flavoursome boost.
  6. How do you prepare a more sophisticated dressing for this salad?
    For a more complex dressing:
    • Whisk 2 tablespoons olive oil, 1 tablespoon balsamic vinegar, 1 teaspoon Dijon mustard, 1 teaspoon honey, and a minced garlic clove.
      This dressing adds a refined, balanced note without overwhelming the salad’s flavours.
  7. What benefits do pickled cucumbers bring to this recipe?
    Pickled cucumbers add a tangy, salty note that offsets the sweetness of the potatoes and bell pepper. Their crisp texture enhances the salad’s overall balance, providing a pleasant taste experience.
  8. Are olives necessary? What alternatives exist?
    Olives offer a salty flavour and soft texture, but you can replace or complement them with:
    • Capers: for an intense tangy kick.
    • Toasted nuts: for a crunchy contrast and unique aroma.
    • Crumbled feta cheese: for a creamy texture (if not vegan).
  9. How do you keep the salad fresh before serving?
    Store the Oriental potato salad in the refrigerator, tightly covered to prevent drying out. Add the parsley and dressing just before serving to preserve freshness and vibrant flavours.
  10. What main dishes or garnishes pair well with this salad?
    The Oriental potato salad can accompany:
    • Grilled chicken or pork.
    • Roasted or pan-fried fish.
    • Vegetarian patties.
      It also works as a main course served with a slice of wholemeal bread.

Pork Stew in Onion, Pepper, Carrot, and Garlic Sauce

Ingredients:

  • 800 g pork meat (shoulder or neck)
  • 2 large onions, chopped
  • 2 red bell peppers, cut into strips
  • 2 carrots, sliced into rounds
  • 4 garlic cloves, chopped
  • 3 tablespoons olive oil
  • 2 tablespoons tomato paste
  • 200 ml dry white wine (optional)
  • 1 cup meat stock (or water)
  • 1 teaspoon dried thyme
  • 1 bay leaf
  • Salt and pepper, to taste
  • 1 teaspoon sugar (to balance tomato acidity)
  • Fresh parsley for garnish (optional)

Instructions:

  1. Prepare the meat:
    Cut the pork into 3–4 cm cubes. Season with salt, pepper, and thyme.
  2. Brown the meat:
    In a large pan or deep pot, heat the olive oil. Add the pork and brown on all sides until golden. Remove meat and set aside.
  3. Cook the vegetables:
    In the same pot, add the onions and sauté until translucent, about 5–7 minutes.
    Add the bell peppers and carrots and cook for another 5 minutes, stirring occasionally.
    Add the garlic and cook 1–2 minutes until aromatic.
  4. Add tomato paste and liquids:
    Stir in the tomato paste, combining well with the vegetables.
    If using wine, pour it in now and simmer for 2–3 minutes to evaporate the alcohol.
    Add the meat stock (or water), bay leaf, and sugar. Bring to a boil.
  5. Simmer the stew:
    Return the pork to the pot and stir well. Cover and simmer on low heat for 1–1.5 hours, until the meat is tender and the sauce has thickened.
    Check occasionally and add more liquid if needed.
  6. Finish and serve:
    Taste and adjust seasoning with salt and pepper. Serve the pork stew with your favourite side: mashed potatoes, polenta, or rice. Garnish with fresh parsley if desired.

This hearty pork stew in a rich vegetable sauce is perfect for a family meal. Enjoy!

Bestseller #1
  • 10-Piece Cookware Set: The pots and pans set includes 2 * frying pan (24cm, 28cm), 2 * saucepan with lid (16cm/1.5L,18cm…
  • Eco-friendly Granite Material: Nonstick granite material, with 100% free of PFOS, PFOA, lead and cadmium. The 5-ply thic…
  • Great Nonstick Performance: Excellent non stick performance keeps food sliding smoothly along the surface for easy clean…
  • Heat Up Quickly and Evenly: The induction pans set adopts large magnetized base and provides a larger heating area, whic…
  • Service & Guarantee: CAROTE has over 25 years experiences in non-stick cookware, in case you receive defect or damaged c…
Bestseller #2
  • 8-PIECE SET: Our marble cookware set includes 24cm casserole pot with lid, 16cm and 18cm saucepan with lid, 20cm and 24c…
  • QUALITY MATERIAL: The Nuovva induction pot and pan set features a premium quality marble coating, a safer and stronger a…
  • NON-STICK: The marble 8pcs kitchen set features a non stick quality allowing much easier maintenance, less force and che…
  • HEALTHY: Our kitchen cookware set is a safer alternative to traditional non stick coatings made from toxic chemicals and…
  • KITCHEN ESSENTIAL: Prepare an assortment of dishes with our marble cookware pots and pans set with lids; stir fry, stew,…
Bestseller #3
  • 🔥Induction Kitchen Cookware Set 12 Piece – Include 20cm fry pan/ 28cm fry pan / 24cm Deep Fry Pan with lid / 1.5Q saucep…
  • 🔥Eco-friendly Granite Coating – Nonstick black granite material with 100% free of PFOS, PFOA, lead and cadmium, which en…
  • 🔥Heat Up Quickly and Evenly – The induction saucepans set adopts large stainless steel magnetized base and provides a la…
  • 🔥Granite Cookware Set with Bakelite Handle – Bakelite is used because it has heat-resistant properties and is an electri…
  • 🔥Great Quality & Service – Quality first, Service Utmost. All cookware sets purchased have a 365 Days warranty as standa…
Bestseller #4
  • ✔️ STAINLESS STEEL – Stainless steel 12 Piece Cookware set. Made from high quality stainless steel. This set is ideal fo…
  • ✔️ INCLUDES – 1 x Sauce pan size: 16cm,1 Sauce pan size: 16cm , Casserole dish sizes: 1x16cm, 1x18cm, 1x20cm , 1x24cm, 6…
  • ✔️ HIGH QUALITY – Tempered glass, rolled safety edges and 1.5mm capsulated aluminium bottom are among just a few of the …
  • ✔️ ABOUT THIS ITEM – This 12-piece cookware set is perfect for any kitchen. Made of stainless steel with a mirror polish…
  • ✔️ FEATURES – It is suitable for gas, electric and solid hotplates and requires no additional parts or assembly. The mul…
Bestseller #5
  • 3 PIECE SET: includes a 16 cm, 18 cm and 20 cm saucepan to cater to a range of cooking tasks
  • THERMOCORE TECHNOLOGY: eliminate hot spots and create even heat distribution across your pans for faster, more efficient…
  • POLISHED STAINLESS STEEL: features high quality construction to ensure your pans have long-lasting durability
  • STAY COOL HANDLES: the phenolic design keeps the pan’s handles cool to touch so you can safely cook and serve your food
  • 10 YEAR GUARANTEE: receive your standard 1 year guarantee, then an additional 9 years when you register the product onli…
Bestseller #6
  • 5 PIECE SET – includes 16/18/20 cm saucepans and 14 cm milk pan/24 cm fry pan to cater to a wide range of cooking tasks
  • THERMOCORE TECHNOLOGY – eliminate hot spots and create even heat distribution across your pans for faster, more efficien…
  • POLISHED STAINLESS STEEL – features high quality construction to ensure your pans have long-lasting durability
  • STAY COOL HANDLES – the phenolic design keeps the pan’s handles cool to touch so you can safely cook and serve your food
  • 10 YEAR GUARANTEE – receive your standard 1 year guarantee, then an additional 9 years when you register the product onl…
Bestseller #7
  • 5 PIECE PAN SET: The essential pan set for all of your kitchen needs – heat up your food using the 18cm, 20cm and 22cm s…
  • SUPERIOR NON-STICK COATING: The multi-layer Cerastone coating is 5x stronger than other non-stick coatings, and is PFAS,…
  • QUALITY CONSTRUCTION: Each pan is crafted with a high quality, long-lasting forged aluminium body that enables quick and…
  • STAY COOL HANDLE: Each pan features a soft touch, non-slip handle for comfortable control over your cooking
  • SUITABLE FOR ALL HOB TYPES: A bonded steel base provides even heat distribution to ensure your food is cooked thoroughly…
  • DISHWASHER SAFE: The non-stick ceramic coating prevents food from sticking to the surface, and this pan set is dishwashe…
  • 5 YEAR GUARANTEE: Trusted Tower quality with a standard 1 year guarantee and 4 year extension, subject to product regist…
  • A BRAND YOU CAN TRUST: Tower is an iconic British brand boasting over 100 years of quality in manufacturing and design e…
Bestseller #8
  • ULTIMATE SAUCEPAN SET: Our Marble induction safe saucepan set includes 20cm, 18cm and 16cm saucepans with a handy pour s…
  • FINEST QUALITY: The non-stick induction ready saucepan set by Nuovva is constructed from premium quality materials desig…
  • NON-STICK PERFORMANCE: Our 3 pcs kitchen saute pan set allows you to experience superior cooking with the non-stick coat…
  • ERGONOMIC DESIGN: The induction frying pan cooking set by Nuovva features a useful spout to pour sauces and liquids effi…
  • AESTHETIC FINISH: Our high quality 3 pcs non-stick saucepan set showcases a beautiful sleek Marble finish, enhancing the…
Bestseller #9
  • ✔️ SET INCLUDES – 0.95l Saucepan With Lid, 1.25l Saucepan Wih Lid, 1.4l Saucepan, 2.5l Casserole With Lid
  • ✔️ QUALITY CONSTRUCTION – Each pan is crafted with a high quality, long-lasting forged aluminium body that enables quick…
  • ✔️ SUITABLE FOR ALL HOB TYPES – A bonded steel base provides even heat distribution to ensure your food is cooked thorou…
  • ✔️ DISHWASHER SAFE – The non-stick ceramic coating prevents food from sticking to the surface, and this pan set is dishw…
  • ✔️ LONG-LASTING COATING – Each pan upgrades premium 3-layer nonstick coating; 3 times more durable than traditional cook…
Bestseller #10
  • 【Enjoy Healthy & Easy Cooking】Feature top quality harder granite coating with 10x Ultra non-stick performance, Non-toxic…
  • 【Super Non-stick & Effortless Cleaning】Our non stick pots and pan set has a ultra smooth and highly non-stick surface th…
  • 【Versatile Cookware Set】GiPP 10pcs cookware set non stick meets all of your everyday cooking needs and cooking ideas. Yo…
  • 【Perfect for All Stoves】Cast aluminum construction pots and pans set heat up quickly and evenly. Highly magnetically con…
  • 【Reliable Service & Guarantee】The aesthetic looking and durable construction make GiPP granite cookware set stand out, G…
£109.99
Is prime
  1. What is the secret to tender pork in a stew?
    Choosing a cut like shoulder or neck—with enough fat—keeps meat juicy. Browning seals in juices and intensifies flavour. Slow-simmer covered for at least 1–1.5 hours on low ensures succulent fibres.
  2. Why add white wine to the recipe?
    Dry white wine contributes a subtle acidity and aroma that balances the natural sweetness of vegetables and meat. It also helps tenderise the meat; the alcohol evaporates, leaving only the flavour. Substitute with unsweetened apple juice or stock if avoiding alcohol.
  3. How to intensify stew flavour?
    • Use meat stock instead of water for richer taste.
    • Add fresh herbs like rosemary or thyme at the end.
    • Cook the tomato paste a few minutes before adding liquids to reduce raw acidity and enhance sweetness.
  4. How to prevent the stew from becoming too thin or too thick?
    If too thin, simmer uncovered for the last 15–20 minutes to reduce liquid. If too thick, gradually stir in warm stock or water until desired consistency is reached.
  5. What sides best accompany this pork stew?
    • Mashed potatoes: Creaminess balances the rich sauce.
    • Polenta: A traditional pairing that complements texture.
    • White rice: Absorbs the stew’s flavours simply.
      Fresh bread is also perfect for mopping up every drop of the sauce.
  6. Why add brown sugar to the stew?
    Brown sugar balances the tomatoes’ acidity and adds a subtle caramel note, enriching the overall flavour. Substitute with honey for a natural alternative.
  7. How to adapt this recipe for a gluten-free diet?
    The stew is almost gluten-free, but check processed ingredients—like tomato paste or stock—for hidden gluten. Use certified gluten-free versions.
  8. Are red bell peppers essential?
    Red peppers add sweetness and extra flavour, but you can omit or replace them with other vegetables like celery or zucchini. The stew remains delicious without them.
  9. What is the role of the bay leaf in the stew?
    The bay leaf imparts a subtle woody aroma that complements the meat and vegetables. Remove it before serving to avoid bitterness.
  10. How can this stew be made healthier?
  • Use lean cuts (e.g., pork loin or chicken breast).
  • Reduce oil to one tablespoon.
  • Replace brown sugar with a natural sweetener or omit.
  • Add extra vegetables like zucchini or mushrooms to boost nutrition and lower calorie density.