How to Get Rid of Stretch Marks with Natural Ingredients: Remedies and Tips to Improve Skin Appearance through Exercise

Stretch marks are an aesthetic concern faced by many people, regardless of age, sex, or skin type. These fine lines or streaks on the skin, which typically appear on the abdomen, thighs, buttocks, or breasts, are caused by rapid skin stretching due to factors such as sudden growth, pregnancy, weight fluctuations, or hormonal changes. Although stretch marks are medically harmless, many seek solutions to make them less visible or to eliminate them entirely. In this article, we will explore how you can reduce stretch marks using natural ingredients and how an active lifestyle with regular exercise can contribute to improving skin appearance.

What Are Stretch Marks and What Causes Their Appearance?

Stretch marks are dermal scars that occur when the skin undergoes excessive tension or stretching over a short period. They consist of broken collagen and elastin fibers, which the body repairs by forming thin lines of skin that differ in color from the surrounding tissue. Depending on when they appear, stretch marks can be red, purple, white, or silver. Factors contributing to stretch marks include:

  • Rapid body growth: Adolescence often involves sudden height and weight increases.
  • Pregnancy: During pregnancy, the body changes quickly, and skin around the abdomen, breasts, and thighs is under significant stress.

To minimize stretch marks during the nine months of pregnancy, you should keep your skin hydrated internally and externally. Use lotions and creams made with natural ingredients on areas prone to stretch marks, adding vitamin E (known for its anti-inflammatory and antioxidant properties). Take vitamin C supplements (dermatologists recommend 500 mg/day to support collagen production). Perform light exercises to improve blood circulation. Build a balanced diet rich in water and foods that promote skin elasticity: strawberries, blueberries, nuts, seeds, mango, avocado, watermelon, broccoli, spinach, carrots, sweet potatoes, pumpkin, bell peppers, cucumbers, celery. Don’t forget to use sunscreen to protect your skin from UV rays.

If, despite these preventive measures, stretch marks persist after pregnancy, there are effective methods to reduce their visibility. An important first step is adopting a gradual weight-loss pace, which helps prevent new stretch marks and allows skin to adapt slowly to volume changes.

Another effective treatment is regular massage of the affected area using a dry brush with soft, natural bristles. This massage stimulates lymphatic and blood circulation, aiding toxin removal and promoting skin regeneration. It is recommended to perform this massage for 5–6 minutes before each shower, using gentle circular motions to exfoliate dead cells and improve skin texture.

If home remedies do not yield the desired results, cosmetic treatments such as laser procedures can improve stretch mark appearance. However, these treatments are expensive and carry risks, so options must be evaluated carefully.

Alternatively, retinol creams available in pharmacies can be effective in reducing stretch marks. These creams show noticeable results after about six weeks of consistent use. It is important to avoid direct sun exposure while using retinol, as it can sensitize the skin.

Alongside these options, natural remedies—as listed above—offer a cost-effective, gentle approach, significantly aiding in skin regeneration and improving elasticity.

By combining a gradual weight-loss regime, regular massage, retinol treatments, and natural solutions, you can significantly improve skin appearance and reduce stretch mark visibility. A balanced and patient approach is essential in the skin’s recovery process.

Natural Ingredients That Can Help Reduce Stretch Marks

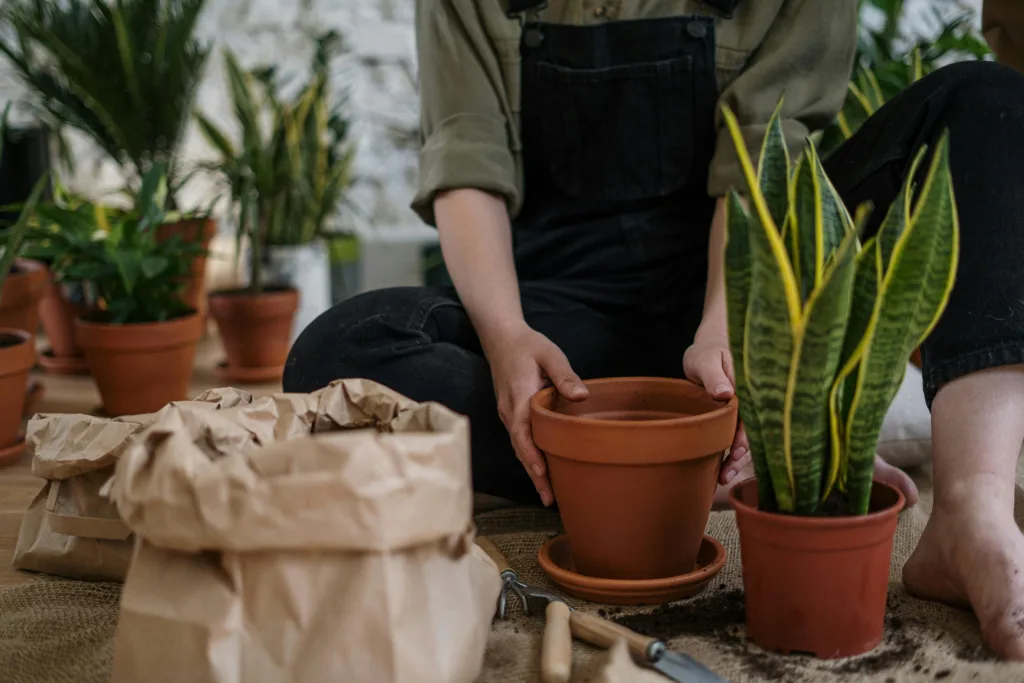
While there is no instant cure to eliminate stretch marks completely, several natural ingredients can enhance their appearance by stimulating cell regeneration and hydration. Some of the most effective ingredients include:

  • Aloe vera: Rich in healing compounds, it soothes and repairs skin tissue.
  • Cocoa butter: Deeply moisturizes and improves skin elasticity.
  • Shea butter: Nourishes and softens the skin, supporting collagen production.
  • Rosehip oil: Contains essential fatty acids and vitamin C to promote skin regeneration.
  • Coconut oil: Provides intense hydration and has antimicrobial properties.
  • Almond oil: High in vitamin E, it helps reduce scar appearance and keeps skin supple.
  • Honey: A natural humectant with antibacterial properties, supporting skin healing.

Incorporating these natural ingredients into a daily skincare routine, combined with regular exercise to boost blood flow, can make stretch marks less noticeable and improve overall skin health. Remember that consistency and patience are key to seeing lasting results.ilor:

Argan Oil

Argan oil is rich in vitamin E and essential fatty acids, which help hydrate and repair the skin. It can improve skin elasticity and reduce the appearance of stretch marks when applied regularly.

Recipe:
Mix argan oil with a few drops of lavender or chamomile essential oil, known for their soothing and regenerative properties. Apply the blend to stretch marks twice daily, gently massaging the skin for a few minutes.
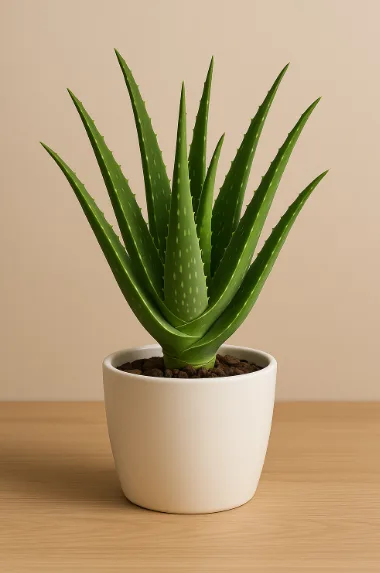
  1. Aloe Vera Gel

Aloe vera is an excellent natural ingredient for calming and hydrating the skin, with anti-inflammatory and regenerative properties. Aloe vera gel helps stimulate collagen production, leading to firmer, more elastic skin.

Recipe:
Extract fresh gel from an aloe vera leaf and apply it directly to the stretch mark areas. Leave it on for 20–30 minutes, then rinse with warm water. Use daily for best results.

Olive Oil

Olive oil is another excellent ingredient for skin care, being rich in vitamins A, D, and K. It serves as a natural moisturizer that helps maintain the skin soft and elastic.

Recipe:
Mix olive oil with a little fresh lemon juice, which aids in gentle exfoliation of the skin and promotes cell regeneration. Apply this blend to stretch marks and massage well to stimulate circulation.

Shea Butter

Shea butter is a natural ingredient rich in vitamins and fatty acids that nourish the skin and help restore its elasticity. It is effective in reducing stretch marks and preventing their formation.

Recipe:
Warm a small amount of shea butter until it melts, then apply it to the areas affected by stretch marks. Use daily for best results.

Sugar for Exfoliation

    Sugar is a natural exfoliant that helps remove dead skin cells and stimulate blood circulation. This can lead to smoother, more even skin, reducing the appearance of stretch marks.

    Recipe:
    Mix brown sugar with olive oil or coconut oil to create a natural scrub. Use this scrub 2–3 times per week, applying it to stretch marks and massaging gently.

    How Can Exercise Improve Skin Appearance?

    In addition to using natural ingredients, an active lifestyle and regular exercise can have a significant impact on skin appearance and the visibility of stretch marks. Physical activity helps enhance blood circulation, tone muscles, and stimulate collagen and elastin production—the substances that maintain skin firmness and elasticity.

    Toning Exercises
    Exercises that target muscle toning and strengthening, such as Pilates, yoga, or weight training, can help reduce the appearance of stretch marks, as firmer muscles contribute to tighter, more even skin.

    Cardio for Improved Circulation
    Cardio exercises, such as running, swimming, or cycling, stimulate blood circulation and help transport nutrients to the skin. This can support cell regeneration and reduce the risk of developing new stretch marks.

    Proper Hydration

    Another benefit of exercise is the improvement of metabolism and the hydration process. Physical activity stimulates sweating, which helps eliminate toxins and maintain the body’s water balance. Proper hydration supports skin elasticity and helps in preventing stretch marks.

    Conclusion

    Stretch marks are not a health issue but represent an aesthetic concern for many people. Using natural ingredients and incorporating a regular exercise regimen into your life are two of the most effective methods to improve skin appearance and reduce stretch marks. Although there is no miraculous solution for their complete removal, natural approaches and an active lifestyle can contribute significantly to healthier, more beautiful skin.

    Regular application of natural oils, exfoliating the skin, and physical training can make a significant difference in improving skin texture, helping you feel more confident and comfortable in your own skin.

    Feng Shui: Tips for Creating a Balanced and Harmonious Space in Your Life

    Feng Shui is an ancient Chinese practice focused on the art of arranging objects and spaces in ways that promote the positive flow of energy (chi) and create a harmonious environment. By applying Feng Shui principles, you can transform not only the appearance of your home but also your well-being, relationships, and overall success. In this article, we offer practical tips and examples for incorporating Feng Shui into your life.

    1. Cleanliness and Order: The Foundation of Feng Shui
      Before applying any other principles, it’s essential to have a clean and organized space. Clutter can block positive energy and create stress. Feng Shui emphasizes the importance of maintaining order to allow chi to flow freely.
      Example: If you have a room or office piled with items, take a moment to declutter. Discard what you no longer need and ensure everything has its place. This simple act will enhance mental clarity and energy flow.
    2. Bed Position: A Key Element in Feng Shui
      According to Feng Shui, the bed position is crucial for attracting positive energy. Ideally, place your bed in the “command position,” where you can see the door without being directly in line with it. This symbolizes control over your life and a sense of security in your rest environment.
      Example: If your bed faces the door directly, move it so you can view the entrance without lying in its direct path. This adjustment can improve sleep quality and your feeling of safety.
    3. Natural Light: Activating Positive Energy
      Natural light plays an essential role in Feng Shui because it represents life and vitality. Use as much daylight as possible to energize your spaces. Insufficient light creates stagnation, whereas bright, natural light encourages the flow of positive chi.
      Example: To brighten and invigorate your living room, remove heavy curtains in favor of sheer drapes or leave windows bare to let sunlight flood in. Strategically placed mirrors can also reflect light and amplify positive energy.
    4. Colors: Influencing Mood through Feng Shui
      Feng Shui assigns specific energies to colors, influencing a room’s atmosphere. Choosing the right palette can transform a space’s vibrations, creating a balanced and harmonious environment.
      • Red: Associated with vitality, good fortune, and passion; ideal for living rooms or the southern area of your home.
      • Green: Symbolizes growth and freshness; perfect for workspaces and home offices.
      • Blue: Brings calm and tranquility; recommended in bedrooms for restful sleep.
      • Yellow: Stimulates creativity; great for studio or creative zones.
        Example: For a relaxing bedroom, choose soft blue or pale green walls. To boost productivity in your office, add yellow or orange accents.
    5. Scents: Stimulating Positive Energy through Fragrance
      Scents play an important role in Feng Shui, helping to balance a space’s energy. Using essential oils and incense can enhance chi and promote well-being.
      • Lavender: Known for its calming properties; ideal for the bedroom.
      • Citrus (orange, lemon): Encourages an active, uplifting atmosphere in living areas.
      • Jasmine: Perfect for a romantic or relaxing ambiance in the living room or bathroom.
        Example: Place a lavender diffuser in your bedroom for deep sleep, and use citrus oils in the living room to energize the space.
    6. Plants: Purifying the Air and Energizing Spaces
      In Feng Shui, plants are considered bring-ers of positive energy and are used to improve the chi flow in rooms. Choose healthy, vibrant plants to purify the air and boost the vitality of your space.
      Example: Place a lucky bamboo or peace lily near entrances to invite good fortune, and add a jade plant in the wealth corner (southeast) for abundance.

    By following these Feng Shui tips, you can create a home that not only looks beautiful but also supports your health, relationships, and personal success through the balanced flow of energy. These plants not only purify the air but also contribute to creating a calm, energizing, and harmonious atmosphere. Here are some examples of beneficial plants for the home:

    Lucky Bamboo (Dracaena sanderiana)

    Lucky bamboo is one of the most popular Feng Shui plants, associated with good fortune, prosperity, and success. It is an easy-care plant that adapts to various lighting conditions. In Feng Shui, bamboo is ideally placed in the southeast corners of your home, which correspond to the wealth area.

    Benefits:

    • Brings positive energy and prosperity.
    • Serves as a symbol of growth and stability.
    • Purifies the air.

    Aloe Vera

    Aloe vera is a succulent plant known for its healing and purifying properties. In Feng Shui, it symbolizes protection and is believed to attract positive energy. Aloe vera can be placed in any room, but it is especially beneficial in the office or work area to support concentration and mental clarity.

    Benefits:

    • Purifies the air and improves its quality.
    • Is considered a protective plant.
    • Helps promote an atmosphere of calm and clear thinking.

    Jasmine (Jasminum)

    Jasmine is a fragrant flowering plant that symbolizes love and harmony in Feng Shui. It is ideal for the bedroom, where it can enhance relationships and create a romantic, calming atmosphere. Jasmine is also known for its ability to improve air quality.

    Benefits:

    • Brings energy of love and harmony.
    • Stimulates a calm and relaxing atmosphere.
    • Helps create an environment conducive to rest and rejuvenation.

    Ficus (Ficus benjamina)

    Ficus is a popular Feng Shui plant, as it helps improve energy flow in spaces and protects the surrounding environment. It is perfect for office areas, promoting an atmosphere of focus and balance. Ficus can be used to attract positive energy and prosperity.

    Benefits:

    • Brings vital energy and harmony to any room.
    • Enhances concentration and mental clarity.
    • Purifies the air and supports a healthy environment.

    Spider Plant (Chlorophytum comosum)

    The spider plant is renowned for its ability to purify the air and reduce stress. It is very easy to care for and adapts well to various lighting conditions. In Feng Shui, this plant is associated with vital energy and protection.

    Benefits:

    • Purifies the air and absorbs toxins.
    • Helps reduce stress and anxiety.
    • Symbolizes growth and protection.

    Lavender

    Lavender is not only a wonderfully fragrant plant, but it is also extremely beneficial for creating a calming and relaxing environment. In Feng Shui, lavender is associated with tranquility and protection, making it ideal for the bedroom or any area where you want to feel more relaxed.

    Benefits:

    • Relaxing and soothing, helping to reduce stress.
    • Promotes restful sleep and a peaceful atmosphere.
    • Attracts positive energy and guards against negative influences.

    Sansevieria (Mother-in-Law’s Tongue)

    Sansevieria is a hardy, resilient plant known for its ability to purify the air. In Feng Shui, it is also considered a protective plant, as it absorbs negative energies and transforms them into positive energy. It is an excellent choice for work areas or for corners where you want to enhance beneficial energy.

    Benefits:

    Stimulates personal growth and prosperity.

    Improves air quality.

    Helps create a protected and balanced environment.

    Orchid

    Orchids are delicate and elegant plants that symbolize beauty and balance. In Feng Shui, orchids are often associated with attracting love and prosperity. They are excellent choices for the bedroom or any space where you want to enhance harmony and relationships.

    Benefits:

    • Brings love, beauty, and prosperity.
    • Creates a calming and balanced atmosphere.
    • Can stimulate positive energy in personal relationships.

    Peace Lily (Spathiphyllum)

    The peace lily is a white-flowering plant that symbolizes peace, harmony, and balance in Feng Shui. It is one of the best plants for purifying the air and improving air quality. It is often placed in relaxation areas or offices to add a calming and balanced atmosphere.

    Benefits:

    • Purifies the air and helps eliminate indoor toxins.
    • Brings harmony and peace to the room.
    • Symbolizes success in personal and professional life.

    Conclusion

    Plants not only enhance a room’s appearance but also offer significant Feng Shui benefits. They can purify the air, boost positive energy, and create a more balanced and harmonious environment. Choosing the right plants for your home will not only improve its aesthetic but also foster a space that supports your physical, mental, and emotional well-being. Enrich your home with some of these plants and enjoy their benefits for your family’s health and harmony.


    Reflecting Harmony through Furniture and Décor

    Furniture should be arranged to encourage interaction and allow an easy flow of energy. Avoid sharp corners and opt for rounded shapes that promote a gentler, more balanced flow of chi.

    Example: In the living room, position your sofa in a command position so everyone seated can see the door. This creates a sense of security and control. In the bedroom, avoid placing mirrors or furniture too close to the bed, as this can disrupt the flow of chi and negatively affect sleep.


    Final Conclusion

    Feng Shui is not just a decorating practice but a comprehensive system aimed at improving your quality of life by creating a harmonious and balanced space. By applying Feng Shui principles in your daily life, you can invite more positive energy, prosperity, health, and well-being into your home. Whether you choose to use colors, plants, or rearrange your furniture, every small detail contributes to a space that truly reflects the balance and harmony you desire.

    Delicious Pancakes: An Easy Treat for Any Time of Day

    There’s nothing more enjoyable than savouring a freshly made pancake, thin and perfectly golden. Whether you prefer them plain with a sprinkle of powdered sugar or with various fillings like fruit, chocolate, or jam, pancakes are a versatile choice and irresistible. These treats can be served at any time: in the morning for an energy-boosting breakfast, at lunch or dinner as a delightful dessert, or even as a quick snack between meals. No matter the occasion, pancakes can bring a smile to anyone’s face. So, let’s discover how you can add this simple and delicious recipe to your daily routine!

    Simple Pancake Recipe

    This pancake recipe is very easy and quick, perfect for a delicious breakfast or dessert.

    Ingredients:

    • 1 egg
    • 250 ml milk
    • 150 g flour
    • 1 tablespoon sugar (optional)
    • A pinch of salt
    • 2 tablespoons oil (for the batter)
    • 1 tablespoon oil (for frying)

    Method of Preparation:

    Prepare the batter:

    1. In a large bowl, whisk the egg with a whisk or fork.
    2. Add the milk and stir well.
    3. Add the flour, sugar, and salt, mixing until you obtain a smooth batter without lumps. If the batter is too thick, add a little more milk.
    4. Finally, stir in the 2 tablespoons of oil.

    Fry the pancakes:

    1. Heat a non-stick pan over medium heat. Pour in the tablespoon of oil and let it warm.
    2. Ladle a portion of batter into the pan and tilt to spread it into a thin layer.
    3. Fry the pancake for 1–2 minutes on each side, until it turns golden. Flip it with a spatula.

    Serving:

    • Continue frying the remaining pancakes, brushing the pan with oil each time.
    • Serve with your favorite fillings, such as jam, chocolate, or fresh fruit.

    These pancakes are easy to make and absolutely delicious! Enjoy!

    Time-Management Ideas for Busy Moms: How to Balance Family Life, Children, and Personal Time

    Motherhood is undoubtedly full of challenges and rewards. From constant childcare, managing household chores, and meeting the needs of the entire family, moms face numerous daily tasks. Yet, amid this chaos, there are ways a mother can organize efficiently, blending the roles of mom, wife, and individual without feeling overwhelmed. Here are some time-management ideas to help busy moms tackle daily duties and still find time for themselves.

    Set Daily Priorities

    In a typical day, it’s easy to get lost among all the activities—waking little ones, preparing meals, baths, homework, playtime, and dinner prep. To avoid stress and work effectively, it’s important to set priorities.

    Example: A mother might start her day by listing essential tasks: “Prepare breakfast,” “Quick tidy-up,” “Homework help,” and “Playtime with kids.” Less critical tasks can be postponed or delegated (for instance, general cleaning could wait until the weekend).

    Create a Clear Routine for Each Family Member

    Routines are the key to success in a busy household. When everyone knows what and when they should do something, life becomes more organized and less stressful. Routines give both children and parents structure and predictability.
    Example: A morning routine can include waking at the same time, breakfast, getting ready for school or daycare, and checking backpacks. An evening routine might involve bedtime prep, reading a story, or talking about the day. This not only saves time but also creates a calm environment for children.

    Use Technology to Organize Your Time

    There are a multitude of apps and online tools that can help busy moms manage their time more effectively. From shopping-list apps to family planners, these solutions can make life much easier.

    Example: Apps like Google Calendar or Trello are excellent for scheduling the entire family’s daily activities. You can set notifications for important events such as doctor’s appointments or school functions. There are also budgeting apps like Mint or Yolt, which help ensure you stay within your monthly budget.

    Delegating Tasks: An Essential Help for Busy Moms

    A mother doesn’t have to do everything alone. Delegating tasks to other family members—or even hiring outside help—can make an enormous difference in time management.

    Example: Your partner can assist with dinner preparation or bathing the children in the evening, while the kids can take on small responsibilities like setting the table or sorting laundry. Additionally, hiring a cleaning service once a week can provide valuable support.

    Combine Work and personal life: Make Time for Yourself

    Despite the multitude of responsibilities, it’s important for a mother to carve out time for herself. Without a balance between professional, family, and personal life, the risk of burnout is significant. Therefore, it’s essential to allocate a few daily or weekly moments to relax, exercise, or pursue hobbies.

    Example: You can start the day with a few minutes of meditation or yoga, and in the evening—after the children have fallen asleep—dedicate time to reading a book, watching a movie, or simply unwinding. It’s also helpful to schedule a “night out” with friends or a family gathering to recharge your batteries.

    Learn to Say “No”

    It’s important to learn to say “no” when extra activities don’t fit your schedule or you simply lack the resources to carry them out. Overcommitting will affect both your well-being and your efficiency in completing daily tasks.

    Example: If someone asks you to help with a non-priority project and you feel it will overload your day, don’t hesitate to decline. Setting clear boundaries is essential to protect your time and energy.


    Plan Family Activities

    Moms who feel overwhelmed by daily responsibilities can become exhausted if they don’t schedule moments of fun and relaxation with their families. Planning recreational family activities can bring a sense of satisfaction and strengthen family bonds.

    Example: A weekend park outing or a board-game night can be excellent opportunities to disconnect from routine and enjoy quality time with loved ones.


    Make Time for Self-Reflection and Personal Growth

    Amid all your duties, it’s important to allocate time for self-reflection and personal development. Start by setting goals for your growth as an individual and ensure you follow your passions.

    Example: Dedicate 15–20 minutes daily to reflect on your day—what you achieved and what you’d like to improve. It can also be helpful to set self-improvement goals, such as learning a new skill or reading one book per month.


    In Conclusion

    Managing a day-to-day schedule as a mom can seem challenging, but with a few effective time-management strategies, it’s possible to balance family responsibilities with personal time. Setting priorities, creating clear routines, leveraging technology, delegating tasks, making time for yourself, and learning to say “no” are just a few ways a busy mom can successfully navigate everyday life. Remember, balance is key, and a little organization effort can make a big difference in your quality of life.

    Children Born on a Solar Eclipse Day: Unique Destinies and Special Qualities That Drive World Change

    Children Born on a Solar Eclipse Day: What Qualities They Will Have and How It Will Affect Their Lives

    The day a solar eclipse occurs is considered by many cultures to be a special moment, rich in mystical and astrological significance. It is also a rare and spectacular phenomenon that has sparked countless questions about its impact on those born on that day. In this article, we explore the qualities children born during a solar eclipse might possess, how this event could influence their lives, and the meaning it might hold for a newborn—using the example of Saturday, March 29, 2025.

    What Is a Solar Eclipse and How Does It Happen?
    A solar eclipse occurs when the Moon passes between the Earth and the Sun, covering it fully or partially. During a total eclipse, the Sun is completely obscured, and the sky darkens, creating an otherworldly “day-night” atmosphere for a few minutes. This event is extremely rare, and the partial eclipse on March 29, 2025 will be visible in many parts of the world. Astrologers, spiritualists, and even scientists are intrigued by its potential influence on those born during it.

    Spiritual and Astrological Significance of Solar Eclipses

    In astrology, a solar eclipse is often associated with major changes, transformations, and important beginnings. It is said to symbolize a moment when cosmic energy brings a “new beginning,” marking a period in which new perspectives and opportunities can arise. Astrologers maintain that individuals born during a solar eclipse are frequently seen as possessing special traits or unusual destinies, influenced by the eclipse’s rare and dramatic nature.

    In general, children born on the day of a solar eclipse might be considered as born under the sign of change and transformation. It is believed that they may lead intense lives, experiencing major shifts and possessing a unique ability to overcome obstacles and turn difficult situations into opportunities.

    What Qualities Will Children Born on a Solar Eclipse Day Have?

    1. Unique Perspective on Life: Children born on the day of a solar eclipse may be characterized by a unique worldview. They might tend to see things from unconventional angles, ask profound questions, and seek truth beyond appearances. This capacity for deep understanding and analysis can contribute to a successful life, though it may also bring internal challenges.
    2. Adaptability and Resilience: A solar eclipse transforms the natural landscape, reflecting the ability of those born on this day to adapt quickly to change. They may be resilient in the face of adversity and capable of finding their way after difficult periods. Through each major life shift, they learn and become stronger.
    3. Magnetic Energy and Charisma: Astrology suggests that individuals born during a solar eclipse can draw attention with a magnetic and charismatic energy. They often emerge as natural leaders or inspirational figures, exerting a powerful impact on those around them.
    4. Special Destiny and Life Mission: It is believed those born under a solar eclipse are destined to make a significant impact in the world. This may manifest in innovative or artistic careers, or even volunteer and humanitarian endeavors. They may feel a strong inner calling and a mission to help or inspire others.
    5. Tendency to Live in “Peaks”: Children born during a solar eclipse may experience life in high-intensity phases, alternating between moments of calm and profound change. Such an existence can bring major achievements as well as periods of crisis or deep personal quests.

    Impact of the Solar Eclipse on Children’s Lives

    1. Major Changes in Personal and Professional Life: Children born on the day of a solar eclipse may undergo major life shifts, just as the eclipse temporarily transforms the sky. These changes can be positive or challenging, but will inevitably bring important life lessons.
    2. Courage to Face Challenges: Those born on such days can learn to navigate periods of uncertainty and adversity. They will face significant obstacles yet develop inner strength to overcome them. This quality will be crucial throughout their lives, helping them stay motivated even in tough times.
    3. Attraction to Spirituality and Truth-Seeking: Many individuals born on a solar eclipse day may develop a deep interest in spirituality or philosophy, driven by an intense desire to understand life’s meaning. They may be drawn to meditation, self-discovery practices, or even scientific research, seeking deeper truths about existence.

    Conclusion

    Children born on a solar eclipse day are considered very special, born under the sign of change, transformation, and the pursuit of profound purpose. Although no scientific evidence confirms that eclipses shape personality or destiny, many believe this cosmic event can have a significant impact on those born during it. Those born on March 29, 2025, under the partial solar eclipse, may experience lives full of extraordinary challenges and achievements, with a unique and deep destiny marked by the power of transformation.

    11 Ingenious Low-Cost Organization Ideas: How to Transform Your Space Without Spending Much

    In a world where modern living often means maximizing small spaces and efficiency, organizing your home or office becomes a priority. Yet many organizing solutions can be expensive. If you’re on a tight budget and want to enhance order and functionality in your space, don’t worry. There are plenty of ingenious ways to organize and transform your home without spending a fortune.

    This article explores 11 clever organization ideas achievable on a small budget. These solutions will not only maximize your space but also add a neat, pleasing, and functional look to your home. We include examples of DIY projects and affordable solutions for every room.

    1. Hanging Shelves from Curtain Rods or Rope

    To save floor space and add an interesting décor element, try hanging shelves. Use a curtain rod or sturdy rope to suspend wooden boards—even recycled wood or old pallets—on the wall. These shelves are perfect for storing books, plants, or decorative items.
    Example: In a small living room or office corner, install hanging shelves and fill them with essentials or decorations. They create a modern vibe and free up floor area.

    2. Storage Boxes from Decorated Cardboard

    One of the simplest and most economical methods to maintain order in any room is using storage boxes. You can transform cardboard boxes into functional and elegant storage solutions. All you need to do is decorate them with colored paper, wallpaper, or fabric. These boxes are ideal for storing toys, books, shoes, or other small items.

    Example: In the bathroom or bedroom, use decorated cardboard boxes to store bedding or personal care products. Place them on shelves or under the bed to save space efficiently.

    3. Using Wicker Baskets for Organization

    Wicker baskets are an elegant and affordable choice for any type of organizing. They’re perfect for storing toys, clothes, or accessories. You can find wicker baskets at budget-friendly prices in home improvement stores or online.

    Example: Use wicker baskets to organize seasonal clothing in your closet or to keep desk items neatly arranged. Wicker baskets add a rustic or natural touch to any room.

    4. Under-Bed Storage: Drawers or Under-Bed Bins

    One of the best underutilized storage spots in a small room is under the bed. You can use storage drawers or plastic bins to organize winter clothes, shoes, or any items you don’t use daily.

    Example: If you have a bed frame with enough clearance, add rolling storage drawers underneath to save considerable space. If drawers aren’t an option, use transparent plastic bins so you can easily see what’s stored.

    5. Door and Corner Organizers

    By using over-the-door organizers, you can maximize space in the kitchen, bathroom, or closet. These solutions are excellent for storing cleaning supplies, towels, or even shoes. Door organizers are budget-friendly and easy to install on the back of any door.

    Example: Install a door organizer inside your closet to store cleaning products or handbags. In the bathroom, use one to hold cosmetics or bath towels.

    6. Desk Organization with Mugs and Office Boxes

    Instead of purchasing an expensive desk with multiple drawers, use old mugs or cardboard boxes to organize pens, pencils, and other office supplies. These are an economical and creative way to keep everything tidy.

    Example: Place a few decorative mugs on your desk to hold writing instruments or colored pencils. These budget-friendly solutions will also add a touch of personality to your workspace.

    7. Building Shelves from Pallets

    If you want to introduce a bit of rustic or industrial style into your home, constructing pallet shelves is an excellent option. Wooden pallets are easy to find and very affordable. You can use them to build wall-mounted shelving, plant stands, or even a small desk.

    Example: In the living room, install pallet shelves to support books or decorative plants. You can also use them in the bathroom for storing towels and personal care items.

    8. Utilizing the Back of Doors

    Another way to save space in any room is by using the back of the door. It can become the perfect spot to hang clothes, bags, hats, or other accessories.

    Example: Install hooks or hanging organizers on the bathroom door for towels and robes. In the bedroom, add hooks for purses or accessories.

    9. Using Jars and Bottles for Organization

    Jars and bottles can be used to store all kinds of items, from jewelry, loose change, and office supplies to kitchen spices. They are inexpensive and extremely useful storage solutions.

    Example: Use small jars to organize jewelry, straws, rubber bands, and other small accessories. In the kitchen, glass jars are perfect for storing cereals, pasta, or spices.

    10. Vertical Organization Systems

    Instead of focusing on horizontal storage, which takes up more space, you can create a vertical organization system using hanging shelves or suspended drawers. These solutions save space and are easy to implement.

    Example: In the bathroom, install hanging shelves above the toilet or on the opposite wall to store personal care products. In the living room, vertical shelves can hold books, toys, or decorative items.

    11. Repurposing Old Furniture

    În loc să investești într-un mobilier nou și scump, poți reutiliza mobilierul vechi pe care îl ai, dându-i o a doua viață. Poți să-l vopsești, să adaugi un nou strInstead of investing in new, expensive furniture, you can repurpose old pieces you already have, giving them a second life. You might paint them, add fresh upholstery, or swap out the doors and handles for a completely new look.

    Example: An old desk can be transformed into a modern workspace with just a bit of paint and new hardware. Likewise, an antique dresser can become a TV stand or a storage cabinet.

    In conclusion, organizing your home doesn’t have to mean big spending. With a little creativity and affordable materials, you can transform any space into a tidy, functional, and pleasant environment. By using these ingenious low-cost organization ideas, you’ll learn how to maximize your space and create a more efficient and harmonious home.

    6 Basic Principles of Women Who Don’t Age: Secrets of Ageless Youth

    In the pursuit of eternal youth, many women aspire to age gracefully, without letting the passage of time leave its mark on them. Over the decades, I have observed women who seem to maintain their youth and vitality far longer than others, even in the face of life’s challenges. What do they do differently? What principles do they embrace? Here are six of the most important principles of women who don’t age, which can be easily applied in everyday life.

    1. Adopt an active and healthy lifestyle

    One of the most important lessons we can learn from women who don’t age is the significance of regular exercise. An active lifestyle helps maintain a healthy body and a clear mind. For example, women who exercise regularly—whether through yoga, Pilates, swimming, or walking—are more likely to stay energetic and look younger. Consistent physical activity improves blood circulation, accelerates metabolism, and prevents the accumulation of body fat, thereby reducing the risk of health issues associated with premature aging.

    Example: Famous women like Jennifer Lopez, who at 50 looks younger than ever, maintain a strict exercise regimen, including strength training and dance, which contributes to a toned body and firm skin.

    2. Skincare: hydration and UV protection

    Hydrated skin that is protected from UV rays is another secret of women who don’t age. Those with radiant skin do not rely solely on genetics but also on a consistent skincare routine. They use high-quality moisturizers that help maintain skin elasticity and prevent the formation of wrinkles. Additionally, protecting the skin from the sun is essential to prevent premature aging. Daily use of a sunscreen (SPF) is crucial to shield the skin from UV damage, one of the primary causes of early aging.

    Example: Actress Halle Berry, known for her flawless skin, follows a skincare routine focused on intense hydration and daily sun protection. She also makes it a habit to drink plenty of water to keep her skin hydrated from within.

    3. Mindfulness and stress management

    Chronic stress negatively impacts both physical and mental health, contributing to premature skin aging and hormonal imbalance. Women who manage to age gracefully know how to regulate their stress levels through meditation, relaxation, and mindfulness practices. These techniques not only maintain mental well-being but also balance hormones, which can reduce signs of aging.

    Example: Women who have practiced yoga throughout their lives, such as Cindy Crawford—known for her daily yoga routine—demonstrate extraordinary flexibility, good muscle tone, and a balanced mental state. Yoga benefits both body and mind, helping to prevent stress and anxiety.

    4. Balanced diet and antioxidants

    Nutrition plays a crucial role in preserving youth. Women who remain youthful and healthy adopt a nutritious diet based on natural foods rich in essential vitamins and minerals. They also include plenty of antioxidant-rich foods in their diet, which protect cells from damage caused by free radicals, thus helping to prevent cellular aging.

    Example: Actress Gwyneth Paltrow is renowned for her diet centered on organic, antioxidant-packed foods such as berries, leafy green vegetables, and chia seeds. Her healthy eating habits play a key role in maintaining a youthful, energetic appearance.

    5. Maintain a positive attitude and surround yourself with a supportive social network

    Another essential principle of women who don’t age is a positive mindset toward life. Those who stay young keep an open and optimistic outlook despite the challenges of aging. They are supported by a strong social network of friends and family who encourage them. Studies have shown that a robust social circle and healthy relationships are crucial for longevity and mental health.

    Example: Oprah Winfrey is an outstanding example of a woman who has preserved her youthful spirit through a positive attitude and a balanced life. She often speaks about the importance of relationships and an open mindset.

    6. Restorative sleep and recovery

    A good night’s sleep is essential for the body’s regeneration. Women who age gracefully recognize the importance of quality sleep and recovery. They establish a regular sleep routine, ensuring they get enough rest to restore energy and allow their skin and body to regenerate.

    Example: Julia Roberts, known for her youthful appearance, places great importance on sleep and relaxation, mentioning in several interviews how restorative sleep plays a vital role in maintaining a healthy body and clear mind.


    In conclusion, women who don’t age and who remain youthful and vibrant embrace simple yet essential principles in their daily lives. They choose an active lifestyle, a nutritious diet, restorative sleep, a positive mindset, and are mindful of stress management. By integrating these principles, any woman can learn to age with grace and preserve her vitality for many years. Each of us can learn from them by adopting these habits, which not only enhance physical appearance but also contribute to a balanced and happy mental state.

    Sweet Home Stories During the Easter Holidays: Traditional Recipes and Delicious Dish Recommendations

    The Easter holidays are a special time, marked not only by religious traditions and moments of reflection but also by a family feast full of delicious dishes. Among the most beloved Easter customs is the preparation of traditional sweets that bring a warm, familiar atmosphere into our homes. These recipes, passed down from generation to generation, are a true culinary treasure, and no matter how trends change, they retain their authentic charm and taste.

    In this article, we will focus on some of the most cherished traditional Easter sweets, as well as a few recommendations for simple yet delicious recipes, perfect for adding a touch of joy and flavor to your Easter celebrations.

    Biscuit “Salami” with Turkish Delight – A Classic Yet Unmistakable Recipe

    The biscuit salami is one of the most loved desserts in Romanian cuisine, perfect for ending a family meal or enjoying as an afternoon sweet. It’s a simple recipe with a delicious taste, customizable by adding ingredients like Turkish delight, nuts, or raisins. In this version, we include Turkish delight to give it extra flavor and texture. Here’s how to prepare this classic dessert, step by step.

    Ingredients:

    • 400 g plain biscuits (e.g., petit beurre or any unsweetened variety)
    • 150 g butter
    • 200 g sugar
    • 2 tbsp cocoa powder
    • 2 tbsp milk
    • 100 g Turkish delight, diced
    • 100 g nuts or hazelnuts (optional)
    • Rum or vanilla extract (to taste)

    Preparation:

    1. Prepare the ingredients:
      • Crush the biscuits in a large bowl (by hand or with a rolling pin in plastic bags).
      • Dice the Turkish delight into small cubes for even distribution.
      • If using nuts, coarsely chop them for added crunch.
    2. Make the cocoa syrup:
      • In a saucepan over low heat, combine butter, sugar, cocoa, and milk. Stir until sugar dissolves and mixture is smooth.
      • Remove from heat, stir in rum or vanilla, and let the syrup cool slightly so it’s warm—not hot—when added to the biscuits.
    3. Mix everything:
      • In a large bowl, combine crushed biscuits, Turkish delight, and nuts.
      • Pour the cocoa syrup over and mix with a wooden spoon or spatula until everything is coated.
    4. Form the salami:
      • Lay out plastic wrap or parchment, place the mixture on it, and shape into a cylinder, pressing gently.
      • Wrap tightly and refrigerate for at least 4 hours (ideally overnight) to set.
    5. Serve:
      • Unwrap and slice into thin rounds. Optionally dust with powdered sugar for an elegant touch.

    Tips:

    • Substitute Turkish delight with candied fruit or chocolate for variety.
    • For a less sweet salami, reduce sugar.
    • Add raisins or shredded coconut for extra texture.


    Cherry Jam and Walnut Tart – A Detailed Recipe

    Cherry Jam and Walnut Tart is an exceptional dessert, with a perfect balance between the tartness of the cherries and the sweetness of the walnuts. This tart is ideal to enjoy alongside a cup of tea or as a dessert after a festive meal. The buttery crust and rich filling are the perfect combination for a classic and delicious treat.

    Here is a complete and detailed recipe for the cherry jam and walnut tart.

    Ingredients for the crust:

    • 250 g all-purpose flour
    • 100 g cold butter (cut into cubes)
    • 2–3 tbsp powdered sugar
    • 1 egg
    • 1 tsp vanilla extract
    • Pinch of salt
    • 2–3 tbsp cold water (if needed)

    Ingredients for the filling:

    • 200 g cherry jam (or canned cherries, drained, if jam is unavailable)
    • 100 g finely chopped walnuts (or hazelnuts)
    • 50 g sugar (if the cherry jam is not sweet enough)
    • 1 tsp vanilla extract (optional, but adds a distinctive flavor)
    • 1 egg (for egg wash)
    • 1 tbsp milk (for egg wash)

    Preparation:

    1. Making the crust:
      • In a large bowl, sift together the flour, powdered sugar, and salt. Mix gently to distribute evenly.
      • Add the cold butter cubes and rub them into the dry ingredients with your fingertips until the mixture resembles coarse crumbs. (You may use a food processor for speed.)
      • Add the egg and vanilla extract, mixing just until combined. If the dough is too dry, add cold water, one tablespoon at a time, until it comes together. Avoid over-kneading to prevent a tough crust.
      • Wrap the dough in plastic wrap and refrigerate for at least 30 minutes. This chilling helps the dough firm up and become easier to work with.
    2. Preparing the filling:
      • In a small bowl, combine the cherry jam, chopped walnuts, and sugar (if needed). For extra aroma, stir in the vanilla extract.
      • If using canned cherries, drain them well and fold them into the walnut mixture.
    3. Assembling the tart:
      • Divide the chilled dough into two portions: a larger piece for the base and a smaller one for the edges. On a floured surface, roll out the larger piece into a thin round, large enough to line a 24 cm tart pan (bottom and sides).
      • Gently press the dough into the pan, trimming any excess from the edges. Use a fork to dock the base to prevent air bubbles during baking.
      • Spread the cherry-walnut filling evenly over the crust.
    4. Preparing the egg wash (optional):
      • Beat the egg with the milk in a small bowl.
      • Using a pastry brush, lightly coat the tart’s edges with this mixture to achieve a beautiful golden glaze.
    5. Baking the tart:
      • Preheat your oven to 180 °C (with fan) or 200 °C (without fan).
      • Bake the tart for 30–40 minutes, until the crust is golden and crisp around the edges and the cherry jam begins to bubble up slightly.
      • After baking, allow the tart to cool completely before slicing to let the filling set perfectly.
    6. Serving:
      • Serve the tart plain or dusted with powdered sugar for an elegant appearance.
      • For an indulgent treat, accompany it with a dollop of whipped cream or a scoop of vanilla ice cream.

    Additional Tips:

    • For a chocolate twist, melt a few squares of dark chocolate and drizzle over the filling before baking.
    • If walnuts aren’t on hand, substitute with hazelnuts or almonds for equally delicious texture.
    • The tart keeps well in the refrigerator for 2–3 days but is best enjoyed when freshly made.

    This cherry jam and walnut tart is ideal for any festive table, offering not only a wonderful taste but also an extraordinary aroma thanks to the cherry-walnut combination. With its tender crust and juicy filling, it will surely become a family favorite!

    Semolina Pasca (Flourless)

    Pasca is a traditional Easter dessert, and in this flourless variant, pasca becomes more easily digestible while retaining its creamy texture and authentic taste. Semolina is the key ingredient that replaces flour, providing the pasca with a delicate consistency, perfect for the holidays.

    Ingredients:

    For the filling:

    • 500 g well-drained cottage cheese
    • 150 g semolina
    • 200 ml milk
    • 200 g sugar
    • 4 eggs
    • 1 tsp vanilla extract
    • Zest of 1 lemon
    • 50 g raisins (optional, if you enjoy dried fruit)
    • 1 tsp baking powder (to help aerate the mixture)

    For the dough (base and edges):

    • 100 g butter
    • 100 g sugar
    • 1 egg
    • 1 tsp vanilla extract
    • Pinch of salt
    • 2–3 tbsp sour cream (for a more tender dough)
    • 2 tbsp cold water (if needed to bind the dough)

    Preparation:

    1. Making the dough (base and edges):

    1. In a large bowl, cream the softened butter with the sugar and a pinch of salt until light and fluffy.
    2. Add the egg and vanilla extract, mixing well.
    3. Gradually stir in the sour cream until the mixture is smooth.
    4. If the dough is too dry and does not come together, add cold water one tablespoon at a time until it forms a workable paste.
    5. Wrap the dough in plastic wrap and refrigerate for 15–20 minutes to firm up before use.

    2. Preparing the semolina filling:

    1. In a saucepan, bring the milk to a boil. Gradually add the semolina, stirring continuously to prevent lumps. Cook until all the liquid is absorbed and the mixture becomes creamy. Let it cool completely.
    2. In a large bowl, combine the well-drained cottage cheese with the cooled semolina, stirring to blend.
    3. Beat the eggs with the sugar, then fold into the cheese and semolina mixture until all ingredients are fully incorporated.
    4. Stir in the vanilla extract, lemon zest, and raisins (or other optional additions such as candied fruit or nuts). Mix until homogeneous.
    5. Gently fold in the baking powder.

    3. Assembling the pasca:

    1. Preheat your oven to 180 °C (fan) or 200 °C (conventional).
    2. Grease a tart or baking pan with butter and line it with parchment paper to prevent sticking.
    3. Remove the dough from the refrigerator and roll it out on a floured surface (or between sheets of parchment) into a sheet large enough to cover the bottom and sides of the pan.
    4. Gently press the dough into the pan, creating a border by pressing lightly along the edges. Dock the bottom with a fork to prevent air bubbles during baking.
    5. Pour the cheese and semolina filling into the prepared crust, smoothing the top.

    4. Baking and finishing:

    1. Bake the pasca in the preheated oven for 40–50 minutes, or until the top is golden and the center is set. Test for doneness by inserting a skewer into the middle—if it comes out clean, the pasca is baked.
    2. Allow the pasca to cool completely before slicing. For best results, chill in the refrigerator for several hours or overnight so the filling firms up and holds its shape.

    Additional Tips:

    • For a fluffier pasca, you can add a second teaspoon of baking powder to the filling to increase aeration.
    • Substitute raisins with candied fruit for a more varied flavor.
    • To create a lighter version, replace the sugar with natural sweeteners and the sour cream with Greek yogurt or plain yogurt.

    This flourless semolina pasca is simple to prepare yet full of tradition and flavor. With its fine texture and delicate filling, it is perfect for Easter celebrations or any special occasion.

    Traditional Homemade Chocolate Recipe

    Homemade chocolate is a delicious dessert that can bring back childhood memories. It’s a simple recipe with an intense flavor and a smooth texture, perfect for serving at festive tables or enjoying as a treat at any time of day. With accessible ingredients and a short preparation time, homemade chocolate is an ideal choice for those who want to make a dessert at home without using industrial ingredients.

    Here’s how you can prepare homemade chocolate in the simplest and clearest way.

    Ingredients:

    • 200 g butter
    • 200 g sugar
    • 100 ml milk
    • 250 g high-quality cocoa powder
    • 200 g nuts (optional; you can use hazelnuts or almonds)
    • 1 tsp vanilla extract (optional)
    • Pinch of salt (to enhance the intense cocoa aroma)

    Preparation:

    1. Preparing the ingredients:

    • Ensure the butter is at room temperature, making it easier to melt and mix.
    • Weigh and prepare all ingredients. If adding nuts or other dried fruits, chop them into small pieces.
    • Sifting the cocoa powder helps prevent lumps—sift it into a separate bowl before use.

    2. Melting the butter and creating the base mixture:

    • In a large saucepan, combine butter and sugar. Melt over medium heat, stirring frequently until the butter is melted and the sugar is dissolved.
    • Once the sugar has fully dissolved and the butter is melted, add the milk. Stir well until the milk is fully incorporated and the mixture is smooth and uniform.
    • Remove the pan from heat and gradually whisk in the sifted cocoa powder, stirring continuously to avoid lumps. The mixture should thicken and become dense.

    3. Adding nuts and other flavorings:

    • Stir in the chopped nuts (or other dried fruits) to distribute them evenly throughout the chocolate mixture.
    • If desired, add vanilla extract and a pinch of salt to highlight the chocolate’s deep, rich flavor.
    • Continue stirring until the mixture is homogeneous and all ingredients are fully combined.

    4. Molding and chilling:

    • Prepare a small 20×20 cm pan or a silicone mold lined with parchment paper to prevent sticking. If you lack parchment, lightly grease the pan with butter.
    • Pour the chocolate mixture into the mold and level it evenly with a spatula. Ensure the mixture is spread uniformly.
    • Let the chocolate cool to room temperature, then refrigerate for at least 3–4 hours—ideally overnight. This chilling step is essential for the chocolate to set and achieve a firm consistency.

    5. Serving:

    • Once the chocolate has fully set and hardened, remove it from the mold. If you used a silicone mold, demolding will be very easy.
    • Slice the chocolate into squares or desired shapes. For cleaner cuts, use a hot knife (dip it in warm water before slicing).

    6. Storage:

    • Store homemade chocolate in an airtight container in the refrigerator for 1–2 weeks. Keeping it chilled is important, as it contains no preservatives and can soften or melt at room temperature.

    Tips and Variations:

    • For a silkier chocolate: Add 1 tsp of melted cocoa butter into the mixture to give it an even smoother texture.
    • For a sweeter chocolate: Increase the sugar amount, but be cautious—too much sweetness can overpower the intense cocoa taste.
    • Ingredient swaps: Replace nuts with hazelnuts, almonds, or even raisins for a different flavor. You can also stir in coconut flakes for an interesting texture.
    • Dairy-free version: For a vegan option, substitute milk with almond, coconut, or other plant-based milk, and replace butter with margarine or vegan butter.

    This homemade chocolate recipe is easy to prepare, yielding a smooth, creamy chocolate with an intense cocoa flavor. Perfect for serving as a dessert at festive gatherings or gifting to loved ones!

    Marius Cake Recipe

    Marius Cake is a delicious dessert, featuring a fluffy sponge, a layer of fine cream, and a chocolate glaze. It’s an elegant and refined cake that can become the perfect dessert for any special occasion. Here’s how you can prepare it, step by step, to achieve the best result.


    Ingredients:

    For the sponge:

    • 5 eggs
    • 150 g sugar
    • 100 ml water
    • 200 g flour
    • 1 packet baking powder
    • 2 tbsp cocoa powder
    • 50 g melted butter
    • 1 tsp vanilla extract

    For the cream:

    • 400 ml heavy cream (36% fat)
    • 200 g powdered sugar
    • 200 g white chocolate (or milk chocolate for a sweeter taste)
    • 1 packet gelatin (or 10 g gelatin granules)
    • 100 ml water

    For the chocolate glaze:

    • 100 g dark chocolate
    • 50 ml heavy cream
    • 2 tbsp powdered sugar

    1. Preparing the sponge:

    1. Preheat the oven to 180 °C. Grease a 24 cm round cake pan with butter and line it with parchment paper.
    2. In a large bowl, beat the eggs with the sugar using a mixer until they become foamy and increase in volume.
    3. In a small saucepan, bring the water to a boil. Once boiling, add a few tablespoons of sugar and stir until it dissolves completely.
    4. In another bowl, sift together the flour, baking powder, and cocoa. Gradually fold these dry ingredients into the egg mixture, alternating with the hot sugar water—always adding the liquid little by little.
    5. Stir in the melted butter and vanilla extract with a spatula until fully incorporated.
    6. Pour the batter into the prepared pan and level the surface with a spatula. Bake for 25–30 minutes, or until a skewer inserted into the center comes out clean.
    7. Allow the sponge to cool completely before removing it from the pan and slicing it into two or three layers.

    2. Preparing the cream:

    1. Soak the gelatin in 100 ml of cold water for 10 minutes. Then, gently warm (do not boil) until fully dissolved.
    2. Heat the heavy cream in a saucepan (without bringing it to a boil), then add the chopped white chocolate. Stir until the chocolate melts completely and the mixture is smooth.
    3. Stir the dissolved gelatin into the white chocolate cream until well combined.
    4. Let the cream cool slightly, then refrigerate for 15–20 minutes to firm up a bit. After chilling, add the powdered sugar and whip with a mixer until the cream becomes fluffy and holds a firm consistency.
    5. For a lighter texture, you may fold in a little whipped cream into the white chocolate mixture.

    3. Assembling the cake:

    1. Slice the cooled sponge into 2 or 3 layers, depending on how thick you want the cream layers.
    2. Place the first layer of sponge on a serving platter and spread half of the white chocolate cream over it.
    3. Add the second sponge layer and top with the remaining cream. If you have three layers, repeat accordingly.
    4. Cover the cake with the final sponge layer and refrigerate for at least 2 hours to allow the cream to set.

    4. Preparing the chocolate glaze:

    1. In a small saucepan, heat the heavy cream and powdered sugar until they reach a boil.
    2. Once boiling, add the chopped dark chocolate and stir until it melts completely and the glaze becomes shiny.
    3. Let the glaze cool slightly, then pour it evenly over the chilled cake.

    5. Serving:

    After the glaze has set slightly, slice the cake and serve it cold. You can decorate with fresh fruit, whipped cream, or chocolate shavings according to your preference.


    Additional Tips:

    • For a fruity note, place fresh or candied fruit (such as raspberries or strawberries) between the cream layers.
    • For an even lighter texture, replace the white chocolate cream with a mascarpone cheese cream.
    • To intensify the flavor, add a splash of rum or coffee extract to the white chocolate cream.

    Marius Cake is a delightful dessert with a delicate taste and soft texture that will surely become a favorite of everyone who tries it!

    Cocoa Loaf Cake Recipe

    The cocoa loaf cake is a classic dessert, simple to prepare and very tasty, perfect for any occasion. With a fluffy texture and an intense cocoa flavor, this loaf can be served both at breakfast and as a dessert at a family meal. Follow the detailed steps below to prepare the most delicious cocoa loaf cake!

    Ingredients:

    For the batter:

    • 3 eggs
    • 200 g sugar
    • 1 packet baking powder (10 g)
    • 200 g flour
    • 50 g high-quality cocoa powder
    • 100 ml milk
    • 100 g melted butter (or oil)
    • 1 tsp vanilla extract
    • Pinch of salt

    For the chocolate glaze (optional):

    • 100 g dark chocolate (or milk chocolate, depending on preference)
    • 50 ml heavy cream

    1. Preparing the batter:

    1. Preheat the oven to 180 °C (with fan) or 200 °C (without fan). Grease a loaf pan (about 25 cm long) with butter and dust it with flour, or line it with parchment paper to prevent sticking.
    2. In a large bowl, beat the eggs with the sugar using a mixer until you obtain a spongy cream that has doubled in volume—this can take about 3–5 minutes.
    3. Add the milk and melted butter (or oil) to the egg and sugar mixture. Continue mixing until fully incorporated.
    4. In another bowl, sift together the flour, cocoa powder, baking powder, and salt. Thoroughly mix these dry ingredients to prevent lumps.
    5. Gradually fold the dry ingredient mixture into the wet mixture, stirring gently with a spatula or on low mixer speed, so as not to create lumps. Mix until you obtain a smooth, uniform batter.
    6. Stir in the vanilla extract once more to distribute it evenly.

    2. Baking the loaf:

    1. Pour the batter into the prepared loaf pan. Level the surface gently with a spatula to ensure an even top.
    2. Place the pan in the preheated oven and bake for approximately 40–45 minutes. To check doneness, insert a skewer into the center—if it comes out clean, the cake is baked.
    3. For an even fluffier outcome, check the loaf after 30 minutes and, if the top is browning too quickly, cover it with aluminum foil.

    3. Preparing the glaze (optional):

    1. In a small saucepan, combine the chopped chocolate with the heavy cream. Heat over low heat, stirring continuously, until the chocolate is fully melted and the glaze is shiny and smooth.
    2. Allow the glaze to cool slightly before pouring it over the cooled loaf.

    4. Assembling and serving:

    1. After the loaf has cooled completely, pour the chocolate glaze over the top, using a spoon or knife to spread it evenly.
    2. Let the glaze set for a few minutes before slicing the cake into pieces.
    3. Serve the cocoa loaf cake alongside a cup of tea or coffee.

    Additional Tips:

    • For added aroma, you can add a few drops of rum extract or a pinch of cinnamon to the batter.
    • For a softer crumb, replace part of the butter with yogurt or sour cream for an extra tender bite.
    • Fruit variation: Stir chunks of chocolate or candied fruit (e.g., raspberries, blueberries, or bananas) into the batter for a more varied flavor.
    • Sugar-free option: To make this loaf more diet-friendly, replace the sugar with natural sweeteners (such as stevia or xylitol).

    This cocoa loaf cake is a classic dessert that’s easy to make and extremely delicious, perfect for brightening up any family meal or enjoying as a snack. Fluffy, aromatic, and boasting an intense cocoa flavor, it will surely become a favorite for everyone!

    Carmen Cake Recipe

    Carmen Cake is a delicious and refined dessert, perfect for festive tables or any special occasion. It features a tender crust with a distinct flavor, an apricot jam and walnut cream, and a final glaze that adds a crisp texture and a delicate taste. Here’s how to prepare this cake step by step, with all the necessary details.

    Ingredients:

    For the layers:

    • 250 g Unirea Original margarine
    • 150 g powdered sugar
    • 1 tsp ammonium bicarbonate, neutralized with lemon (to help the crust become light and fluffy)
    • 4 egg yolks
    • 500 g flour
    • 1–2 tbsp sour cream (to aid in kneading the dough)

    For the cream:

    • 100 ml milk
    • 150 g Unirea margarine for creams
    • 300 g apricot jam (or another sweet jam, to taste)
    • 1 cup ground walnuts (about 100 g)
    • 2 tbsp cocoa powder (to add a hint of chocolate)
    • Zest of one lemon (for extra aroma)

    For decoration:

    • 4 egg whites
    • 200 g granulated sugar
    • 50 g dark chocolate (for grating)

    Preparation time: 90 minutes
    Difficulty: Medium


    1. Preparing the layers:

    1. In a large bowl, combine 250 g margarine and 150 g powdered sugar. Mix until the margarine softens and the sugar dissolves.
    2. Add the neutralized ammonium bicarbonate; this will help achieve a light, fluffy crust.
    3. Incorporate the 4 egg yolks and mix until homogeneous.
    4. Gradually add the 500 g flour, stirring continuously. You may need to add 1–2 tbsp sour cream to help the dough come together. The dough should be soft but not sticky.
    5. Knead the dough for 5–10 minutes until smooth and elastic. If it’s too stiff, add a bit more sour cream—but not too much, or the dough may become too soft.
    6. Divide the dough into 3 equal portions and roll each out on a floured surface.
    7. Bake each sheet separately on a 20×30 cm baking tray at 180 °C (preheated oven) for about 10–12 minutes, or until the edges are lightly golden.
    8. Once baked, let the layers cool completely before preparing the cream.

    2. Preparing the cream:

    1. In a small saucepan over low heat, warm 100 ml milk. When it’s hot, add 150 g margarine for creams and stir until fully melted.
    2. Stir in 300 g apricot jam (or jam of choice) until smooth. If the jam is too thick, add a splash of milk to reach a creamy consistency.
    3. Add 1 cup ground walnuts and 2 tbsp cocoa powder, stirring to create a thick, uniform cream.
    4. Grate the zest of one lemon into the cream for a fresh, aromatic note. Mix well and let the cream cool slightly before layering.

    3. Assembling the cake:

    1. Place the first baked layer on a serving platter or in a serving dish.
    2. Spread half of the apricot-jam-and-walnut cream evenly over the first layer.
    3. Place the second layer on top and cover it with the remaining cream.
    4. Top with the final layer and press gently to secure all layers.

    4. Decorating the cake:

    1. Beat the 4 egg whites with 200 g sugar until you obtain stiff, glossy peaks.
    2. In a small saucepan or microwave, melt 50 g dark chocolate over a bain-marie.
    3. Spread the meringue uniformly over the top layer of the cake.
    4. Drizzle the melted chocolate over the meringue and let the cake cool completely.

    5. Serving:

    Allow the cake to cool fully at room temperature or in the refrigerator for a few hours so the cream sets and you achieve a perfect texture. Cut into small pieces and serve with a cup of tea or coffee.


    Additional Tips:

    • Storage: This cake keeps very well in the refrigerator for several days, often tasting even better the next day.
    • Fruit variation: For a more intense fruit flavor, swap the apricot jam for berry or plum jam.
    • Extra decoration: Sprinkle the cake with toasted nuts or coconut flakes for a more attractive presentation and additional flavor.

    Carmen Cake is a refined dessert with multiple textures and flavors that will surely impress any guest!

    Figaro Cake Recipe

    Figaro Cake is a classic dessert that combines the sweet taste of plum jam with the crunchy texture of walnuts and the tender, buttery crust. In this version, we replace margarine with butter for a richer and more delicate flavor. Here’s how to prepare this cake step by step.

    Ingredients:

    For the dough:

    • 250 g butter (instead of Unirea Original margarine)
    • 200 g granulated sugar
    • 3 egg yolks
    • 500 g flour
    • 1 packet baking powder (10 g)
    • 1 tsp vanilla extract
    • 1 tsp rum extract (optional, but adds a distinctive aroma)

    For the cream:

    • 3 egg whites
    • 400 g plum jam (or other preferred jam)
    • 150 g ground walnuts
    • 1 tsp rum extract

    Preparation time: 30 minutes
    Difficulty: Medium


    1. Preparing the dough:

    1. In a large bowl, place 250 g room-temperature butter and 200 g sugar. Mix well with a mixer or spatula until the butter is soft and the sugar dissolves.
    2. Add the 3 egg yolks and stir until fully incorporated.
    3. In another bowl, sift together the flour and baking powder. Add the vanilla and rum extracts, mixing the dry ingredients to blend them evenly.
    4. Gradually fold the flour mixture into the butter-sugar yolk mixture, stirring by hand or with a spatula until you obtain a crumbly dough.
    5. Divide the dough into three equal parts. Two parts will form the base and top of the cake, and the remaining third will be used to cover the cream.

    2. Preparing the cream:

    1. Beat the 3 egg whites with a pinch of salt until stiff peaks form.
    2. Gently fold the 400 g plum jam into the beaten egg whites. For extra aroma, you can add a bit of rum extract.
    3. Stir in the 150 g ground walnuts until you have a uniform cream.

    3. Assembling the cake:

    1. Line a 20×30 cm baking tray with parchment paper or grease it with butter and dust with flour.
    2. Spread two-thirds of the dough evenly over the bottom of the tray—this will be the cake’s base.
    3. Spoon the plum-walnut cream over the dough layer and spread it uniformly.
    4. Grate the remaining third of the dough over the cream layer, covering the filling completely.

    4. Baking the cake:

    1. Preheat the oven to 180 °C (fan) or 200 °C (static).
    2. Bake the cake for 25–30 minutes, or until the top dough turns golden and crisp.
    3. Check doneness with a skewer—if it comes out clean, the cake is ready.

    5. Cooling and serving:

    1. Let the cake cool completely in the tray before cutting into portions.
    2. Optionally dust with powdered sugar once fully cooled for an elegant finish.
    3. Serve the cake cold, alongside a cup of tea or coffee for a perfect treat.

    Additional Tips:

    • For an intensified flavor, add a dash of rum or almond extract to the jam cream.
    • If you don’t have plum jam, substitute with sour cherry or berry jam for a different aroma.
    • For extra decoration, sprinkle toasted almond flakes or more ground walnuts over the top.

    Figaro Cake is a delightful dessert, with the perfect combination of tender dough, plum-jam cream, and a crunchy topping. It’s an excellent choice for family gatherings or any special occasion!

    Pufișor Cake Recipe

    Pufișor Cake is a refined dessert, featuring a fluffy sponge, a delicate cream, and a layer of crunchy meringue. To make this recipe healthier, we replace margarine with butter. Here are the detailed steps to prepare this cake, step by step.

    Ingredients:

    For the sponge:

    • 150 g butter (instead of margarine)
    • 1 tbsp cocoa powder
    • 50 g chocolate (preferably dark)
    • 100 g flour
    • 200 ml milk
    • 1 packet baking powder (10 g)
    • 150 g powdered sugar
    • 250 g granulated sugar
    • 2 packets vanilla sugar
    • Pinch of salt
    • 2 tbsp vinegar
    • Juice of 1 lemon
    • 50 g couverture chocolate
    • 10 eggs (for sponge and meringue)

    For the cream:

    • 150 g butter (instead of margarine)
    • 150 g powdered sugar
    • 200 ml milk
    • 4 egg yolks
    • 1 packet vanilla sugar
    • 1 tbsp flour
    • Juice of 1 lemon

    For the meringue:

    • 4 egg whites
    • 100 g granulated sugar
    • 1 packet vanilla sugar

    For the glaze:

    • 50 g couverture chocolate

    Preparation time: 60 minutes
    Difficulty: Medium


    1. Preparing the sponge:

    1. In a large bowl, cream 250 g granulated sugar with the yolks of 6 eggs until you obtain a creamy, light mixture.
    2. Add 1 tbsp cocoa powder, the baking powder, the vinegar, and a pinch of salt. Stir gently to combine.
    3. Gradually fold in the flour with a spatula or mixer on low speed.
    4. In a small saucepan, heat the milk with 50 g chocolate, stirring until the chocolate melts completely.
    5. Incorporate the warm chocolate milk into the egg mixture, stirring constantly.
    6. In another bowl, beat the 6 egg whites until stiff peaks form. Gently fold them into the batter, mixing from bottom to top to preserve the airy texture.
    7. Line a baking tray with parchment paper and lightly grease it with butter. Pour in the batter and bake at 175 °C for about 30 minutes, or until a skewer comes out clean.

    2. Preparing the cream:

    1. In a small saucepan, heat the milk and add 4 egg yolks, 1 packet vanilla sugar, and 1 tbsp flour. Stir continuously over low heat until the cream thickens.
    2. Remove from heat and let cool. Meanwhile, beat 150 g butter with the powdered sugar until you obtain a smooth, creamy frosting.
    3. Once the custard has cooled, gradually incorporate it into the butter mixture. Mix well and add lemon juice for a fresh, balanced flavor.

    3. Preparing the meringue:

    1. Beat the 4 egg whites until stiff peaks form. Add 100 g granulated sugar and 1 packet vanilla sugar, continuing to beat until the meringue is glossy and firm.
    2. Place the meringue over a bain-marie and continue beating for another 5–10 minutes, until the sugar is fully dissolved and the meringue is dense.

    4. Assembling the cake:

    1. Once the sponge has cooled completely, slice it into two or three layers.
    2. Spread the cream evenly over the first layer.
    3. Place the second sponge layer on top and cover it with the meringue, distributing it uniformly.
    4. Melt 50 g couverture chocolate over a bain-marie and use it to decorate the meringue with thin chocolate drizzles.

    5. Final bake and serving:

    1. Return the assembled cake to the preheated oven at 180 °C for about 10–15 minutes, or until the meringue is slightly browned and crisp.
    2. Let the cake cool completely before slicing—this step is crucial to allow the meringue to set and maintain the cake’s shape.
    3. Cut into small portions and serve chilled, alongside a cup of tea or coffee.

    Additional Tips:

    • Intensify the chocolate flavor by adding a few tablespoons of cocoa powder to the custard cream.
    • For extra decoration, sprinkle the meringue with chopped nuts or chocolate flakes.

    Pufișor Cake is a sophisticated dessert, offering a delightful contrast between the puffy sponge, the delicate cream, and the crunchy meringue. It will add an elegant touch to any meal and is sure to impress all your guests!

    Traditional Cozonac with Walnuts, Cocoa, and Turkish Delight Recipe

    Cozonac with walnuts, cocoa, and Turkish delight is a classic holiday dessert that delivers a wonderful flavor and a fluffy texture. This traditional Romanian recipe combines a tender dough with a rich walnut-cocoa filling, while the Turkish delight adds extra aroma and color. Here are the detailed steps to prepare the best cozonac.


    Ingredients:

    For the dough:

    • 1 kg flour (preferably type 000)
    • 250 ml warm milk
    • 200 g sugar
    • 150 g butter (or margarine, if you prefer)
    • 5 eggs (4 yolks + 1 whole egg for brushing)
    • 50 g fresh yeast
    • 1 tsp vanilla extract
    • 1 tsp grated lemon zest
    • Pinch of salt
    • 50 ml oil (for brushing)
    • 100 ml warm water (to dissolve the yeast)
    • 2 tbsp sour cream (for a more tender dough)

    For the filling:

    • 300 g ground walnuts
    • 100 g sugar
    • 3 tbsp cocoa powder
    • 150 ml milk
    • 100 g Turkish delight, diced
    • 1 tsp rum extract (optional)

    For brushing before baking:

    • 1 egg
    • 2 tbsp milk

    1. Preparing the dough:

    1. In a small bowl, dissolve the yeast and 1 tsp sugar in the 100 ml warm water. Let it activate for 10–15 minutes until foamy.
    2. In a large bowl, combine the flour, 200 g sugar, salt, and lemon zest. Make a well in the center and add the egg yolks, whole egg, vanilla, activated yeast, and warm milk. Mix gradually, integrating the flour into the liquids.
    3. Once the dough starts to come together, add the melted (and slightly cooled) butter and knead until smooth and elastic.
    4. Continue kneading for 10–15 minutes, adding oil gradually to make the dough finer. If it’s too sticky, add a little flour, but avoid over-adding.
    5. Cover the bowl with a clean towel and let the dough rise in a warm place for 1–2 hours, until it doubles in volume.

    2. Preparing the filling:

    1. In a saucepan over low heat, combine 150 ml milk and 100 g sugar. Cook, stirring, until the sugar dissolves.
    2. Stir in the 3 tbsp cocoa powder to form a smooth cocoa paste. Let it cool slightly.
    3. Add the ground walnuts and rum extract, mixing until well combined.
    4. Fold in the diced Turkish delight.

    3. Assembling the cozonac:

    1. After the dough has risen, divide it into two equal parts.
    2. Roll out the first portion on a floured surface into a rectangle.
    3. Spread half of the walnut-cocoa-Turkish delight filling onto the dough, leaving a few centimeters clear at the edges.
    4. Roll the dough into a log; if too long, cut it in two.
    5. Place the roll into a greased cozonac pan, tucking the ends under to seal. Repeat with the second dough portion and filling.
    6. Cover the pans with a towel and let the cozonaci rise for another 30–40 minutes.

    4. Baking the cozonac:

    1. Preheat the oven to 180 °C.
    2. Beat the egg with 2 tbsp milk and brush the risen cozonaci to give a beautiful glossy crust.
    3. Bake for 40–50 minutes, until golden and passing the skewer test (it should come out clean).
    4. If they brown too quickly, tent with foil for the last 10 minutes.

    5. Cooling and serving:

    1. Once baked, let the cozonaci cool in their pans for 10–15 minutes, then remove and cool completely on a rack.
    2. Slice and serve with a cup of tea or coffee.

    Additional Tips:

    • For extra fragrance, add a pinch of cinnamon or orange extract to the filling.
    • If you prefer no Turkish delight, substitute with candied fruit or small chocolate pieces.
    • To enrich the filling further, stir in raisins or coconut flakes.

    This walnut, cocoa, and Turkish delight cozonac is perfect for the holidays, with its fluffy texture and incredible aroma. It’s sure to become a family favorite!

    Bestseller #1
    • Set of 5 Mix Cake Tins
    • High Quality from Ariana Homeware
    • Comes in Lovely Box
    • Approx. Sizes of Cake Tins: 20 x 24 x 25 x 35 x 40 cm
    • Non-Stick Coating
    Bestseller #2
    • NON STICK BAKING TRAYS – These baking trays are finished with a non-stick coating which means it’s easy to clean once yo…
    • DISHWASHER SAFE – These oven baking trays are dishwasher safe; allowing you to make the job of cleaning much easier and …
    • DIMENSIONS – 32cm x 22cm x 1cm – these are approximate external measurements from edge to edge. They are slim in design …
    • OVEN SAFE TEMPERATURES – This pack of oven trays are suitable for use up to 230C / 450F / Gas Mark 8.
    • VARIETY OF USES – These baking trays can be used around the kitchen, for instance as a chip pan, small roasting tin and …
    Bestseller #3
    • Specification – You will get 3 exquisite nonstick baking pans, S size: 8″ L x 6″ W x 1.7″ H(22cm L x 17cm W x 4.5cm H,),…
    • Superior Nonstick Technology – Our deep baking pan set coated a premium nonstick coating layer and protective layer, it …
    • Stackable and Easy to Clean – Our cookie baking is flexible and stackable, the nonstick surface is easy to clean. Hand w…
    • Wide Usage Baking Pans – Our deep baking pans nonstick set could be widely used for savory baking, sheet cakes, cookies,…
    • Durable Baking Pan – Dicunoy baking pan is made of heavy gauge and durable carbon steel material, warp-resistant, nonsti…
    Bestseller #4
    • Pack of 2 rectangular bread pans, ideal for baking bread, meatloaf, etc
    • Durable carbon steel ensures quick and even heat distribution for even browning of baked goods
    • Non-stick coating prevents food from sticking; oven-safe up to 220°C
    • Hand wash recommended; part of Amazon Basics -Series of non-stick coated carbon steel baking trays
    • Internal dimensions 24 x 12.7 x 6.8 cm and exterior 27 x 15 x 7 cm.
    • Never use under a grill
    • Made without PFAS
    Bestseller #5
    • VIBRANT TEAL EXTERIOR – The Prestige x Nadiya bakeware range comes with a beautiful teal non stick exterior, with roasti…
    • NON STICK SURFACE – This roasting tin has a black non stick PFOA-free interior with a textured raised pattern surface to…
    • HEAVY GAUGE STEEL – Made from heavy gauge steel that’s durable yet lightweight and finished with rolled edges for anti w…
    • DISHWASHER AND OVEN SAFE – The high quality non stick surface is easy cleaning and dishwasher safe. This square baking t…
    • 10 YEAR GUARANTEE – Quality that’s built to last. Such is Prestige confidence in this durable baking tray, it comes with…
    Bestseller #6
    • ✅ Everything You Need to Bake Cakes and Cheesecakes : RFAQK baking tins non stick brings everything you need for baking …
    • ✅ Ultimate Springform Round Cake Tin for Multipurpose Baking: This cake baking set for baking includes 3 Springform Cake…
    • ✅ Easy to Use; Non-Stick & Leak-proof: Even if you’re a beginner or pro your struggle with loose bottom cake tin leaking…
    • ✅ Range of Premium Cake Decorating Kit : Once baked, cake decorating is the next important step in your cake-mastering j…
    • ✅ Love from One Baker to Another: All the cake pans and tools included are BPA-free and tried-and-tested under different…
    Bestseller #7
    • 👍【BAKING TRAY SET】The package Include 4 pcs baking trays for oven non stick, 3 different sizes meet your different needs…
    • 👍【HIGH QUALITY】The oven tray non stick made of non stick carbon steel, strong and sturdy, 100% PFOA free, non-toxic and …
    • 👍【HIGH TEMPERATURE RESISTANCE】The maximum heat-resistant temperature of baking tray is up to 220℃, can be used long time…
    • 👍【WIDE APPLICATION】The non stick baking tray can be used baking beef, chicken, pork, grilled fish, vegetables, biscuits,…
    • 👍【AFTER-SALES SERVICE】JMIATRY brand is very mature and loved by many people, we adhere to the attitude of quality first….
    Bestseller #8
    • Dimensions: 26cm Length, 14.5cm Width, 6cm Depth Superior Non-Stick Coating: Our 2lb loaf pan features an advanced non-s…
    • Heavy-Duty Construction: Made from high-quality, durable carbon steel, this loaf pan offers exceptional heat conductivit…
    • Perfect Size: With a 2lb capacity, this loaf pan is ideal for baking a variety of breads, cakes, and meatloaf, making it…
    • Easy to Clean: The non-stick surface makes cleanup a breeze. Simply hand wash with warm, soapy water or place it in the …
    • BPA-Free and Safe: Our loaf pan is free from harmful chemicals, ensuring your baked goods are safe and healthy for you a…
    • Ergonomic Design: Features wide, flat handles for a secure grip, making it easy to transfer your creations in and out of…
    Bestseller #9
    • KITCHEN ESSENTIAL: This Chef Aid Square Cake Pan is a versatile and multi-use pan and ideal for baking all styles of cak…
    • NON-STICK: This Chef Aid Square Cake Pan comes with high grade Goldflon non-stick coating for effortless quick and easy …
    • FAMILY SIZED: With internal measurements of 20 x 20 cm (8 x 8 Inch) this baking tin will serve the Family with your chos…
    • QUALITY MATERIALS: This baking tin is made of high-quality carbon steel making it very durable and ideal for everyday us…
    • CHEF AID: The Chef Aid non-stick cookware range is a well-loved and very popular range of 25 products that caters for ev…
    Bestseller #10
    • ONE PAN THAT DOES IT ALL: with this square baking pan, you can do everything from baking yummy traybakes to roasting suc…
    • UST RIGHT FOR 2 PERSON ROASTS: at 20 x 20 x 5 cm, there’s room to roast small meat joints or poultry with veggies
    • NON STICK COATING: this roasting tin releases food quickly for easy clean-ups, and is BPA, PTFE and PFOA free
    • RECIPE IDEAS: use it for savoury dinner time bakes, like creamy lasagne, or quick chocolate sponges for those ‘cake-atta…
    • TRUSTED SINCE 1850: another piece of high quality everyday bakeware from KitchenCraft, it’s dishwasher safe and has a 5 …

    Splinuta (Solidago virga-aurea): Complete Guide to Its Benefits and Uses


    Introduction to Splinuta

    Splinuta, scientifically known as Solidago virga-aurea, is a perennial herbaceous plant valued throughout history in both traditional medicine and folklore. Native to Europe’s temperate regions, this plant has long been used in various natural remedies due to its remarkable therapeutic properties. Over time, splinuta has gained popularity for its beneficial effects on urinary and respiratory conditions.

    Botanical Description of Splinuta
    Belonging to the Asteraceae family, splinuta grows erect stems up to 1.5 meters tall. Its lanceolate leaves are a deep green with serrated edges. Bright yellow flowers, grouped in dense inflorescences, appear in late summer to early autumn, attracting bees and butterflies. Splinuta thrives in well-drained, nutrient-rich soils and tolerates a range of light conditions from full sun to partial shade.


    Therapeutic Benefits of Splinuta

    Splinuta is renowned for its active compounds, including flavonoids and saponins. Key effects include:

    • Anti-inflammatory: Effective in reducing inflammation, especially in respiratory conditions like asthma.
    • Diuretic: Promotes toxin elimination and supports urinary tract health, useful for urinary infections.
    • Antioxidant: Protects cells from oxidative stress, contributing to overall wellness.

    Recent studies confirm splinuta’s efficacy in alleviating urinary infection symptoms and respiratory issues.


    Methods of Using Splinuta

    SSplinuta can be used in various forms, each offering its own advantages. Among the most popular methods of usage are:

    Infusions: Add one tablespoon of dried flowers to a cup of hot water and let steep for 10–15 minutes. This is an effective diuretic and anti-inflammatory remedy.

    Below are several recipes for Solidago virga-aurea (Splinuta) ointments and teas, which can be used for different ailments and to maintain overall health:

    1. Splinuta Ointment for Wounds and Skin Irritations

    Ingredients:

    • 30 g dried Solidago virga-aurea flowers
    • 100 ml olive oil (or another vegetable oil, such as coconut oil)
    • 10 g beeswax (optional, for a firmer consistency)

    Instructions:

    1. Place the dried splinuta flowers in a glass jar and add the olive oil.
    2. Warm the jar in a bain-marie, allowing the oil to heat gently for about 30 minutes, taking care not to let it boil.
    3. Once time has passed, let the oil cool, then strain it through cheesecloth or a fine sieve.
    4. If you desire a more solid consistency, stir in melted beeswax and mix until completely cooled.

    Usage:
    Apply the ointment to irritated skin, wounds, or inflammations 2–3 times per day until improvements are observed.


    2. Splinuta Tea for Urinary Tract Health

    Ingredients:

    • 1–2 tablespoons of dried Solidago virga-aurea flowers and leaves
    • 250 ml boiling water

    Instructions:

    1. Place the dried flowers and leaves in a cup.
    2. Pour boiling water over the plant material and let it infuse for 10–15 minutes.
    3. Strain the tea and drink it hot.

    Administration:

    Consume 1–2 cups per day to support urinary tract health and to help with toxin elimination from the body.


    3. Splinuta Tea for Reducing Respiratory Inflammation

    Ingredients:

    • 1 tablespoon dried Solidago virga-aurea flowers
    • 250 ml boiling water

    Instructions:

    1. Place the dried flowers in a tea cup.
    2. Pour boiling water over them and let infuse for 10–15 minutes.
    3. Strain the tea and drink it warm.

    Administration:

    Drink one cup per day to help alleviate respiratory inflammation and support lung health.


    4. Splinuta Ointment for Joint Pain and Rheumatism

    Ingredients:

    • 30 g dried Solidago virga-aurea flowers
    • 100 ml olive oil or sesame oil
    • 10 g beeswax (optional)
    • 5–10 drops lavender or mint essential oil (for additional soothing effects)

    Instructions:

    1. Place the dried flowers in a jar and add the olive or sesame oil.
    2. Heat the mixture in a bain-marie for 30 minutes.
    3. Strain the oil through cheesecloth or a fine sieve and let it cool.
    4. Stir in the melted beeswax until fully combined.
    5. If desired, add the essential oil and mix again.

    Usage:

    Apply the ointment to painful or inflamed joints, massaging gently 2–3 times per day.


    5. Splinuta Tea for Detoxification and Immune Support

    IIngredients:

    • 1 tablespoon dried Solidago virga-aurea flowers
    • 250 ml hot water

    Instructions:

    1. Place the dried flowers in a cup and pour over the hot water.
    2. Let infuse for 10–15 minutes, then strain the tea.

    Administration:
    Drink 1–2 cups per day to support the detoxification process and strengthen the immune system.

    Note: Both ointments and teas made from Splinuta can be successfully used for various therapeutic purposes. However, it is recommended to consult a specialist before using them, especially if you have preexisting conditions or are on medication.


    Tinctures: A tincture is prepared by macerating the plant in alcohol, yielding a higher concentration of active compounds. The usual dosage is 20–30 drops twice a day.

    Here are a few tincture recipes using Solidago virga-aurea (Splinuta), which can be employed for diverse therapeutic benefits:

    1. Splinuta Tincture for Urinary Tract Support

    Ingredients:

    • 30 g dried Solidago virga-aurea flowers
    • 100 ml 40–50% alcohol (ethyl alcohol or 70% alcohol, diluted)

    Instructions:

    1. Place the dried flowers into a clean glass jar.
    2. Pour the alcohol over the plant material, ensuring they are completely submerged.
    3. Seal the jar and let it macerate in a dark, cool place for 10–14 days, shaking the jar daily.
    4. After maceration, strain the tincture through cheesecloth or a fine sieve.
    5. Store the tincture in a dark-colored bottle to protect the active compounds from light.

    Administration:

    Take 20–30 drops of the tincture 2–3 times per day, diluted in a glass of water, to support urinary tract health.


    2. Splinuta Tincture for Anti-Inflammatory and Respiratory Effects

    Ingredients:

    • 40 g dried Solidago virga-aurea flowers and leaves
    • 150 ml 40–50% alcohol

    Instructions:

    1. Place the dried plant material in a glass container.
    2. Pour the alcohol over it, ensuring everything is completely submerged.
    3. Seal the container tightly and let it macerate for 2 weeks in a cool, dark place, shaking daily.
    4. After maceration, strain the tincture through cheesecloth or a fine sieve.
    5. Store the tincture in a dark glass bottle to protect its active compounds from light.

    Administration:

    Take 15–20 drops of the tincture twice a day to help reduce inflammation and support respiratory health.


    3. Splinuta Tincture for Detoxification and Immune Support

    Ingredients:

    • 25 g dried Solidago virga-aurea flowers
    • 100 ml 70% alcohol or quality white wine

    Instructions:

    1. Place the dried flowers in a glass jar.
    2. Pour the alcohol or wine over the plants, ensuring they are completely covered.
    3. Seal the jar and let it macerate for 10–14 days in a dark, cool place, shaking daily.
    4. After maceration, strain the tincture through a fine sieve.
    5. Store the tincture in an opaque container away from light to protect its active compounds.

    Administration:

    Take 15 drops diluted in a glass of water, 2–3 times per day, for detoxification and to strengthen the immune system.


    4. Splinuta Tincture for Skin Care and Wound Healing

    Ingredients:

    • 30 g dried Solidago virga-aurea flowers
    • 100 ml 40% alcohol

    Instructions:

    1. Place the dried flowers in a clean glass jar.
    2. Add the alcohol, ensuring the flowers are completely submerged.
    3. Seal the jar and let the mixture macerate for 2 weeks in a dark place, shaking the jar daily.
    4. After maceration, strain the tincture and store it in a dark glass bottle to protect its active compounds from light.

    Usage:
    Apply the tincture to the affected skin to aid in wound healing, soothe irritations, and reduce inflammation.

    Note: It is important to consult a specialist before using these tinctures, especially if you have preexisting conditions or are on medication. These tinctures are recommended for both internal and external use in the specified doses.


    Ointment Option:
    For topical application, splinuta can also be made into an antibacterial and cicatrizant ointment, ideal for treating wounds or skin irritations.

    Culinary Use:
    Splinuta may be added to various culinary preparations, such as teas or soups, providing a pleasant flavor and additional health benefits..


    Contraindications and possible adverse effects

    Although splinuta is an effective natural remedy, it is important to be aware of its possible contraindications and adverse effects:

    • Allergies: Individuals with sensitivity to plants in the Asteraceae family should avoid using splinuta.
    • Digestive effects: Excessive use may cause abdominal discomfort, diarrhea, or nausea.
    • Drug interactions: Splinuta may affect the efficacy of diuretics and anticoagulant medications, making a prior medical consultation necessary if you are undergoing treatment.

    Recent research on splinuta

    Modern studies confirm that splinuta has a positive impact on health, being used in the treatment of urinary tract infections and respiratory conditions. A recent study showed that splinuta extracts help reduce kidney inflammation, and other research suggests its role in managing allergic symptoms and in natural treatments for allergic rhinitis.


    Splinuta in popular culture

    Splinuta is not only a medicinal plant, but also a cultural symbol. In European traditions, it is associated with myths of protection and well-being, being used in rituals to invoke health and prosperity. In some cultures, it is believed that wearing a Splinuta flower brings good luck and wards off evil spirits.


    Home cultivation of Splinuta

    For those wishing to cultivate Splinuta at home, it is important to choose well-drained soil and ensure moderate sun exposure. The plants should be watered regularly, but without allowing the soil to become excessively wet. Routine care includes removing spent flowers and monitoring for pests.


    Conclusion

    Splinuta (Solidago virga-aurea) is a valuable plant with multiple health benefits, serving as an effective natural remedy in the treatment of urinary and respiratory ailments. By using splinuta in the form of infusions, tinctures, or ointments, you can support overall health in a natural way. However, it is important to consult a specialist before integrating this plant into your health routine, especially in cases of pre-existing conditions or ongoing medical treatments.


    Bestseller #2
    • Goldenrod (Solidago virgaurea) herb with flowers Mother Tincture concentrated extract 1:10. 100% Natural, alcohol and su…
    • A NATURAL AID: Goldenrod food supplement in drops. 40 drops (2 ml) contain 200 mg of Goldenrod. Glyceric macerate or pur…
    • NATURALMA – A Natural Way of Life: We respect and love Nature, that’s why all our supplements are Vegan and contain no a…
    Bestseller #3
    • Goldenrod (Solidago virgaurea) herb with flowers 300 TABLETS (150 g format). Product in the form of pills and tablets (t…
    • A NATURAL AID: Goldenrod (Solidago virgaurea) herb with flowers food supplement in tablets. 4 tablets contain 1200 mg of…
    • MADE IN ITALY: Our food supplements are produced and packaged in ITALY.

    Here are 10 frequently asked questions for the article on Splinuta (Solidago virga-aurea):

    1. What is Splinuta and what are its main health benefits?
      Splinuta is a perennial herbaceous plant with remarkable therapeutic benefits, such as reducing inflammation, supporting urinary tract health, and antioxidant protection.
    2. How can I use Splinuta to treat urinary conditions?
      Splinuta can be used in the form of tea or tincture to support urinary tract health and to help eliminate toxins from the body.
    3. Is Splinuta effective for respiratory treatments?
      Yes, Splinuta has anti-inflammatory effects and can be used to alleviate symptoms of respiratory conditions such as asthma or bronchitis.
    4. How can I prepare a Splinuta tea?
      For tea, add 1–2 tablespoons of dried Splinuta flowers and leaves to a cup of hot water and let it infuse for 10–15 minutes.
    5. What other forms of Splinuta use are recommended?
      Splinuta can also be used as an ointment for wounds and skin inflammations or as a tincture for internal and external conditions.
    6. Are there contraindications or adverse effects associated with using Splinuta?
      Individuals allergic to plants in the Asteraceae family should avoid Splinuta. It may also interact with diuretic and anticoagulant medications, making medical consultation advisable.
    7. How can I cultivate Splinuta at home?
      Splinuta prefers well-drained soil with moderate sun exposure. It is important to water it regularly without letting the soil become too wet.
    8. How can I prepare a Splinuta tincture?
      A Splinuta tincture is prepared by macerating dried flowers in ethyl alcohol for 10–14 days, then administering 20–30 drops per day.
    9. What are the main active components in Splinuta?
      Splinuta contains flavonoids, saponins, and antioxidant compounds, which contribute to its therapeutic benefits, including reducing inflammation and protecting cells.
    10. Is Splinuta recommended for maintaining general health?
      Yes, Splinuta can support overall health, contributing to detoxification, enhanced immunity, and reduced chronic inflammation. However, it is important to discuss its use with a specialist before integrating it into your routine.

    Sorrel Soup with Corn Grits

    This soup is a traditional Romanian recipe, perfect for spring and summer, thanks to the fresh, sour taste of sorrel. Combined with corn grits and a touch of borscht, it is a light yet flavorful soup.

    Ingredients:

    • 6 cups of water
    • 3 tablespoons of corn grits
    • 3 tablespoons of chopped sorrel
    • 4 tablespoons of chopped green onions
    • 2 tablespoons of oil
    • 4 eggs (yolks only)
    • 1/3 cup of milk
    • 2 cups of sour cream
    • 2 cups of acidic borscht or a bit of citric salt
    • Salt
    • Bay leaves
    • Ground black pepper
    • Fresh lovage
    • 2 tablespoons of chopped dill and parsley

    Preparation Method:

    1. Bring the water to a boil, add the corn grits, and cook for 25–30 minutes.
    2. After 25–30 minutes, add the chopped sorrel, green onions, and borscht. Continue cooking for another 5–7 minutes.
    3. Stir in the oil, season with salt and pepper, and let it simmer for an additional 5 minutes.
    4. Meanwhile, in a separate bowl, whisk together the egg yolks, milk, and sour cream until smooth.
    5. Once the soup is ready, slowly pour in the egg-and-cream mixture, stirring continuously to prevent the eggs from curdling and to create a creamy, delicate broth.
    6. Add the freshly chopped herbs—dill, parsley, and lovage—and let the soup simmer for another 2–3 minutes to meld the flavors.
    7. Serve hot, garnished with an extra dollop of sour cream and a sprinkle of fresh herbs on top.

    Description:

    Sorrel Soup with Corn Grits is a light and refreshing soup, ideal for the warmer months. The sour taste of sorrel is perfectly balanced by the fine texture of the corn grits and the richness of sour cream. The borscht adds an extra layer of acidity, while the eggs and sour cream contribute to a creamy broth that is both luscious and gentle. Fresh dill and parsley provide a vibrant, aromatic finish, making this soup an excellent choice for a healthy and comforting lunch.

    Bestseller #1
    • 10-YEAR GUARANTEE: Ensuring long lasting performance and reliability, discover a premium quality set with robust design …
    • HEAT INDICATOR: THERMO-SIGNAL technology indicates the ideal starting cooking temperature to guarantee perfect texture, …
    • DURABLE NON-STICK COATING : Tefal’s high-quality Power Resist coating delivers outstanding non-stick performance
    Bestseller #2
    • 5 PIECE PAN SET: Perfect for all your cooking needs! This Salter Timeless pan set includes 16, 18 and 20 cm saucepans, a…
    • SUITABLE FOR ALL HOB TYPES: Designed for every home – this versatile pan set is suitable for use on all hobs including g…
    • STAINLESS STEEL: Cook with confidence! Each pan is made from high quality stainless steel meaning it will maintain its e…
    Bestseller #3
    • 10-YEAR GUARANTEE: Ensuring long lasting performance and reliability, discover a premium quality set with robust design …
    • HEAT INDICATOR: THERMO-SIGNAL technology indicates the ideal starting cooking temperature to guarantee perfect texture, …
    • ERGONOMIC & STAY COOL HANDLES: Heat-resistant and anti-slip handles for a comfort and safe grip
    Bestseller #4
    • Tefal Ingenio Emotion is made from mirror polished 18/10 stainless steel.
    • Ingenio Emotion cookware also has practical pouring edges for easy serving and is oven safe (up to 260°C, minus handle a…
    • Optimal space saving: With the handle detached, these ingenious pots and pans nest one inside the other, saving up to 50…
    Bestseller #5
    • Exclusive to Amazon and Tefal
    • prepare with flair: in high-quality, mirror-polished stainless steel, these pots and pans are as stylish as they are str…
    • last longer: frying pans have a non-stick coating reinforced with titanium, making them super-durable and easier to clea…
    £170.72
    Is prime
    Bestseller #6
    • Elementary five-piece set, 14 cm milk pan, 16/18 cm saucepans with lids and 20/24 cm frying pans
    • Useful features include non-stick coating and Thermospot technology
    • Oven and dishwasher safe for added convenience
    Bestseller #7
    • INGENIO is much more than a frying pan: you can cook on the baking sheet, gratin your recipes in the oven and store left…
    • Contents: 24 cm sauté pan + frying pans 22/26/28 cm + saucepans 16/18/20 cm + airtight lids 16/20 cm + 3 spatulas (spoon…
    • Ultra-secure removable handle: the secure and patented removable handle is backed by a 10-year warranty***
    £149.06
    Bestseller #9
    • INGENIO is much more than a frying pan: you can cook on the baking sheet, gratin your recipes in the oven and store left…
    • INDUCTION: a thick heat diffusion base for tasty meals and long-lasting performance
    • Contents: coated frying pans 22/28 cm + 18 cm uncoated saucepan + 24 cm sauté pan + 24 cm glass lid + 2 accessories (spa…
    £117.95
    Bestseller #10
    • Solid style – Polished stainless steel for a stylish look and solid cooking performance. In fact, the stainless steel is…
    • Last longer – New generation Tefal coating with 2 abrasion-resistant layers loaded with resistant minerals and reinforce…
    • Flawless searing – The new Thermo-Spot is the secret of successful cooking! Easy to use, it becomes uniform in color whe…
    £129.99

    Frequently Asked Questions

    1. Can I replace the corn grits with another ingredient?
      Yes, you can substitute the corn grits with rice or barley for a similar texture and a different flavor profile.
    2. Is Sorrel Soup with Corn Grits a vegan recipe?
      No, this recipe contains eggs and sour cream. However, you can create a vegan variant by using plant-based sour cream (e.g., soy cream) and vegan egg substitutes.
    3. How can I make the soup more sour if I don’t have enough sorrel?
      You can increase the acidity by adding more borscht or a pinch of citric salt to intensify the sour taste.
    4. How can I enhance the flavor of the soup?
      Add more aromatic herbs such as thyme or lovage, or even a small amount of tomato paste for a richer, more complex taste.
    5. How do I know when the corn grits are done?
      The corn grits are ready when they become tender and absorb most of the liquid, typically after 25–30 minutes of boiling.
    6. Is it necessary to use eggs and sour cream in the recipe?
      If you prefer a lighter soup, you can omit the eggs and sour cream, but they add a creamy richness that is characteristic of this dish.
    7. What can I use instead of sorrel if it’s not available?
      You can use spinach or nettles for a somewhat similar effect, although sorrel’s unique tangy flavor is hard to replicate exactly.
    8. How can I store Sorrel Soup with Corn Grits for multiple days?
      Store the soup in the refrigerator for 2–3 days. You can also freeze it, but it’s best to add the sour cream and eggs just before serving to maintain the texture.
    9. Is this soup suitable for children?
      Yes, it is a healthy and easily digestible soup, ideal for children. You can adjust the seasoning to suit their preferences.
    10. How can I make the soup spicier?
      If you prefer a spicier soup, add fresh or dried hot chili peppers to taste.