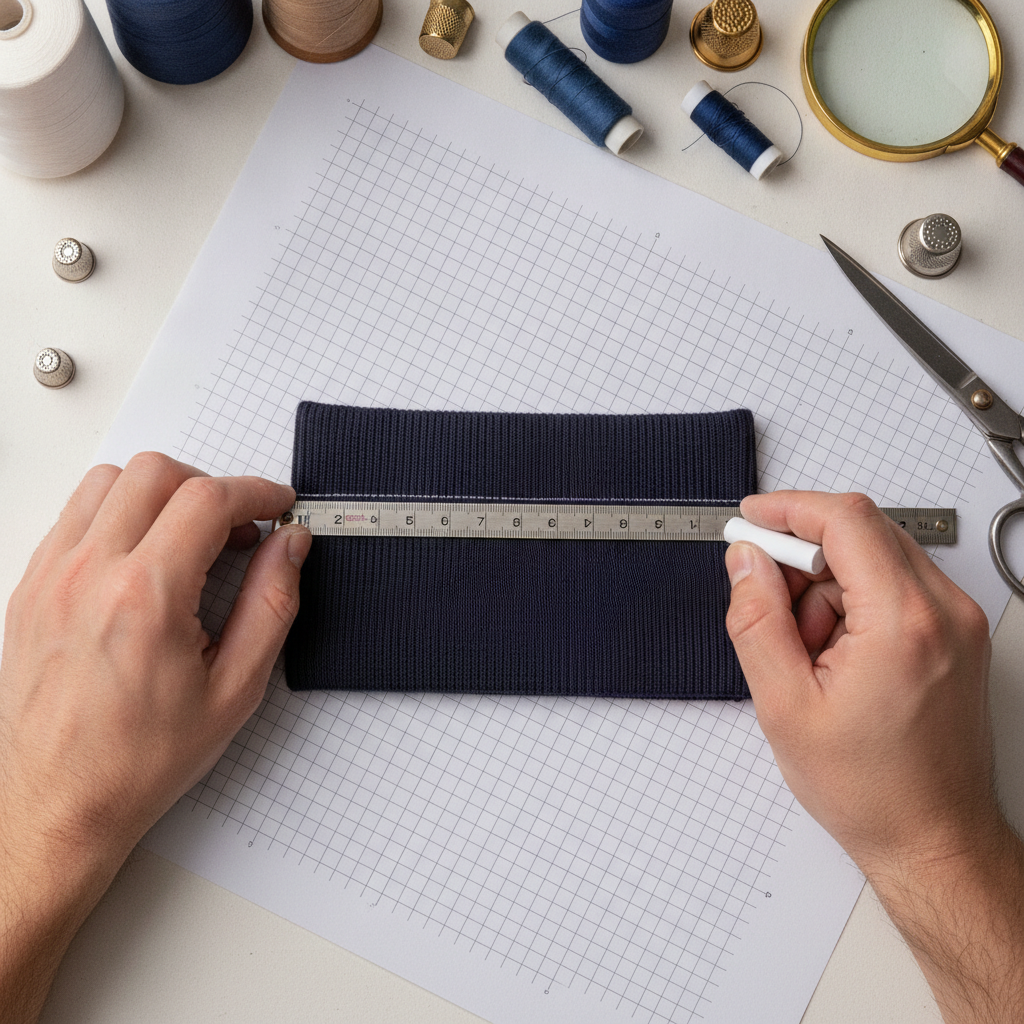
Few garment defects compromise bespoke craftsmanship as visibly as a distorted collar or a waistband that collapses under load. In production and custom tailoring alike, the dreaded “bacon neckline”—where a knitted rib band ripples outward like corrugated sheet metal—and waistbands that curl, fold horizontally, or creep down the sacrum are symptomatic of a single underlying flaw: treating elastic components with arbitrary rules of thumb rather than the applied physics of negative ease.
Woven tailoring relies on positive ease: draft dimensions exceed anatomical circumferences to permit respiration, kinetic extension, and structural drape. Stretch textiles and tension-bearing closures function under precisely the inverted principle. They mandate negative ease, wherein the finished circumference of the band is engineered significantly smaller than the garment opening or the anatomical landmark it grips. To execute this cleanly requires mastering tensile modulus, elastic recovery, and differential feeding across the seamline.
The Physics of Stretch Modulus and Recovery Memory
Before cutting a single millimetre of knit ribbing or non-roll elastic, an atelier pattern drafter must classify the substrate’s mechanical limits. Two physical phenomena govern every tension closure: tensile modulus (the force required to stretch a material to a given elongation) and elastic recovery (the percentage of length regained after the elongating load is released).
When an elastic substrate is stretched past its yield point, it enters plastic deformation. Once this occurs, internal elastomer bonds—whether natural latex cores, dry-spun elastane (Spandex/Lycra), or texturized synthetic filaments—fracture permanently. The material undergoes hysteresis loss, manifesting as permanently stretched-out, flaccid edges. Conversely, if insufficient elongation is drafted into the cut, the closure exerts excessive pressure, causing skin pinching, adipose displacement, and seam puckering along the garment perimeter.
Typology of Elastic Materials in Haute Couture and Bespoke Workrooms
- Braided Elastic: Features distinct longitudinal ridges that narrow drastically under tension. When stitched through, its internal parallel rubber threads are easily severed by needle penetration, destroying recovery. It is strictly reserved for interior casing insertions, never direct edge attachment.
- Knit Elastic: Pliable, lightweight, and engineered with an interlooped chain stitch. It retains its crosswise width when stretched and does not weaken when penetrated by ballpoint or stretch machine needles. Ideal for mid-weight jerseys, lingerie, and lightweight internal bands.
- Woven Non-Roll Elastic: Characterized by dense warp and weft intersections with heavy mono-filament lengthwise ribs. It demonstrates high tensile modulus, virtually zero width collapse under elongation, and supreme resistance to horizontal roll-over. This is the mandatory standard for structured trousers, skirts, and heavy denim waistbands.
- Tubular and Flat 1×1 / 2×2 Rib Knits: Pure textile bands reliant on alternating knit and purl stitches. While lacking synthetic elastomeric cores, high-twist combed cotton or wool rib knits exhibit dynamic mechanical stretch. They require precise negative ease ratios (typically 15% to 22% reduction) to ensure the rib rests flush against curved contours such as the base of the neck.
The Mathematical Formulas of Atelier Negative Ease
Amateur seam construction frequently relies on folkloric ratios like the ubiquitous “3/4 rule” (75%) for all neckbands. This is a recipe for catastrophic garment failure. A 100% cotton 1×1 rib with zero Lycra content possesses fundamentally different modulus curves and tensile memory than a 95/5 cotton-spandex jersey or a rigid 50mm non-roll waistband elastic. Precision construction demands calibrated formulas.
Core Engineering Equations
To determine the exact structural length required for any elastic band or ribbing strip, apply the following sequence:
1. Finished Loop Circumference ($L_{text{finished}}$):
$$text{L}_{text{finished}} = text{Base Circumference} times left(frac{text{Stretch Factor %}}{100}right)$$
Where Base Circumference is either the body measurement at the anatomical point of contact or the absolute circumference of the garment opening seamline (for neckbands/armholes).
2. Total Cut Length ($L_{text{cut}}$):
$$text{L}_{text{cut}} = text{L}_{text{finished}} + text{Seam Allowance}$$
For loop joins closed with a standard flat seam, add twice the seam allowance (e.g., $2 times 10text{mm}$). For waistbands joined with an overlapping flat-locked or multi-step zigzag join, add the exact overlap depth (typically 15mm to 25mm).
3. Absolute Negative Ease Diagnostic:
$$text{Negative Ease} = text{Base Circumference} – text{L}_{text{finished}}$$
This verifies that the absolute tension reduction falls within safe kinetic tolerances for the wearer’s comfort.
Standard Garment Application Ratios
- T-Shirt Crew Neckbands (Cotton/Lycra Rib): 80% to 85% of total neck opening seamline.
- T-Shirt V-Necks and Bound Collars: 82% to 87% (less tension to prevent corner puckering).
- Athletic Waistbands & Leggings: 82% to 88% of target waist/high-hip measurement.
- Casing-Encased Woven Waistbands: 88% to 92% of target waist measurement.
- Sleeve & Ankle Cuffs: 75% to 82% of limb circumference.
- Swimwear Leg Openings (Chloroprene/Rubber Elastic): 75% to 80% of opening perimeter.
🛠️ Interactive Atelier Tool: Elastic & Ribbing Calculator
Skip manual math and cutting guesswork. Use our free interactive tool to instantly calculate your exact measurements, fabric yield, and project specifications:
Empirical Bench Testing: Determining the Elastic Modulus
When working with unlabelled deadstock materials, custom circular knits, or specialized imported notions, do not guess the stretch factor. Conduct an empirical stretch benchmark at the cutting table.
- Take a continuous sample of the intended elastic or cross-grain ribbing strip.
- Mark two pins precisely 100mm (or 10 inches) apart inside the interior length of the sample, avoiding the cut ends to eliminate distortion.
- Anchor the zero-mark securely against a firm cutting ruler clamped to the table.
- Extend the second pin smoothly along the ruler until the elastic reaches its maximum comfortable functional stretch—the point immediately before the weave starts to narrow radically or resist manual elongation.
- Read the extended measurement. If 100mm stretches comfortably to 135mm, the material has a 35% stretch allowance ($135 – 100 = 35$).
- Release the tension completely and let the material rest unweighted for 60 seconds. Verify that the pins return precisely to 100mm. If the pins rest at 104mm, the material exhibits a 4% plastic deformation failure rate, meaning your cutting formulas must integrate slightly firmer tension to compensate for rapid wear relaxation.
Master Assembly: Differential Distribution and Sewing Protocols
Even a mathematically flawless cut will warp if assembled improperly under the needle. Sewing an elastic component requires balanced tensile distribution and machine mechanical calibration.
1. The Quartering and Octa-Marking Protocol
Never attempt to stretch elastic progressively “by eye” while operating the machine treadle. Fold the calculated and joined elastic loop in half, marking both ends with tailor’s chalk. Align those two marks to locate the quarter points, and repeat for eighths on wide waistbands. Divide the garment opening (neck seamline or waist seamline) into the identical number of equal segments using fine-point water-soluble markers or tailor’s tacks.
Pin the band to the garment right sides together, matching corresponding nodal marks precisely. Anchor the needle at the first node, grasp both the band and garment firmly between your fingers at the next sequential node, stretch only the band until the garment fabric sits completely flat beneath it, and sew toward your hand. Never stretch the underlying garment fabric; doing so stretches the warp and weft out of true, permanently propagating ripples.
2. Machine Dynamics and Needle Selection
- Needle System: Always install an H-S (Stretch) or H-SUK (Ballpoint) needle. Standard Sharp or Microtex needles possess cutting points that slice through interior elastomeric cores, causing ladder runs and localized blowouts within three laundering cycles.
- Differential Feed Optimization: When sewing knits on an overlocker/serger, set your differential feed dial between 1.2 and 1.5. This compresses the lower feed dogs relative to the front, actively pushing more fabric into the seam to neutralize the forward stretching force of the presser foot.
- Stitch Architecture: If executing waistbands on an industrial lockstitch, use a 3-step zigzag stitch (tri-motion) or an elastic chainstitch (ISO 401). Plain straight stitching (ISO 301) lacks mechanical stretch; tension loads will snap the bobbin thread upon first donning.
Atelier Quality Control: The Roll-Over Prevention Technique
To prevent internal elastic from twisting inside casings during laundering and wear, master workrooms apply two specific anchoring techniques:
First, for fully enclosed waistbands, ditch-stitch the elastic directly into the garment along existing vertical structural lines—such as side seams, centre-back seams, and front dart apex extensions. Secure with a tiny bartack or backtacked lockstitch along the ditch of the seam. This prevents any rotational torsion without interrupting the lateral stretch of the waistband between seams.
Second, when executing external ribbing (such as athletic cuffs or bomber jacket hems), understitch the interior seam allowance to the elastic foundation using a narrow, lengthened multi-step zigzag. This establishes a structural hinge that naturally pulls the seam inward toward the body, producing razor-sharp perimeter lines that sit perfectly flush against the human form.
By blending physical testing, negative ease mathematics, and precision assembly, your workroom can produce waistbands that hold firm without constricting, and necklines that frame the collarbone with bespoke perfection. For calculating production material expenditures and ensuring your specialized knitwear commissions remain commercially sound, utilize our Profit Planner alongside the Project Price Estimator to price your atelier creations with master-level confidence.
Do you enjoy the content on Agenda Creativa?
Your contributions help me create new articles, share creative ideas, and keep this platform alive! If you like what I do and want to support my work, you can buy us a coffee.
Every cup of coffee means more than just a gesture – it's direct support for my passion to create inspiring and useful content. Thank you for being part of this journey!
☕ Buy me a coffee